SpringBoot整合Shiro权限管理教程
 发布于2025-11-22 阅读(0)
扫一扫,手机访问
让我们开始SpringBoot-09 Shiro的Hello Shiro教程。我们将从创建一个简单的Maven项目开始,然后逐步搭建Shiro环境。
- 创建一个简单的Maven项目
首先,我们需要创建一个最基本的Maven项目。
- 导入依赖
接下来,我们需要在pom.xml中添加以下依赖:
<dependencies>
    <dependency>
        <groupId>org.apache.shiro</groupId>
        <artifactId>shiro-core</artifactId>
        <version>1.7.0</version>
    </dependency>
    <dependency>
        <groupId>org.slf4j</groupId>
        <artifactId>jcl-over-slf4j</artifactId>
        <version>2.0.0-alpha1</version>
    </dependency>
    <dependency>
        <groupId>org.slf4j</groupId>
        <artifactId>slf4j-log4j12</artifactId>
        <version>2.0.0-alpha1</version>
    </dependency>
    <dependency>
        <groupId>log4j</groupId>
        <artifactId>log4j</artifactId>
        <version>1.2.17</version>
    </dependency>
</dependencies>- 创建log4j.properties
为了配置日志,我们需要创建log4j.properties文件:
log4j.rootLogger=INFO, stdout
log4j.appender.stdout=org.apache.log4j.ConsoleAppender
log4j.appender.stdout.layout=org.apache.log4j.PatternLayout
log4j.appender.stdout.layout.ConversionPattern=%d %p [%c] - %m %n
# General Apache libraries
log4j.logger.org.apache=WARN
# Spring
log4j.logger.org.springframework=WARN
# Default Shiro logging
log4j.logger.org.apache.shiro=INFO
# Disable verbose logging
log4j.logger.org.apache.shiro.util.ThreadContext=WARN
log4j.logger.org.apache.shiro.cache.ehcache.EhCache=WARN
- 创建shiro.ini
创建shiro.ini文件来配置Shiro的用户和角色:
[users] root = secret, admin guest = guest, guest presidentskroob = 12345, president darkhelmet = ludicrousspeed, darklord, schwartz lonestarr = vespa, goodguy, schwartz[roles] admin = schwartz = lightsaber: goodguy = winnebago:drive:eagle5
- 创建Quickstart类
最后,我们创建一个Quickstart类来测试Shiro的功能:
import org.apache.shiro.SecurityUtils; import org.apache.shiro.authc.*; import org.apache.shiro.config.IniSecurityManagerFactory; import org.apache.shiro.mgt.SecurityManager; import org.apache.shiro.session.Session; import org.apache.shiro.subject.Subject; import org.apache.shiro.util.Factory; import org.slf4j.Logger; import org.slf4j.LoggerFactory;public class Quickstart { private static final transient Logger log = LoggerFactory.getLogger(Quickstart.class);
public static void main(String[] args) { // The easiest way to create a Shiro SecurityManager with configured // realms, users, roles and permissions is to use the simple INI config. // We'll do that by using a factory that can ingest a .ini file and // return a SecurityManager instance: // Use the shiro.ini file at the root of the classpath // (file: and url: prefixes load from files and urls respectively): Factory<SecurityManager> factory = new IniSecurityManagerFactory("classpath:shiro.ini"); SecurityManager securityManager = factory.getInstance(); // for this simple example quickstart, make the SecurityManager // accessible as a JVM singleton. Most applications wouldn't do this // and instead rely on their container configuration or web.xml for // webapps. That is outside the scope of this simple quickstart, so // we'll just do the bare minimum so you can continue to get a feel // for things. SecurityUtils.setSecurityManager(securityManager); // Now that a simple Shiro environment is set up, let's see what you can do: // get the currently executing user: Subject currentUser = SecurityUtils.getSubject(); // Do some stuff with a Session (no need for a web or EJB container!!!) Session session = currentUser.getSession(); session.setAttribute("someKey", "aValue"); String value = (String) session.getAttribute("someKey"); if (value.equals("aValue")) { log.info("Retrieved the correct value! [" + value + "]"); } // let's login the current user so we can check against roles and permissions: if (!currentUser.isAuthenticated()) { UsernamePasswordToken token = new UsernamePasswordToken("lonestarr", "vespa"); token.setRememberMe(true); try { currentUser.login(token); } catch (UnknownAccountException uae) { log.info("There is no user with username of " + token.getPrincipal()); } catch (IncorrectCredentialsException ice) { log.info("Password for account " + token.getPrincipal() + " was incorrect!"); } catch (LockedAccountException lae) { log.info("The account for username " + token.getPrincipal() + " is locked. " + "Please contact your administrator to unlock it."); } // ... catch more exceptions here (maybe custom ones specific to your application? catch (AuthenticationException ae) { //unexpected condition? error? } } //say who they are: //print their identifying principal (in this case, a username): log.info("User [" + currentUser.getPrincipal() + "] logged in successfully."); //test a role: if (currentUser.hasRole("schwartz")) { log.info("May the Schwartz be with you!"); } else { log.info("Hello, mere mortal."); } //test a typed permission (not instance-level) if (currentUser.isPermitted("lightsaber:wield")) { log.info("You may use a lightsaber ring. Use it wisely."); } else { log.info("Sorry, lightsaber rings are for schwartz masters only."); } //a (very powerful) Instance Level permission: if (currentUser.isPermitted("winnebago:drive:eagle5")) { log.info("You are permitted to 'drive' the winnebago with license plate (id) 'eagle5'. " + "Here are the keys - have fun!"); } else { log.info("Sorry, you aren't allowed to drive the 'eagle5' winnebago!"); } //all done - log out! currentUser.logout(); System.exit(0); }}
- 启动测试
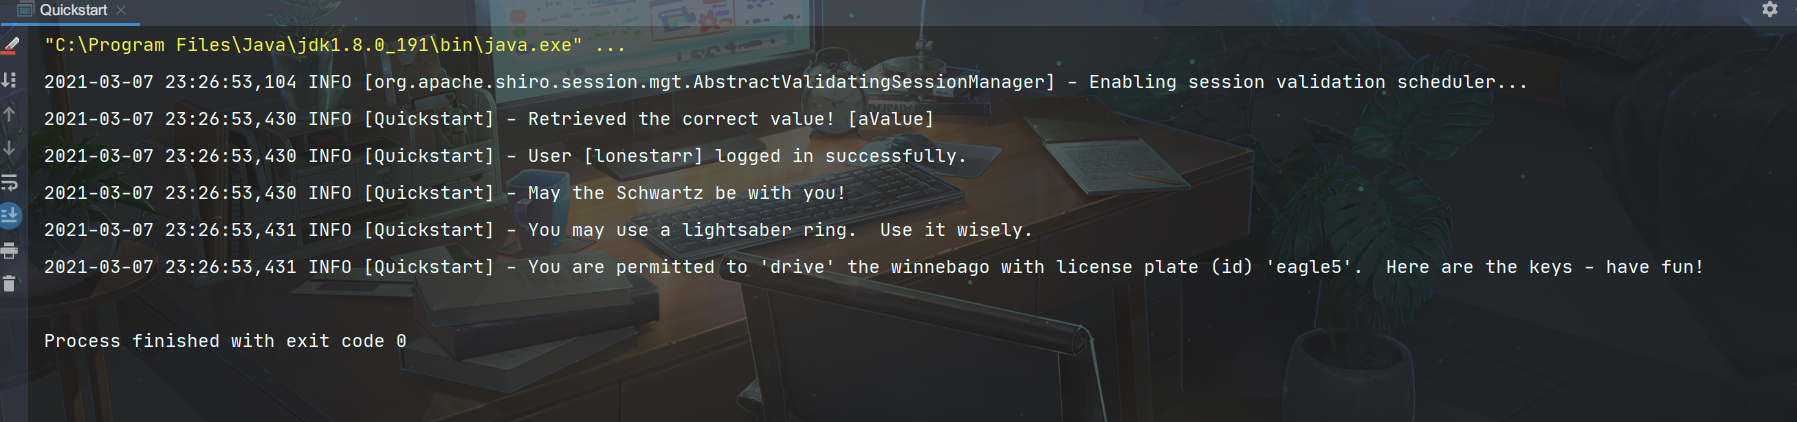
- 可能遇到错误
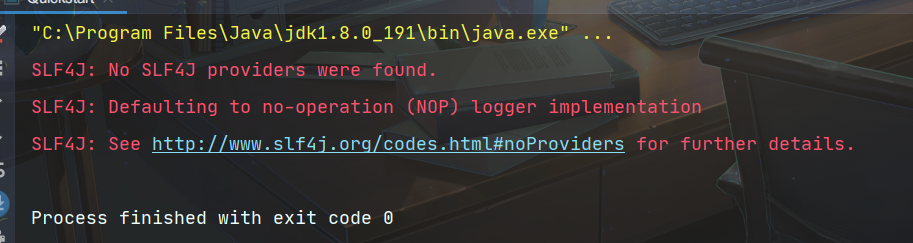
解决办法:
这是因为依赖中的问题。将以下依赖的scope标签删除:
<dependency>
<groupId>org.slf4j</groupId>
<artifactId>jcl-over-slf4j</artifactId>
<version>2.0.0-alpha1</version>
<!-- <scope>test</scope> -->
</dependency>
<dependency>
<groupId>org.slf4j</groupId>
<artifactId>slf4j-log4j12</artifactId>
<version>2.0.0-alpha1</version>
<!-- <scope>test</scope> -->
</dependency>
Shiro环境搭建
Shiro环境搭建需要三个要素:
- ShiroFilterFactoryBean
- DefaultWebSecurityManager
- Realm
我们需要倒着来创建。
创建config文件夹和ShiroConfig、UserRealm类
首先,创建UserRealm类:
public class UserRealm extends AuthorizingRealm {
// 授权
@Override
protected AuthorizationInfo doGetAuthorizationInfo(PrincipalCollection principalCollection) {
return null;
}//认证
@Override
protected AuthenticationInfo doGetAuthenticationInfo(AuthenticationToken authenticationToken) throws AuthenticationException {
return null;
}
}
然后,创建ShiroConfig类:
@Configuration
public class ShiroConfig {
//ShiroFilterFactoryBean
@Bean
public ShiroFilterFactoryBean shiroFilterFactoryBean(@Qualifier("defaultWebSecurityManager") DefaultWebSecurityManager defaultWebSecurityManager){
ShiroFilterFactoryBean bean = new ShiroFilterFactoryBean();
//设置安全管理器
bean.setSecurityManager(defaultWebSecurityManager);
return bean;
}//DefaultWebSecurityManager
@Bean
public DefaultWebSecurityManager defaultWebSecurityManager(@Qualifier("userRealm") UserRealm userRealm){
DefaultWebSecurityManager securityManager = new DefaultWebSecurityManager();
securityManager.setRealm(userRealm);
return securityManager;
}
//创建 realm 对象
@Bean
public UserRealm userRealm(){
return new UserRealm();
}
}
这样,我们就完成了SpringBoot-09 Shiro的Hello Shiro教程的基本步骤。接下来,您可以根据需要进一步扩展和配置Shiro的功能。
本文转载于:https://cloud.tencent.com/developer/article/1813810 如有侵犯,请联系zhengruancom@outlook.com删除。
免责声明:正软商城发布此文仅为传递信息,不代表正软商城认同其观点或证实其描述。
免责声明:正软商城发布此文仅为传递信息,不代表正软商城认同其观点或证实其描述。
产品推荐
-

售后无忧
立即购买>- DAEMON Tools Lite 10【序列号终身授权 + 中文版 + Win】
-
¥150.00
office旗舰店
-

售后无忧
立即购买>- DAEMON Tools Ultra 5【序列号终身授权 + 中文版 + Win】
-
¥198.00
office旗舰店
-

售后无忧
立即购买>- DAEMON Tools Pro 8【序列号终身授权 + 中文版 + Win】
-
¥189.00
office旗舰店
-

售后无忧
立即购买>- CorelDRAW X8 简体中文【标准版 + Win】
-
¥1788.00
office旗舰店
-
 正版软件
正版软件
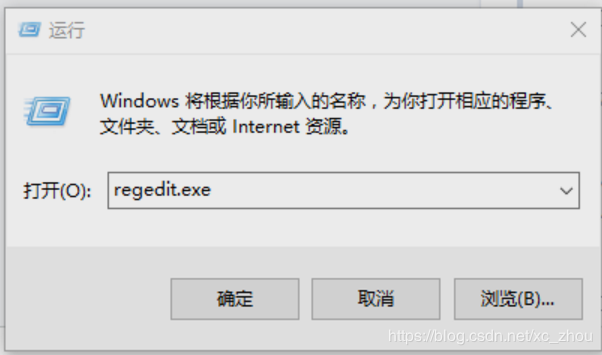
- Win10自动睡眠休眠解决方法
- Windows10用户可能会遇到一个常见的问题,即系统在没有任何操作的情况下,仅两分钟左右就自动进入睡眠状态,即使已经调整过电源设置,这种情况依然会发生。问题根源:这是因为Win10默认启用了快速启动功能,导致系统进入了无人参与系统睡眠状态,默认设定为两分钟自动进入睡眠模式。即使关机后,这种状态也会被保留。解决方案如下:首先,启动注册表编辑器:按下Windows键+R,调出“运行”对话框,然后输入“regedit.exe”并按回车。接下来,在注册表编辑器中导航至HKEY_LOCAL_MACHINE\
- 10分钟前 windows 0
-
 正版软件
正版软件
- 伊瑟西尔技能加点与搭配推荐指南
- 在伊瑟这款游戏中,西尔比是剧情发展中一个关键角色,不少玩家对她的技能加点与搭配存在疑问。以下将为大家提供西尔比的技能加点建议及装备搭配推荐,有需要的玩家可参考使用。伊瑟西尔比技能加点与搭配指南技能加点策略资源紧张阶段:1-1-1主力养成阶段:1-1-1闲置状态:放置仓库,陪伴仓库管理员1号与2号源器搭配方案前期配置:12件攻势套装中期过渡:12件洞悉穿刺+8件狂怒后期成型:12件洞悉穿刺+8件狂怒+6件暴烈利刃推荐词条优先级:暴击率>暴击伤害>攻击力智壳推荐选择前期适用:赤色
- 18分钟前 0
-
 正版软件
正版软件
- Windows 10合并分区方法详解
- Windows10中合并分区空间有三种方法:一、用磁盘管理删除相邻源分区后扩展目标分区;二、用diskpart命令强制删除受保护分区释放空间;三、用易我分区大师无损跨区合并。
- 26分钟前 0
-
 正版软件
正版软件
- 抖音视频模糊怎么处理 抖音画质优化技巧
- 视频模糊主要因压缩、素材质量差、网络差导致,解决方法包括:拍摄时用原生相机1080p或4K高帧率模式,保持光线充足和画面稳定;导出时设分辨率1080x1920、码率8-12Mbps、MP4格式H.264编码;通过抖音App导入高清原片,开启Wi-Fi并关闭“降低画质”选项;避免重复编辑和跨平台转发,保留原始文件用于发布,删除模糊版本后重新上传可提升清晰度。
- 34分钟前 抖音 画质优化 0
-
 正版软件
正版软件
- 新新漫画官网免费看韩漫
- 新新漫画官方在线平台是https://www.xinxinmanhua.com,该网站提供免费韩漫观看服务,采用下拉式阅读模式,资源丰富且更新稳定,支持书架收藏与评论互动。
- 38分钟前 新新漫画 新新漫画网 0
最新发布
-
 1
1
- B站免费入口官网-B站在线观看永久畅享
- 240天前
-
 2
2
- 高德地图是哪个国家开发的?
- 296天前
-
 3
3
- 51漫画高清入口及最新章节更新
- 89天前
-
 4
4
- 拷贝漫画最新官网入口2025
- 129天前
-
 5
5
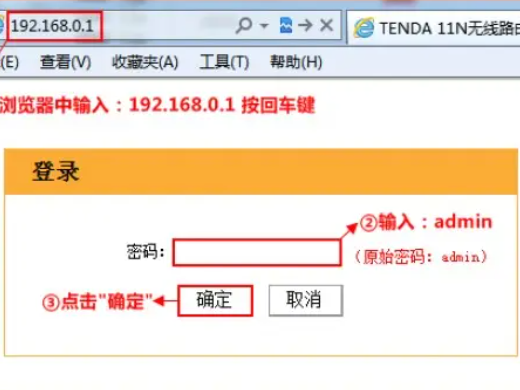
- 如何找到192.168.0.1登录入口
- 350天前
-
 6
6
- yy漫画下拉式免费阅读官网入口
- 219天前
-
 7
7
- 动漫共和国官网入口在线看
- 221天前
-
 8
8
- 2020美团外卖账单报告入口详解
- 238天前
-
 9
9
- 抖音去了外地ip多久会变?ip地址怎么变位置?
- 257天前
相关推荐
热门关注
-
- Xshell 6 简体中文
- ¥899.00-¥1149.00
-

- DaVinci Resolve Studio 16 简体中文
- ¥2550.00-¥2550.00
-

- Camtasia 2019 简体中文
- ¥689.00-¥689.00
-

- Luminar 3 简体中文
- ¥288.00-¥288.00
-

- Apowersoft 录屏王 简体中文
- ¥129.00-¥339.00