python invoking c++
利用Boost.Python和pybind11可在Python中调用C++模块。Boost.Python成熟稳定,需手动处理类型转换与生命周期;pybind11语法现代简洁,支持自动处理结构体和成员暴露。两种方案均需编写包装代码并链接对应库,编译命令简洁,调用方式接近原生Python对象。
在Python中调用C++模块,这事说难不难,说简单也不简单。难在跨语言调用的坑太多,比如类型转换、对象生命周期、异常处理,一不小心就踩进去。简单在像Boost.Python和pybind11这样的工具已经相当成熟,把C++代码暴露给Python,很多时候就是写一个wrapper的事。
下面这份材料,就是把两种方案的「最小可行」路径给你跑了一遍,从代码到构建,清晰明了。
invoking c/c++ module from python
我们先从老牌工具Boost.Python看起。
boost python
Boost.Python的功力是经过时间验证的,很多老项目都在用它。下面这个代码就是一个典型的封装示例,把底层的C++接口 c_module.h 优雅地包装成了Python可调用对象。
code
核心的 wrapper 文件 model_wrapper.cpp。注意看上面对 write 函数的处理——它用了 BOOST_PYTHON_MEMBER_FUNCTION_OVERLOADS 宏,允许在Python里传2个或3个参数,第三个参数 expire 自带默认值0。这种细节,恰恰是生产级代码里需要的。
#include
#include
#include
#include
#include
#include "module_py.h"

using namespace boost::python;

BOOST_PYTHON_MEMBER_FUNCTION_OVERLOADS(write_overloads, MyModulePy::write, 2, 3);

BOOST_PYTHON_MODULE(module_py)
{
    boost::python::scope().attr("__version__") = "v20180123.1";

    class_("MyModulePy")
        .def("read", &MyModulePy::read)
        .def("batch_read", &MyModulePy::batch_read)
        .def("write_read", &MyModulePy::batch_write)
        .def("write", &MyModulePy::write, write_overloads(args("key", "value", "expire"), "put key-value with a expire time"))
        .def("remove", &MyModulePy::remove)
        .def("config", &MyModulePy::config)
    ;
} 好,那接下来一个问题就是,MyModulePy 这个Python类是怎么对接底层C++库的?module_py.h 给出了答案。这里有一点值得留意:batch_read 和 batch_write 中,作者手动处理了字典和列表的转换。这是最绕也是最容易出错的地方——记住,迭代Python字典时,千万不要用 const std::string& k = ... 这种引用捕获方式,否则极大概率会踩到生命周期问题的坑。
#include "c_module.h" // header of libmodule.so

struct MyModulePy
{
    MyModulePy() {}

    std::string read(const std::string& key)
    {
        // do read
        return mModule.Read(key);
    }

    boost::python::dict batch_read(const boost::python::list& keys)
    {
        std::vector ckeys(boost::python::len(keys));
        for (int i = 0; i < boost::python::len(keys); i++)
        {
            ckeys[i] = boost::python::extract(keys[i]);
        }
        std::map cvalues = mModule.BatchRead(ckeys);
        boost::python::dict values;
        for (auto it = cvalues.begin(); it != cvalues.end(); ++it)
        {
            values[it->first] = it->second;
        }
        return values;
    }

    void bach_write(const boost::python::dict& keyValues)
    {
        auto skeys = keyValues.keys();
        // http://www.boost.org/doc/libs/1_34_0/libs/python/doc/v2/dict.html
        int num = boost::python::len(skeys);
        std::map datas;
        for (int i = 0; i < num; i++) // TODO: how to iterate a boost::python::dict ?
        {
            string k = boost::python::extract(skeys[i]);
            // NOTE: do not use 'const string& k = '
            string v = boost::python::extract(subKeyValues[skeys[i]]);
            datas[k] = v;
        }
        return mModule.batch_write(datas);
    }

    void write(const std::string& key, const std::string& value, const int expire = 0)
    {
        // do write
        mModule.Write(key, value, expire);
    }

    void remove(const std::string& key)
    {
        // do remove
        mModule.Delete(key);
    }

    std::string config()
    {
        return mModule.GetConfigInfo();
    }

    Module mModule; // class provided by libmodule.so
}; 至于Python端的使用方式,就非常自然了。实例化MyModulePy,调用读写,就像在操作一个纯粹的Python对象。
import time
from module_py import MyModulePy

m = MyModulePy()

key = 'testkey_%s' % time.time()
value = 'testvalue_%s' % time.time()

try:
    print 'config:', m.config()
    m.write(key, value)
    m.write(key, value, 10)

    print 'write:', key, value
    print 'read:', key, m.read(key)

    print 'delete:', key, m.remove(key)

    for i in xrange(0, 3):
        mytair.write('batch-%s' % i, str(i))

    keys = ['batch-%s' % i for i in xrange(0, 3)]
    print mytair.batch_read(keys)

    for each in keys:
        mytair.remove(each)

    print 'read:', key, m.read(key) # exception

except Exception, e:
    print e
build
编译命令很简单,关键在于链接 -lboost_python 和你的本地库。
g++ model_wrapper.cpp -o module_py.so -shared -lmodule -lboost_pythonpybind11
说完老兵,再来聊聊新锐。pybind11 的语法更现代,上手也更快。项目结构也非常清晰。
layout
/home/admin/pybind11_sample/
|---- py_sample.cpp
|---- sample.py
|---- build.sh
|---- include/
|       |---- pybind11/
|       i installed pybind11 at here
|       |---- text_processor/
|       c++ module
code
py_sample.cpp 里,你会发现 pybind11 用起来要简洁得多。比如 .def_readonly 直接暴露C++成员变量为Python只读属性,省去了写getter的麻烦。返回值是一个自定义结构体 InfoWrapper,pybind11 也能自动处理。
class TextProcessorWrapper
{
public:
    struct InfoWrapper
    {
        std::string simhash_code;
        std::string ancestor_code;
    };

public:
    TextProcessorWrapper(const std::string& data_dir)
    {
        std::map conf;
        conf["data_dir"] = data_dir;
        if (!mTextDedup.Init(conf))
        {
            throw std::runtime_error("failed to init");
        }
    }

    ~TextProcessorWrapper()
    {
    }

    InfoWrapper process(const std::string& text, const std::string& title)
    {
        TextInfo info;
        mTextProcessor.Process(text, title, info);
        InfoWrapper _info;
        _info.simhash_code = info.simhashCode;
        _info.ancestor_code = info.ancestorCode;
        return _info;
    }

protected:
    TextProcessor mTextProcessor; // define in libtext_processor_st.a
};

PYBIND11_MODULE(py_sample, m) {
    m.doc() = "text processor"; // optional module docstring

    // apy class, __init__(), process()
    py::class_(m, "TextProcessor")
        .def(py::init())
        .def("process", &TextProcessorWrapper::process);

    // py class, read only attributes
    py::class_(m, "TextInfo")
        .def_readonly("simhash_code", &TextProcessorWrapper::InfoWrapper::simhash_code)
        .def_readonly("ancestor_code", &TextProcessorWrapper::InfoWrapper::ancestor_code);
}
同样地,看看Python侧是怎么用的——创建一个 TextProcessor 实例,传入数据目录,然后调用 process 就能拿到 simhash_code 和 ancestor_code,非常直观。
#!/usr/bin/env python
# -*- coding=utf-8 -*-
import os
import py_textdedup

data_dir = './data'
dedup = py_sample.TextProcessor(data_dir)
info1 = dedup.process("成都—成温邛高速—温江到寿安的丁字路口左转—成青快速通道—过金马河第一个十字路口右转直行即到",
                     "成都看银杏了")
print info.simhash_code, info.ancestor_code
build
pybind11 的编译命令同样不复杂,核心是链接你的静态库 ltext_processor_st 和指定 -std=c++14。
g++ py_sample.cpp -o py_sample.so -O3 -Wall -shared -std=c++14 -fPIC -I ./include -I /usr/local/include/python2.7 -ltext_processor_st -Wl,--rpath=$$ORIGIN/libs -Wl,--rpath=$$ORIGINref
如果想深入了解 pybind11,官方文档是最好的老师。另外,网上也有不少中英文的实战笔记可以参考,基本能覆盖从零到一的全部问题。
references
最后,把 Boost.Python 的官方文档链接也列一下,方便查证一些更高级的特性,比如重载、索引套件等。
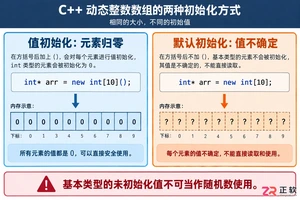
深入解析C++中动态数组的初始化机制,涵盖new操作符的不同用法、基本类型与类对象的初始化差异,以及为何在现代C++开发中应优先使用std::vector。
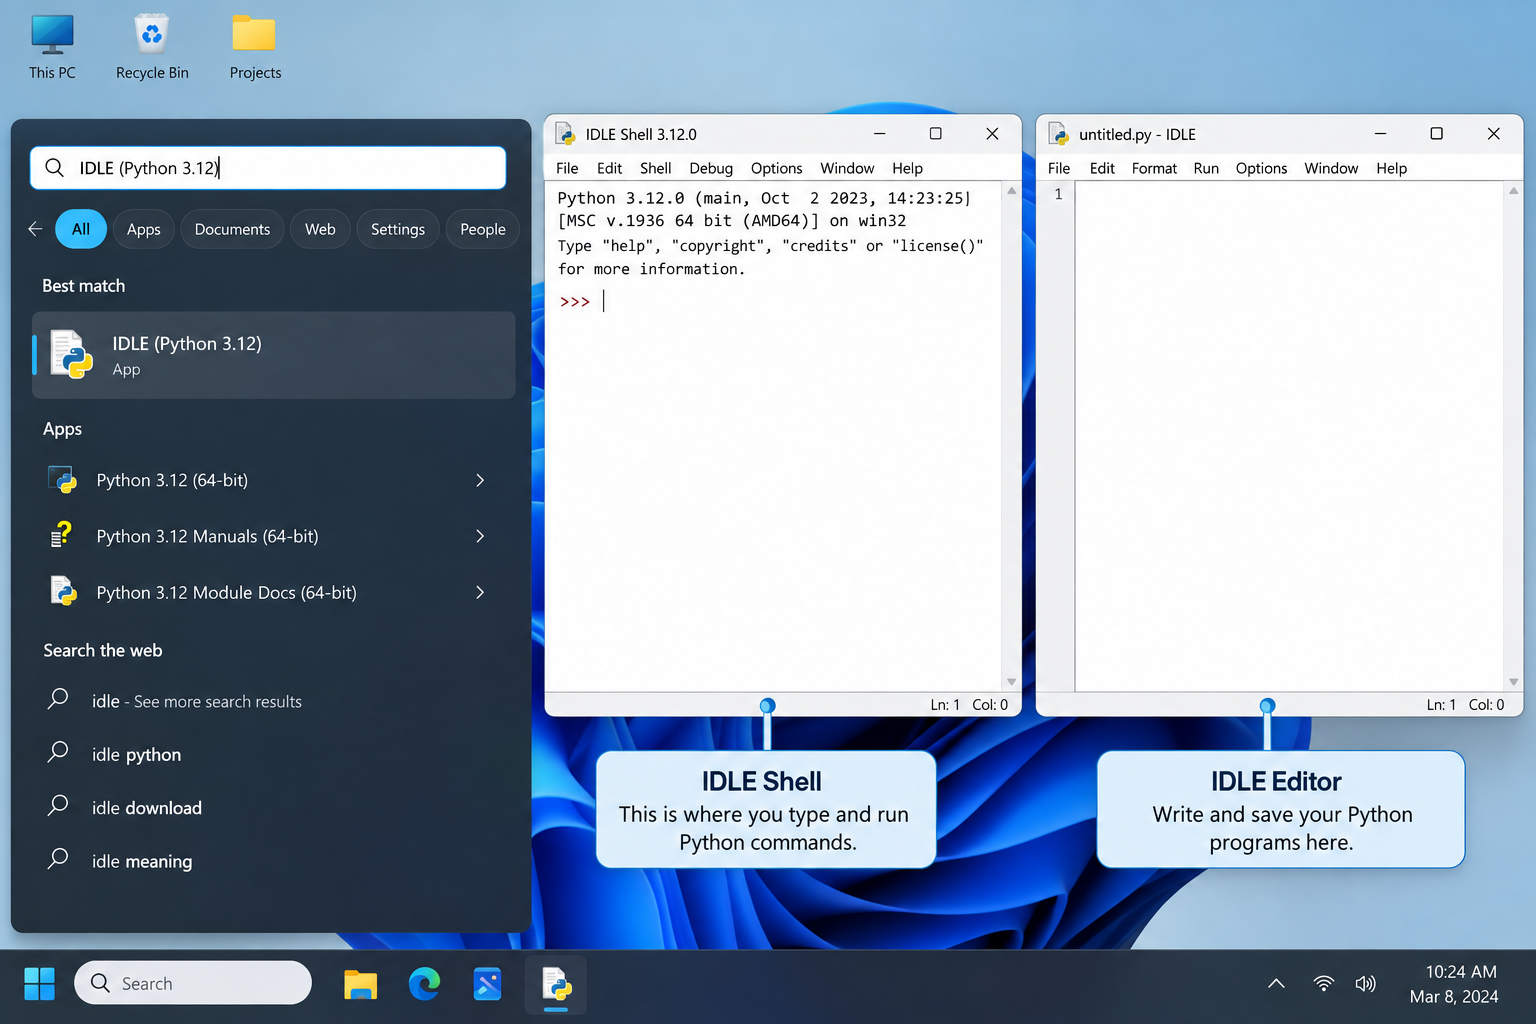
刚在Windows安装好Python却不知道如何启动?本文详细演示如何通过开始菜单找到并打开IDLE集成开发环境,以及如何在PowerShell或命令提示符中使用python和py命令启动交互式解释器、运行.py脚本文件。包含退出解释器的方法及常见启动问题排查,帮助初学者快速验证安装成功并开始编写代码。
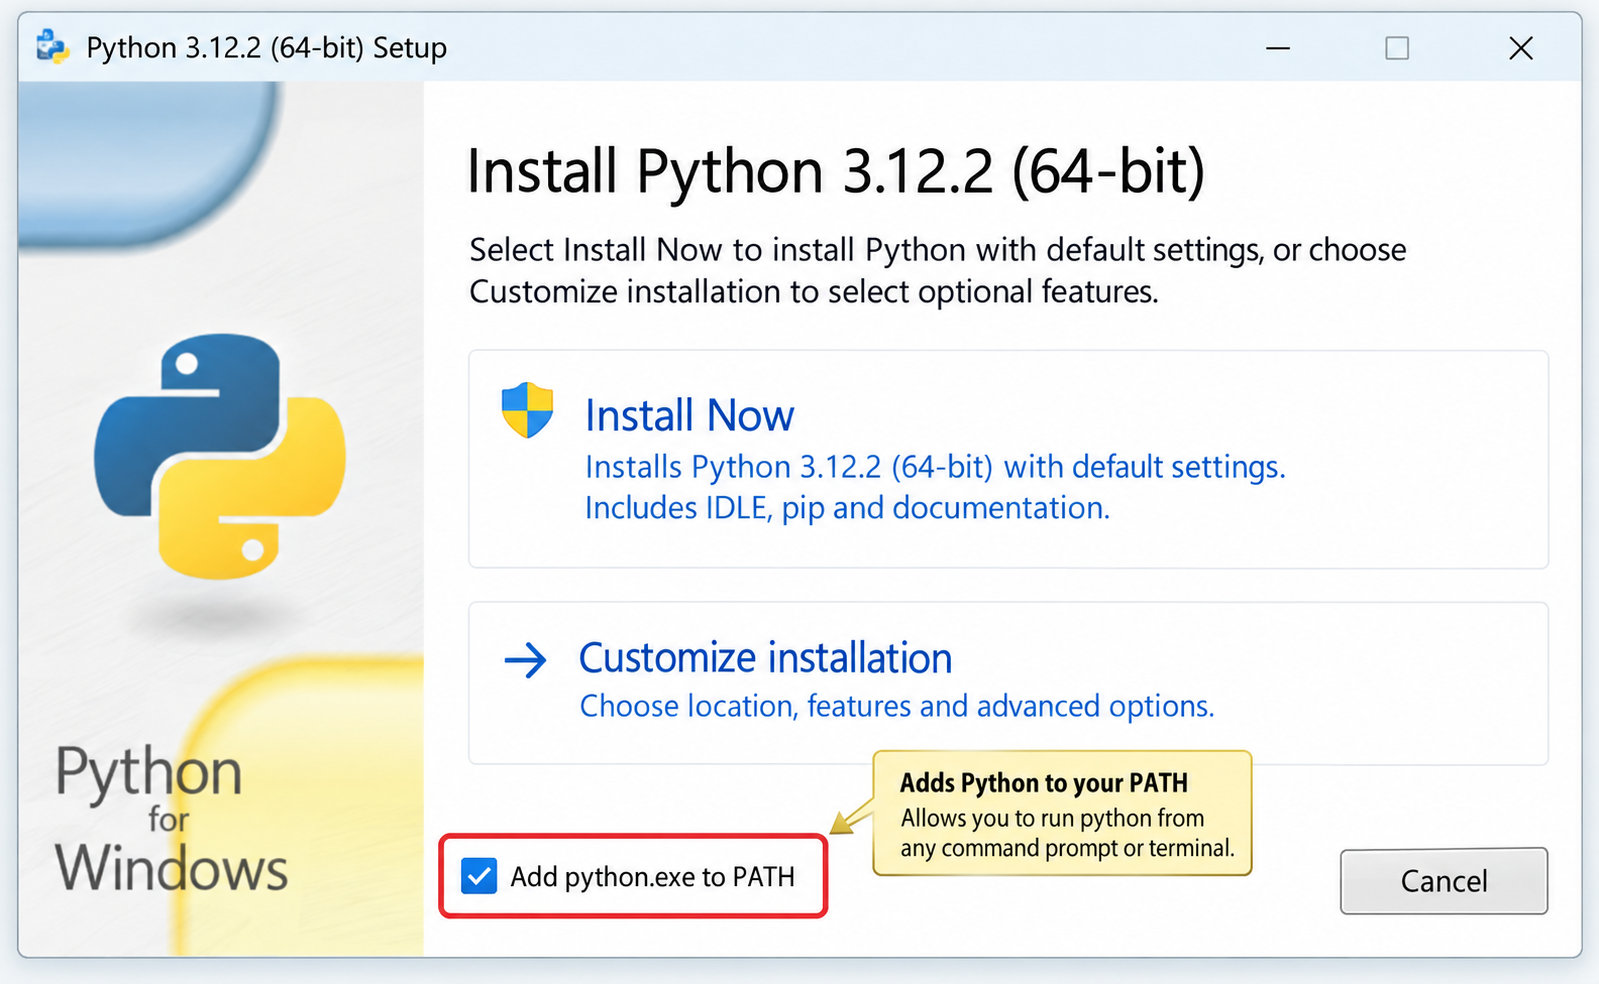
针对Windows初学者的Python安装实战指南。详细讲解如何从Python官网下载匹配架构的安装包,重点演示安装首屏勾选“Add python.exe to PATH”的关键操作,并提供使用python --version和py命令验证环境变量的具体步骤,帮助新手快速搭建开发环境并排查路径问题。

要想确认麒麟OS中Python程序的运行状态以及资源占用情况,我们可以这样做:用ps -ef | grep python来筛选进程;通过top命令,按P键排序查看实时负载;使用pgrep -f "script.py"精准获取PID;借助lsof -p PID验证文件打开状态。另外,还可以结合syst
在Debian系统上配置SSL证书通常涉及以下几个步骤:安装Web服务器:首先,你需要一个Web服务器,比如Apache或Nginx。这里以Apache为例。sudo apt updatesudo apt install apache2获取SSL证书:你可以从Let’s Encrypt免费获取SSL

要想让Python项目在统信UOS上正常运行,得先安装python3、python3-pip、python3-venv、python3-dev以及build-essential等组件。具体操作就是执行sudo apt install命令来一步到位完成安装,同时别忘了配置清华镜像源来给pip加速哦。在
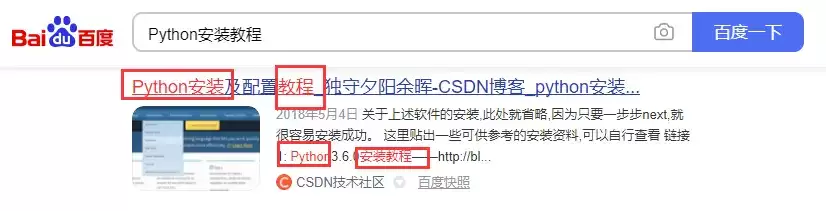
在互联网上的各类网站中,无论大小,基本上都会有一个搜索框,用来给用户对内容进行搜索,小到站点搜索,大到搜索引擎搜索。从简单的来说,搜索功能确实很简单,一个简单的select语句就可以实现数据的搜索。而从复杂的来看,无论是搜索的精度还是搜索的效率,都是有很深的研究范围的。对于简单的搜索功能来说,一个s

立即在终端输入sudo shutdown -c取消倒计时关机,成功后显示“Shutdown cancelled”;若存在pmset重复任务,需再执行sudo pmset repeat cancel清除。Mac因Python脚本执行了os.system("sudo shutdown -h +10")或

之前写过一篇同步场景下用 Python 管理多个固定出口 IP 的实践(ExitPool + requests/httpx),覆盖了健康检查、故障转移和连接池复用。但在实际业务中,越来越多的场景用 asyncio 做高并发采集或批量接口调用——异步事件循环下多出口的管理方式和同步场景完全不同:单线程
写在前面:为什么静态出口 IP 不是"买了就行"不少团队在引入静态出口 IP 产品时,第一反应往往是:“地址配上去,这事就算完了。”可真到了真实业务里,静态出口 IP 真正能体现价值的地方,往往不在分配这一步,而在分配之后怎么管:地址有没有漂移,质量是否达标,某一条线路突然不可用时怎么切换,连接层又






Windows 10 是一款微软推出的经典操作系统,拥有硬件兼容性与多任务处理能力。它更偏向把系统状态查看和常用调节动作放在一起,适合需要持续观察和微调设备状态的场景。

极度公式是一款跨平台专业LaTeX公式识别编辑软件,支持OCR公式识别和多平台编辑。和使用说明,避免使用,享受完整功能与稳定支持。做扫描整理、文字提取和表格转换时,它能把识别后的处理步骤接得更顺,资料录入这类场景会省下不少时间。