

SpringBoot整合Redis缓存如何实现

Redis Assistant 是一款为Redis设计的高效可视化管理与监控工具,提供多种操作模式,高效处理服务器数据。日常使用里的持续防护和信息管理会更突出,适合把安全控制放进长期使用流程中的场景。
SpringBoot支持的缓存组件在SpringBoot中,数据的缓存管理存储依赖于Spring框架中cache相关的org.springframework.cache.Cache和org.springframework.cache.CacheManager缓存管理器接口。如果程序中没有定义类型为CacheManager的Bean组件或者是名为cacheResolver的CacheResolver缓存解析器,SpringBoot将尝试选择启用以下缓存组件(按照指定的顺序):(1)Generic(2)JCa
SpringBoot支持的缓存组件
在SpringBoot中,数据的缓存管理存储依赖于Spring框架中cache相关的org.springframework.cache.Cache和org.springframework.cache.CacheManager缓存管理器接口。
如果程序中没有定义类型为CacheManager的Bean组件或者是名为cacheResolver的CacheResolver缓存解析器,SpringBoot将尝试选择启用以下缓存组件(按照指定的顺序):
(1)Generic
(2)JCache (JSR-107) (EhCache 3、Hazelcast、Infinispan等)
(3)EhCache 2.x
(4)Hazelcast
(5)Infinispan
(6)Couchbase
(7)Redis
(8)Caffeine
(9)Simple
上面按照SpringBoot缓存组件的加载顺序,列举了SpringBoot支持的9种缓存组件,在项目中添加某个缓存管理组件(例如Redis)后,SpringBoot项目会选择并启用对应的缓存管理器。如果在项目中同时添加了多个缓存组件,且没有指定缓存管理器或者缓存解析器(CacheManager或者cacheResolver),那么SpringBoot会按照上述顺序在添加的多个缓存组件中优先启用排在前面的某个缓存组件进行缓存管理(例如,同时添加了Couchbase和Redis这两个缓存组件,那么优先启用Couchbase组件)。
在上一篇文章 SpringBoot缓存管理(一) 默认缓存管理 介绍的默认缓存管理中,我们搭建的项目没有添加任何缓存管理组件,但是依旧实现了缓存管理。这是因为开启缓存管理后,SpringBoot会按照上述缓存组件顺序查找有效的缓存组件进行缓存管理,如果没有任何缓存组件,会默认使用最后一个Simple缓存组件进行管理。Simple缓存组件是SpringBoot默认的缓存管理组件,它默认使用内存中的ConcurrentMap进行缓存存储,所以在没有添加任何第三方缓存组件的情况下,依旧可以实现内存中的缓存管理,但是不推荐这种缓存管理方式。
基于注解的Redis缓存实现
在 SpringBoot缓存管理(一) 默认缓存管理 搭建的项目基础上引入Redis缓存组件,使用基于注解的方式讲解SpringBoot整合Redis缓存的具体实现。
(1)添加Spring Data Redis依赖启动器
在pom.xml文件中添加Spring Data Redis依赖启动器:
  org.springframework.boot
  spring-boot-starter-data-redis
当我们添加Redis相关的依赖启动器后,SpringBoot会使用RedisCacheConfigratioin作为自动配置类进行缓存相关的自动装配类(之前为默认的SimpleCacheConfiguration),容器中使用的缓存管理器变为了RedisCacheManager(之前为默认为cacheManager),这个缓存管理器创建的Cache为RedisCache,进而操控Redis进行数据的缓存。
(2)Redis服务器连接配置
在项目的全局配置文件application.properties中添加Redis数据库的连接配置,示例代码如下:
# Redis服务器地址
spring.redis.host=127.0.0.1
# Redis服务器连接端口
spring.redis.port=6379
# Redis服务器连接密码(默认为空)
spring.redis.password=
(3)对CommentService类中的方法进行修改
使用@Cacheable、@CachePut、@CacheEvict三个注解进行缓存管理,分别进行缓存存储、缓存更新及缓存删除等操作:
package com.hardy.springbootdatacache.service;import com.hardy.springbootdatacache.entity.Comment;import com.hardy.springbootdatacache.repository.CommentRepository;import org.springframework.beans.factory.annotation.Autowired;import org.springframework.cache.annotation.CacheEvict;import org.springframework.cache.annotation.CachePut;import org.springframework.cache.annotation.Cacheable;import org.springframework.stereotype.Service;import java.util.Optional;/**
 * @Author: HardyYao
 * @Date: 2021/6/19 */@Servicepublic class CommentService {

    @Autowiredprivate CommentRepository commentRepository;/** * 根据评论id查询评论
     * @Cacheable:将该方法的查询结果comment存放在SpringBoot默认缓存中
     * cacheNames:起一个缓存命名空间,对应缓存唯一标识
     * @param id
     * @return */@Cacheable(cacheNames = "comment", unless = "#result==null")public Comment findCommentById(Integer id){
        Optional comment = commentRepository.findById(id);if(comment.isPresent()){
            Comment comment1 = comment.get();return comment1;
        }return null;
    }/** * 更新评论
     * @param comment
     * @return */@CachePut(cacheNames = "comment",key = "#result.id")public Comment updateComment(Comment comment) {
        commentRepository.updateComment(comment.getAuthor(), comment.getaId());return comment;
    }/** * 删除评论
     * @param comment_id     */@CacheEvict(cacheNames = "comment")public void deleteComment(int comment_id) {
        commentRepository.deleteById(comment_id);
    }

}
在上述代码中,使用了@Cacheable、@CachePut、@CacheEvict注解在数据查询、数据更新及数据删除方法上进行了缓存管理。
其中,查询缓存@Cacheable注解中没有标记key值,将会使用默认参数值comment_id作为key进行数据保存,在进行缓存更新时必须使用同样的的key;同样,在使用查询缓存@Cacheable注解中,定义了 unless= “#result==null” 表示查询结果为空则不进行缓存。
(4)在CommentController类中新增两个接口
新增更新和删除的接口:
package com.hardy.springbootdatacache.controller;import com.hardy.springbootdatacache.entity.Comment;import com.hardy.springbootdatacache.service.CommentService;import org.springframework.beans.factory.annotation.Autowired;import org.springframework.web.bind.annotation.RequestMapping;import org.springframework.web.bind.annotation.RestController;/**
 * @Author: HardyYao
 * @Date: 2021/6/19 */@RestControllerpublic class CommentController {

    @Autowiredprivate CommentService commentService;

    @RequestMapping(value = "/findCommentById")public Comment findCommentById(Integer id){
        Comment comment = commentService.findCommentById(id);return comment;
    }

    @RequestMapping(value = "/updateComment")public Comment updateComment(Comment comment){
        Comment oldComment = commentService.findCommentById(comment.getId());
        oldComment.setAuthor(comment.getAuthor());
        Comment comment1 = commentService.updateComment(oldComment);return comment1;
    }

    @RequestMapping(value = "/deleteComment")public void deleteComment(Integer id){
        commentService.deleteComment(id);
    }

}
(5)基于注解的Redis查询缓存测试
在浏览器中输入:http://localhost:8080/findCommentById?id=1 进行访问:
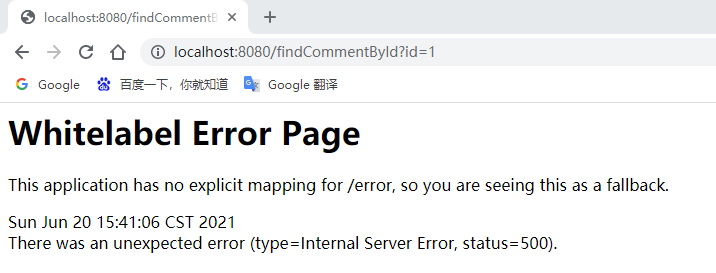
页面报错了,查看控制台信息:

根据报错信息可知:查询用户评论信息Comment时执行了相应的SQL语句,但是在进行缓存存储时出现了IllegalArgumentException非法参数异常,提示信息要求对应的Comment实体类必须实现序列化(DefaultSerializer requires a Serializable payload but received an object of type [com.hardy.springbootdatacache.entity.Comment])。
(6)将缓存对象实现序列化
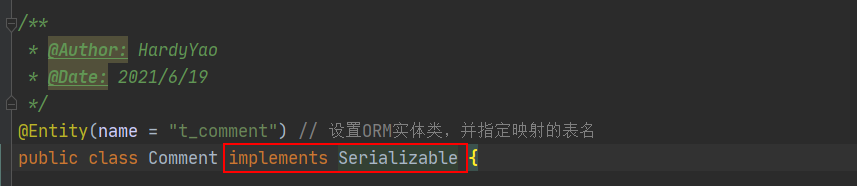
(7)重启项目测试查询缓存
在浏览器中输入:http://localhost:8080/findCommentById?id=1 进行访问(连续访问三次):
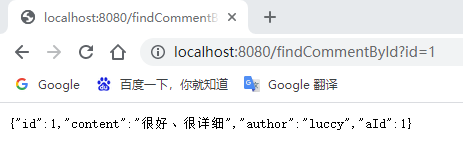
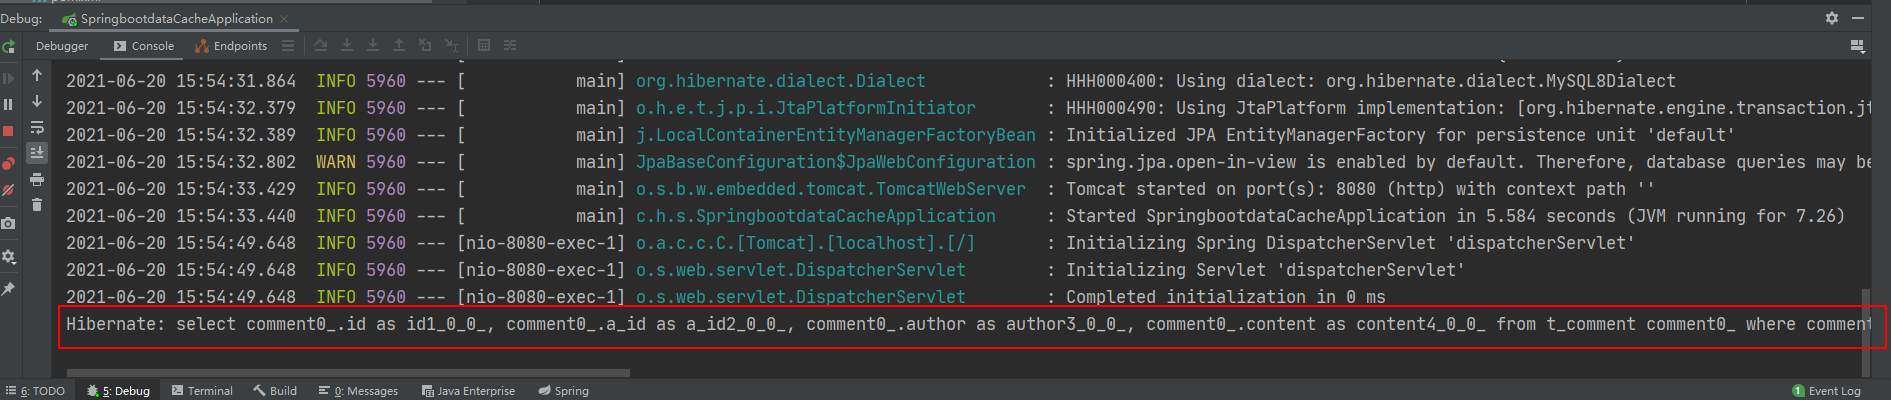
打开Redis客户端可视化工具Redis Desktop Manager,连接本地启用的Redis服务,查看具体的数据缓存效果:

执行findById()方法查询出的用户评论信息Comment正确存储到了Redis缓存库中名为comment的名称空间下。
其中缓存数据的唯一标识key值是以“名称空间comment::+参数值(comment::1)”的字符串形式体现的,而value值则是经过JDK默认序列格式化后的HEX格式存储。这种JDK默认序列格式化后的数据显然不方便缓存数据的可视化查看和管理,所以在实际开发中,通常会自定义数据的序列化格式,这方面的内容在后面会介绍。
(8)基于注解的Redis缓存更新测试
先通过浏览器访问:http://localhost:8080/updateComment?id=1&author=hardy;
接着在访问:http://localhost:8080/findCommentById?id=1,查看浏览器返回信息及控制台打印信息:
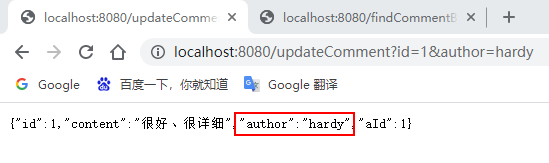
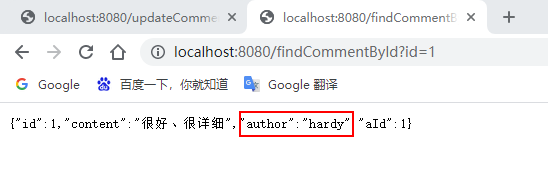
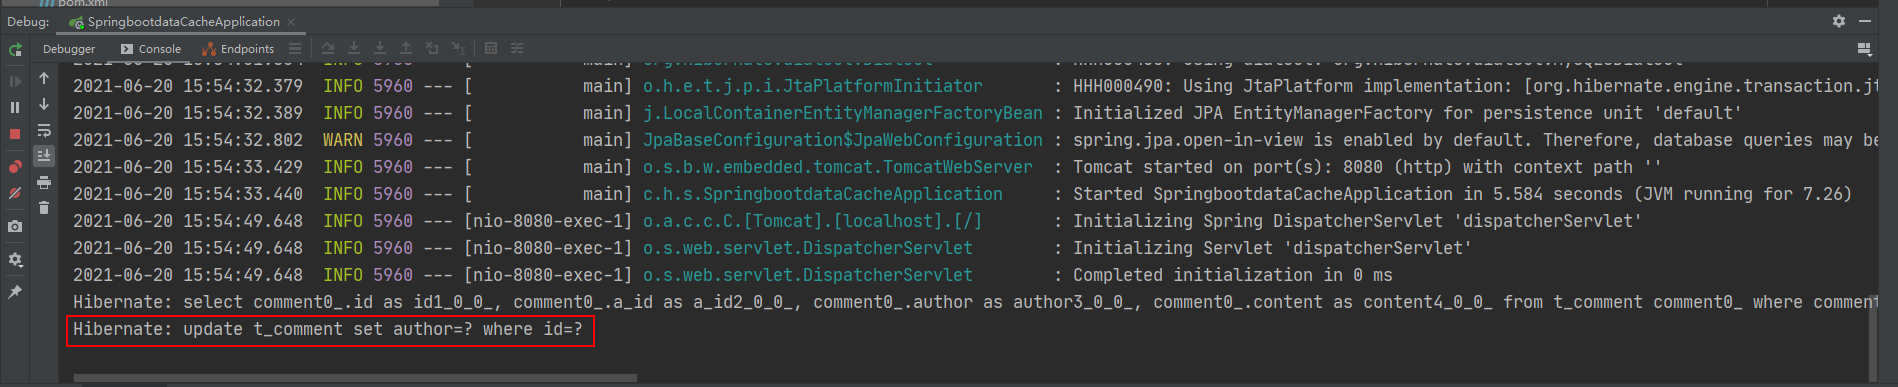
可以看到,执行updateComment()更新id为1的数据时执行了一条更新的SQL语句,后续调用findById()方法查询id为1的用户评论信息时没有再次执行查询的SQL语句,且浏览器返回了更新后的正确结果,这说明@CachePut缓存更新配置成功。
(9)基于注解的Redis缓存删除测试
通过浏览器访问:http://localhost:8080/deleteComment?id=1 和 http://localhost:8080/findCommentById?id=1
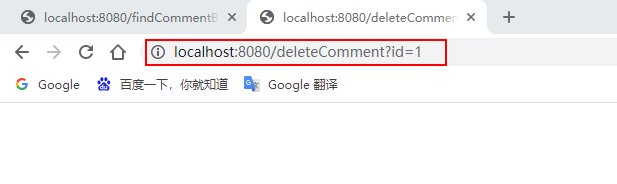
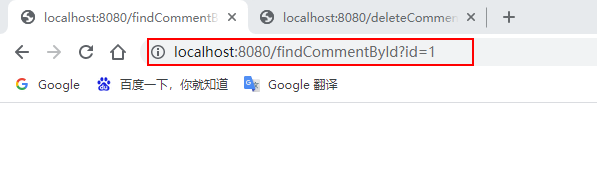
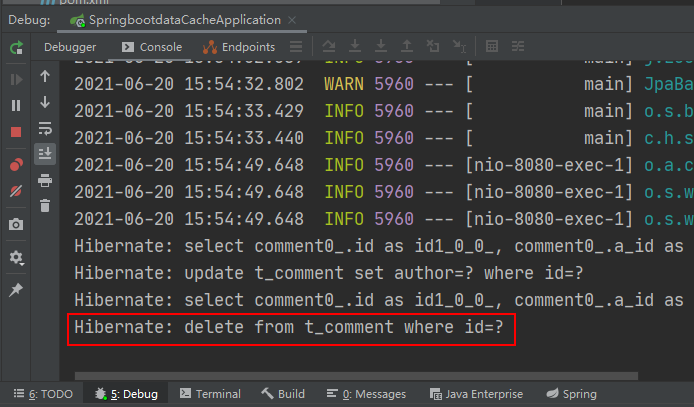
执行deleteComment()方法删除id为1的数据后查询结果为空,查看Redis缓存数据库:
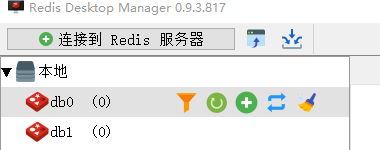
可以看到之前存储的comment相关数据被删除掉了,这表明@CacheEvict注解缓存删除成功实现。
通过上面的案例可以看出:使用基于注解的Redis缓存实现只需要添加Redis依赖、并使用几个注解在对应的方法上,就可以实现对数据的缓存管理。
另外,还可以在SpringBoot全局配置文件中配置Redis有效期,示例代码如下:
# 对基于注解的Redis缓存数据统一设置有效期为1分钟,单位毫秒
spring.cache.redis.time-to-live=60000
上述代码中,在SpringBoot全局配置文件中添加了“spring.cache.redis.time-to-live”属性统一设置Redis数据的有效期(单位为毫秒),但这种方式不够灵活,因此一般不用。
基于API的Redis缓存实现
在SpringBoot整合Redis缓存实现中,除了基于注解形式的Redis缓存形式外,还有一种开发中更常用的方式——基于API的Redis缓存实现。这种基于API的Redis缓存实现,需要在某种业务需求下通过Redis提供的API调用相关方法实现数据缓存管理。同时,这种方法还可以手动管理缓存的有效期。
下面,通过Redis API的方式讲解SpringBoot整合Redis缓存的具体实现。
(1)使用Redis API进行业务数据缓存管理
在 com.hardy.springbootdatacache.service 包下新建一个 ApiCommentService:
package com.hardy.springbootdatacache.service;import com.hardy.springbootdatacache.entity.Comment;import com.hardy.springbootdatacache.repository.CommentRepository;import org.springframework.beans.factory.annotation.Autowired;import org.springframework.cache.annotation.CacheEvict;import org.springframework.cache.annotation.CachePut;import org.springframework.cache.annotation.Cacheable;import org.springframework.data.redis.core.RedisTemplate;import org.springframework.stereotype.Service;import java.util.Optional;import java.util.concurrent.TimeUnit;/**
 * @Author: HardyYao
 * @Date: 2021/6/19 */@Servicepublic class ApiCommentService {

    @Autowiredprivate CommentRepository commentRepository;

    @Autowiredprivate RedisTemplate redisTemplate;/** * 根据评论id查询评论
     * @param id
     * @return */public Comment findCommentById(Integer id){// 先查Redis缓存Object o = redisTemplate.opsForValue().get("comment_" + id);if (o != null) {return (Comment) o;
        } else {// 如果缓存中没有,则从数据库查询Optional dbComment = commentRepository.findById(id);if (dbComment.isPresent()) {
                Comment redisComment = dbComment.get();// 将查询结果存储到缓存中,并设置有效期为1天redisTemplate.opsForValue().set("comment_"+id, redisComment,1, TimeUnit.DAYS);return redisComment;
            } else {return null;
            }
        }

    }/** * 更新评论
     * @param comment
     * @return */public Comment updateComment(Comment comment) {
        commentRepository.updateComment(comment.getAuthor(), comment.getId());// 更新数据库数据后进行缓存更新redisTemplate.opsForValue().set("comment_" + comment.getId(), comment);return comment;
    }/** * 删除评论
     * @param comment_id     */public void deleteComment(int comment_id) {
        commentRepository.deleteById(comment_id);// 删除数据库数据后进行缓存删除redisTemplate.delete("comment_" + comment_id);
    }

}
(2)编写Web访问层ApiCommentController
package com.hardy.springbootdatacache.controller;import com.hardy.springbootdatacache.entity.Comment;import com.hardy.springbootdatacache.service.ApiCommentService;import org.springframework.beans.factory.annotation.Autowired;import org.springframework.web.bind.annotation.RequestMapping;import org.springframework.web.bind.annotation.RestController;/**
 * @Author: HardyYao
 * @Date: 2021/6/19 */@RestController
@RequestMapping("api")  // 改变请求路径public class ApiCommentController {

    @Autowiredprivate ApiCommentService apiCommentService;

    @RequestMapping(value = "/findCommentById")public Comment findCommentById(Integer id){
        Comment comment = apiCommentService.findCommentById(id);return comment;
    }

    @RequestMapping(value = "/updateComment")public Comment updateComment(Comment comment){
        Comment oldComment = apiCommentService.findCommentById(comment.getId());
        oldComment.setAuthor(comment.getAuthor());
        Comment comment1 = apiCommentService.updateComment(oldComment);return comment1;
    }

    @RequestMapping(value = "/deleteComment")public void deleteComment(Integer id){
        apiCommentService.deleteComment(id);
    }

}
(3)测试基于API的Redis缓存实现
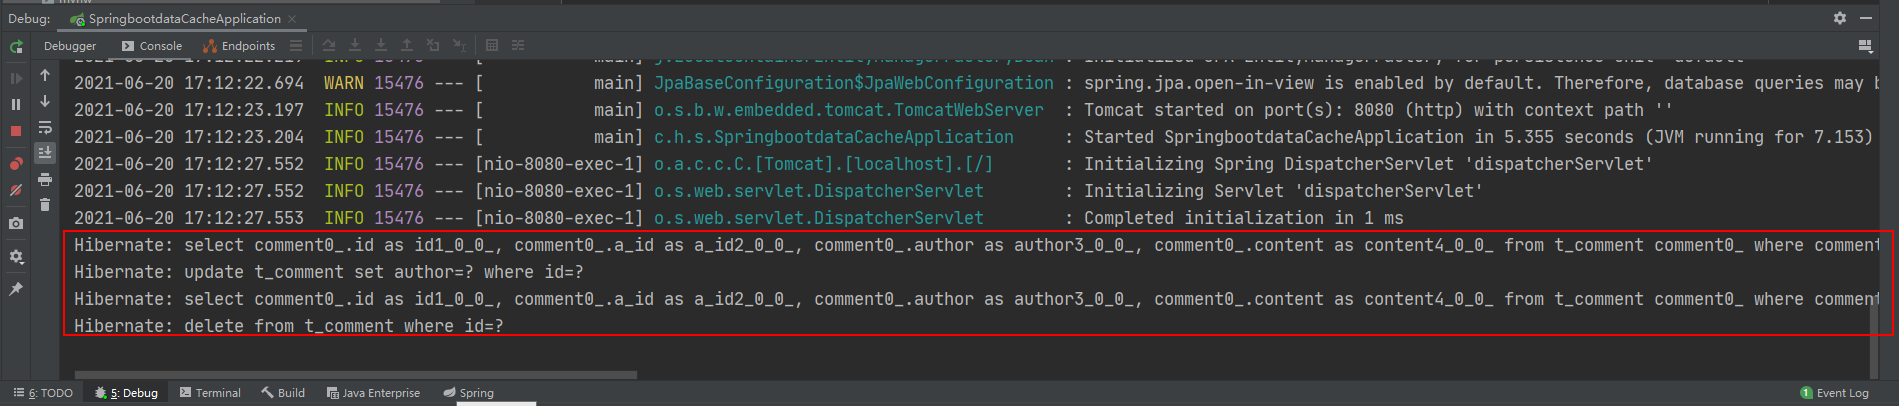
输入:http://localhost:8080/api/findCommentById?id=2(连续输入三次)、http://localhost:8080/api/updateComment?id=2&author=hardy、http://localhost:8080/deleteComment?id=2进行访问:
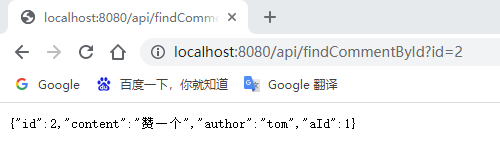
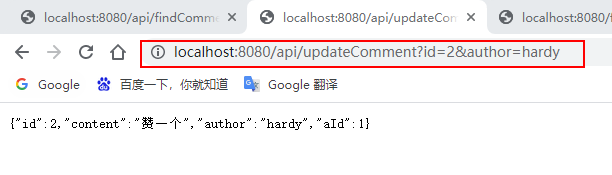
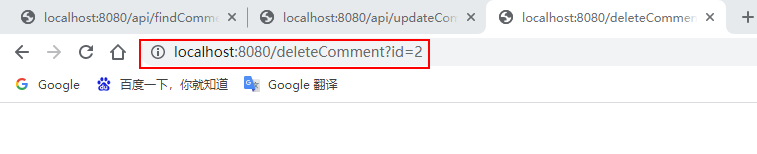
查看控制台消息及Redis数据库:

基于API的Redis缓存实现的相关配置:基于API的Redis缓存实现不需要@EnableCaching注解开启基于注解的缓存支持,所以这里可以选择将添加在项目启动类上的@EnableCaching注解进行删除或者注释,不会影响项目的功能实现。
通过实测展示Claude Code在终端中如何理解自然语言指令、自动修改代码文件并处理复杂编程任务,帮助开发者评估其实际辅助能力。
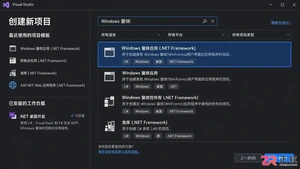
本教程详细讲解如何使用Visual Studio创建WinForms项目,通过添加按钮和标签控件并编写点击事件代码,实现一个基础的计数器功能,适合C#初学者快速上手Windows窗体应用开发。
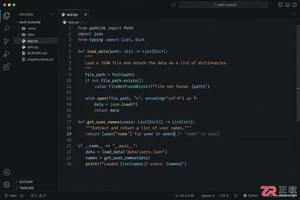
详解Cursor编辑器中自动补全功能的开启与优化设置,涵盖Tab触发机制、上下文窗口调整及模型切换,帮助开发者解决补全延迟、干扰大等问题,提升编码流畅度。
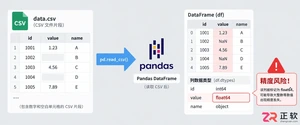
详解Pandas中数据格式转换的核心方法,包括astype强制转换、to_numeric容错处理及日期解析技巧,解决常见类型错误并提升数据处理效率。
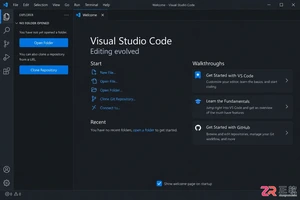
详细介绍在Visual Studio Code中安装Chinese (Simplified)语言包的方法,包括通过扩展市场搜索、安装及自动重启切换至简体中文界面的完整步骤,帮助开发者快速将编辑器本地化。
针对Cursor安装包默认锁定C盘且无路径选择界面的问题,提供通过手动移动文件并创建目录联结(Symbolic Link)的解决方案,实现将软件安装在其他磁盘分区。
详解Windows系统下Rust语言的安装步骤,重点解析rustup工具链管理机制,解决环境变量配置错误及MSVC链接器缺失问题,提供可复制的命令验证方法与常见报错的因果排查思路。
详解VS Code中Chat插件的安装与核心配置步骤,重点解决API连接失败、响应慢等常见问题,通过优化上下文设置提升代码生成质量,适合希望集成AI辅助工具的开发者阅读。
本教程通过实战案例详解UniApp开发流程,包括项目初始化、页面结构解析、数据绑定与事件处理,帮助初学者快速上手跨平台应用开发。
详细讲解2026年最新版Android Studio的下载与安装步骤,涵盖JDK环境检查、组件选择及初始配置,助您顺利开启安卓应用开发之旅。




Blender 是一款免费开源、跨平台的专业 3D 创作软件,集建模、动画、渲染、视频编辑与视觉合成等功能于一体,广泛应用于影视动画、游戏设计和建筑可视化等领域。软件支持 Cycles 物理渲染器与 Eevee 实时渲染引擎,并提供多边形建模、骨骼绑定、物理模拟等专业工具。Blender 兼容 Windows、macOS 和 Linux 系统,安装包轻巧、运行流畅,依托活跃的全球开发者社区持续更新,是从初学者到专业创作者都值得选择的正版 3D 创作工具。


赤友清理大师是一款为 Mac 设计的智能清理优化工具,可精准扫描垃圾、大文件、重复文件等,释放磁盘空间。做扫描整理、文字提取和表格转换时,它能把识别后的处理步骤接得更顺,资料录入这类场景会省下不少时间。
Blender 是一款免费开源、跨平台的专业 3D 创作软件,集建模、动画、渲染、视频编辑与视觉合成等功能于一体,广泛应用于影视动画、游戏设计和建筑可视化等领域。软件支持 Cycles 物理渲染器与 Eevee 实时渲染引擎,并提供多边形建模、骨骼绑定、物理模拟等专业工具。Blender 兼容 Windows、macOS 和 Linux 系统,安装包轻巧、运行流畅,依托活跃的全球开发者社区持续更新,是从初学者到专业创作者都值得选择的正版 3D 创作工具。

Windows 10 是一款微软推出的经典操作系统,拥有硬件兼容性与多任务处理能力。它更偏向把系统状态查看和常用调节动作放在一起,适合需要持续观察和微调设备状态的场景。

极度公式是一款跨平台专业LaTeX公式识别编辑软件,支持OCR公式识别和多平台编辑。和使用说明,避免使用,享受完整功能与稳定支持。做扫描整理、文字提取和表格转换时,它能把识别后的处理步骤接得更顺,资料录入这类场景会省下不少时间。