

centos6.6下如何安装GreenPlum4.3.5.2?
在GP官网上找了一圈,发现关于CentOS的最新版本信息不太明确,其实直接用Red Hat的对应版本就行,两者兼容性很好。 前言 Greenplum的安装思路大致是:选一台主机当Master,其他机器当Segment节点。机器不够?那就用虚拟机开三个CentOS 6.6,采用1+2模式(一个Mast
在GP官网上找了一圈,发现关于CentOS的最新版本信息不太明确,其实直接用Red Hat的对应版本就行,两者兼容性很好。
前言
Greenplum的安装思路大致是:选一台主机当Master,其他机器当Segment节点。机器不够?那就用虚拟机开三个CentOS 6.6,采用1+2模式(一个Master,两个Segment)。
安装的时候有个省事的办法:先在Master机上装好Greenplum,然后通过 gpssh-exkeys 在Master和Segment之间建立互信,接着用 gpssh 就能登录所有机器,做建用户、拷贝安装包等一系列操作。当然,装之前有人会调内核参数、限制参数什么的,看自己需求。我这虚拟机硬件根本达不到官方最低要求,索性跳过这一步。
安装前准备(可选)
1. 在Master机的 /etc/sysctl.conf 中添加
kernel.shmmax = 500000000
kernel.shmmni = 4096
kernel.shmall = 4000000000
kernel.sem = 250 512000 100 2048
kernel.sysrq = 1
kernel.core_uses_pid = 1
kernel.msgmnb = 65536
kernel.msgmax = 65536
kernel.msgmni = 2048
net.ipv4.tcp_syncookies = 1
net.ipv4.ip_forward = 0
net.ipv4.conf.default.accept_source_route = 0
net.ipv4.tcp_tw_recycle = 1
net.ipv4.tcp_max_syn_backlog = 4096
net.ipv4.conf.all.arp_filter = 1
net.ipv4.ip_local_port_range = 1025 65535
net.core.netdev_max_backlog = 10000
net.core.rmem_max = 2097152
net.core.wmem_max = 2097152
vm.overcommit_memory = 2
改完后重启机器或执行 sysctl -p 生效。
2. 在Master机的 /etc/security/limits.conf 中添加
* soft nofile 65536
* hard nofile 65536
* soft nproc 131072
* hard nproc 131072
⚠️ 注意:对于Red Hat 6.x和CentOS 6.x,/etc/security/limits.d/90-nproc.conf 里的参数会覆盖上面的设置。如果两个文件都配置了,记得确保 90-nproc.conf 中的参数也正确。
3. 关闭防火墙
chkconfig iptables off   # 永久关闭,重启后不启动
service iptables stop    # 临时关闭,重启后还会启动
# 用 service iptables status 检查状态
开始GP安装
1. 在Master上安装GP(root权限)
把下载的 greenplum-db-4.3.5.2-build-1-RHEL5-x86_64.zip 放到某个目录,解压(unzip),会得到一个ReadMe和一个.bin文件。默认GP装到 /usr/local/greenplum,其实装哪都行,这里我们选 /opt/greenplum/。
执行bin文件:./greenplum-db-4.3.5.2-build-1-RHEL5-x86_64.bin,一路按空格看协议,直到提示输入 yes|no,打 yes。然后输入安装目录 /opt/greenplum/greenplum-db-4.3.5.2,接着一路 yes 就装好了,挺快的。
2. 创建gpadmin用户
习惯在Master机上先建一个负责GP数据库的用户 gpadmin,后面Segment机的同名用户通过 gpssh 远程添加。
groupadd -g 530 gpadmin
useradd -g 530 -u 530 -m -d /home/gpadmin -s /bin/bash gpadmin
passwd gpadmin              # 设置密码
chown -R gpadmin:gpadmin /home/gpadmin
chown -R gpadmin:gpadmin /opt/greenplum
然后加载Greenplum的环境变量:
source /opt/greenplum/greenplum-db/greenplum_path.sh
# 注意:/opt/greenplum/greenplum-db 是 /opt/greenplum/greenplum-db-4.3.5.2 的软链接,如果没有就自己创建:
# ln -s /opt/greenplum/greenplum-db-4.3.5.2 /opt/greenplum/greenplum-db
3. 建立主机间的互信
首先,在Master机上编辑 /etc/hosts,把Master和Segment的IP与主机名写进去,比如:
127.0.0.1   localhost localhost.localdomain localhost4 localhost4.localdomain4
::1         localhost localhost.localdomain localhost6 localhost6.localdomain6
192.168.127.136 mdw   # master
192.168.127.137 sdw1  # segment
192.168.127.138 sdw2  # segment
接着,在某个目录(比如 /var)下建两个文件:hostlists(包含所有主机名)和 seg_hosts(只包含Segment主机名)。
/var/hostlists 内容:
mdw
sdw1
sdw2
/var/seg_hosts 内容:
sdw1
sdw2
开始建立互信:
gpssh-exkeys -f /var/hostlists
# 输出示例:
[STEP 1 of 5] create local ID and authorize on local host
 ... /home/root/.ssh/id_rsa file exists ... key generation skipped
[STEP 2 of 5] keyscan all hosts and update known_hosts file
[STEP 3 of 5] authorize current user on remote hosts
 ... send to mdw
 ... send to sdw1
 ***
 *** Enter password for sdw1:
[STEP 4 of 5] determine common authentication file content
[STEP 5 of 5] copy authentication files to all remote hosts
 ... finished key exchange with mdw
 ... finished key exchange with sdw1
[INFO] completed successfully
如果提示没有密钥,执行 ssh-keygen -t rsa 和 ssh-add /root/.ssh/id_rsa。如果 ssh-add 报错“Could not open a connection to your authentication agent”,先执行 ssh-agent bash 即可。
互信建立后,就能用 gpssh -f /var/seg_hosts 访问所有Segment机器了。
详细讲解Windows系统安装步骤,包括使用Media Creation Tool制作启动U盘、BIOS/UEFI启动设置、磁盘分区选择及驱动激活检查。区分就地重装与全新安装,帮助用户安全完成系统部署。
想从 Linux 换回 Windows?本文详解制作安装介质、进入 BIOS/UEFI 启动菜单、删除 Linux 分区及安装 Windows 的全过程。重点提示数据备份与磁盘确认,避免误删其他硬盘数据。

学习如何安装和配置 ObjectDock,包括设置 Dock 位置、图标大小、自动隐藏、添加应用快捷方式、更换背景主题以及设置开机自启,打造高效美观的 Windows 桌面环境。
找不到StartAllBack开机启动选项?本文详解如何在Windows设置、任务管理器及启动文件夹中定位StartAllBack启动项,并验证其是否随系统自动运行,解决重启后界面恢复默认的问题。
遇到Windows界面无法切换为中文的情况?本文详解如何区分输入法与显示语言,排查单一语言版本限制,正确安装中文语言包并解决下载失败问题,助您快速恢复中文界面。
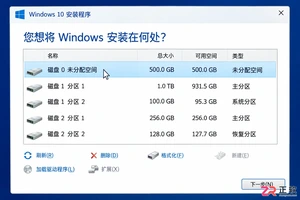
Windows 10 安装过程中遇到分区混乱或报错?本教程指导你如何在备份数据后,正确识别目标磁盘,匹配 UEFI/GPT 启动模式,并通过安装程序自动重建系统分区,确保全新安装顺利启动。
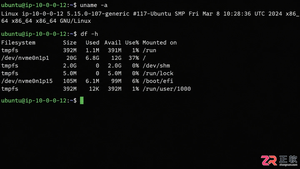
详解 1Panel 在 Linux 服务器上的在线安装步骤。涵盖环境检查、SSH 终端操作、官方脚本执行、Docker 依赖处理及浏览器访问配置,助您快速搭建运维管理面板。
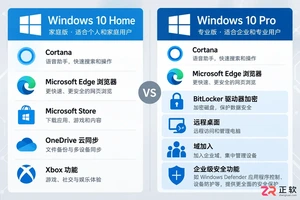
想知道如何将 Windows 10 家庭版升级到专业版?本文详解通过微软商店购买和输入产品密钥两种官方升级方法,说明数据保留情况、成本计算及升级后如何验证 BitLocker 和远程桌面等功能,助您安全获取专业版权限。
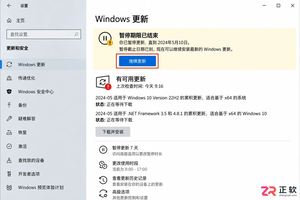
Windows 10 自动更新突然重新启用怎么办?本文详解暂停35天期限结束、误点继续更新、重启后任务续跑及公司域策略覆盖等常见原因,提供查看更新历史、设置活动时间和正确使用疑难解答的操作指南,帮助用户在支持结束前安全管理系统更新。
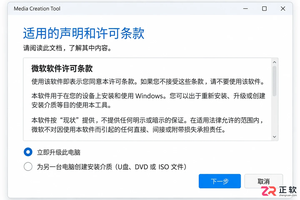
解决 Media Creation Tool 在下载 Windows 镜像时速度慢、中断或报错的问题。本文按操作顺序指导用户检查网络连接、系统权限、磁盘空间及 U 盘状态,确保顺利制作可启动安装介质。




Photoshop 2026 是 Adobe 推出的专业图像处理与视觉设计软件,支持 Windows、macOS 和 iPad 等平台,广泛应用于摄影修图、电商设计、平面海报、数字绘画及视觉合成等创作场景。

Blender 是一款免费开源、跨平台的专业 3D 创作软件,集建模、动画、渲染、视频编辑与视觉合成等功能于一体,广泛应用于影视动画、游戏设计和建筑可视化等领域。软件支持 Cycles 物理渲染器与 Eevee 实时渲染引擎,并提供多边形建模、骨骼绑定、物理模拟等专业工具。Blender 兼容 Windows、macOS 和 Linux 系统,安装包轻巧、运行流畅,依托活跃的全球开发者社区持续更新,是从初学者到专业创作者都值得选择的正版 3D 创作工具。


Photoshop 2026 是 Adobe 推出的专业图像处理与视觉设计软件,支持 Windows、macOS 和 iPad 等平台,广泛应用于摄影修图、电商设计、平面海报、数字绘画及视觉合成等创作场景。
Blender 是一款免费开源、跨平台的专业 3D 创作软件,集建模、动画、渲染、视频编辑与视觉合成等功能于一体,广泛应用于影视动画、游戏设计和建筑可视化等领域。软件支持 Cycles 物理渲染器与 Eevee 实时渲染引擎,并提供多边形建模、骨骼绑定、物理模拟等专业工具。Blender 兼容 Windows、macOS 和 Linux 系统,安装包轻巧、运行流畅,依托活跃的全球开发者社区持续更新,是从初学者到专业创作者都值得选择的正版 3D 创作工具。