Python与前端集成:构建全栈应用
前言 非科班转码,同时学习Rust和Python,最近开始探索Python与前端技术的集成。乍一看全栈开发的概念确实有些模糊,但深入后发现,Python作为后端与前端框架结合,完全能构建出功能强大的全栈应用。下面分享一些实操心得,希望能给同样在转码路上的朋友提供些参考。 一、后端API设计 1.1
前言
非科班转码,同时学习Rust和Python,最近开始探索Python与前端技术的集成。乍一看全栈开发的概念确实有些模糊,但深入后发现,Python作为后端与前端框架结合,完全能构建出功能强大的全栈应用。下面分享一些实操心得,希望能给同样在转码路上的朋友提供些参考。
一、后端API设计
1.1 使用FastAPI创建RESTful API
FastAPI算是当前Python Web框架里的新星,用来搭RESTful API非常顺手:
from fastapi import FastAPI
from pydantic import BaseModel
from typing import List

app = FastAPI()

class Item(BaseModel):
    id: int
    name: str
    price: float
    is_offer: bool = None

items = []

@app.get("/")
def read_root():
    return {"message": "Hello, World!"}

@app.get("/items/{item_id}")
def read_item(item_id: int):
    for item in items:
        if item.id == item_id:
            return item
    return {"error": "Item not found"}

@app.post("/items/")
def create_item(item: Item):
    items.append(item)
    return item

@app.put("/items/{item_id}")
def update_item(item_id: int, item: Item):
    for i, existing_item in enumerate(items):
        if existing_item.id == item_id:
            items[i] = item
            return item
    return {"error": "Item not found"}

@app.delete("/items/{item_id}")
def delete_item(item_id: int):
    for i, item in enumerate(items):
        if item.id == item_id:
            items.pop(i)
            return {"message": "Item deleted"}
    return {"error": "Item not found"}
1.2 使用Flask创建RESTful API
Flask作为老牌框架,同样能胜任RESTful API的搭建:
from flask import Flask, request, jsonify

app = Flask(__name__)

items = []

@app.route('/', methods=['GET'])
def read_root():
    return jsonify({"message": "Hello, World!"})

@app.route('/items/', methods=['GET'])
def read_item(item_id):
    for item in items:
        if item['id'] == item_id:
            return jsonify(item)
    return jsonify({"error": "Item not found"})

@app.route('/items/', methods=['POST'])
def create_item():
    item = request.get_json()
    items.append(item)
    return jsonify(item)

@app.route('/items/', methods=['PUT'])
def update_item(item_id):
    item = request.get_json()
    for i, existing_item in enumerate(items):
        if existing_item['id'] == item_id:
            items[i] = item
            return jsonify(item)
    return jsonify({"error": "Item not found"})

@app.route('/items/', methods=['DELETE'])
def delete_item(item_id):
    for i, item in enumerate(items):
        if item['id'] == item_id:
            items.pop(i)
            return jsonify({"message": "Item deleted"})
    return jsonify({"error": "Item not found"})

if __name__ == '__main__':
    app.run(debug=True)
二、前端框架集成
2.1 与React集成
React作为前端主流框架,与Python后端对接的方式很直接:
// App.js
import React, { useState, useEffect } from 'react';
function App() {
const [items, setItems] = useState([]);
const [newItem, setNewItem] = useState({ id: '', name: '', price: '', is_offer: false });
useEffect(() => {
fetch('http://localhost:8000/items/')
.then(response => response.json())
.then(data => setItems(data));
}, []);
const handleSubmit = (e) => {
e.preventDefault();
fetch('http://localhost:8000/items/', {
method: 'POST',
headers: {
'Content-Type': 'application/json',
},
body: JSON.stringify(newItem),
})
.then(response => response.json())
.then(data => {
setItems([...items, data]);
setNewItem({ id: '', name: '', price: '', is_offer: false });
});
};
return (
Items
{items.map(item => (
-
{item.name} - ${item.price}
))}
);
}
export default App;
2.2 与Vue集成
Vue同样可以无缝对接Python后端,代码风格上更简洁一些:
Items
- {{ item.name }} - ${{ item.price }}
三、数据传输
3.1 JSON数据格式
前后端之间的数据流通,JSON是绝对的标配:
# 后端返回JSON数据
from fastapi import FastAPI
from pydantic import BaseModel

app = FastAPI()

class Item(BaseModel):
    id: int
    name: str
    price: float

@app.get("/item", response_model=Item)
def get_item():
    return {"id": 1, "name": "Item 1", "price": 10.99}
3.2 处理CORS
跨域资源共享(CORS)是前后端集成时绕不开的坎,配置起来其实很简单:
# FastAPI处理CORS
from fastapi import FastAPI
from fastapi.middleware.cors import CORSMiddleware

app = FastAPI()

# 配置CORS
app.add_middleware(
    CORSMiddleware,
    allow_origins=["*"],  # 在生产环境中应该设置具体的域名
    allow_credentials=True,
    allow_methods=["*"],
    allow_headers=["*"],
)

@app.get("/")
def read_root():
    return {"message": "Hello, World!"}
# Flask处理CORS
from flask import Flask, jsonify
from flask_cors import CORS

app = Flask(__name__)
CORS(app)  # 允许所有跨域请求

@app.route('/')
def read_root():
    return jsonify({"message": "Hello, World!"})
四、认证与授权
4.1 JWT认证
JSON Web Token(JWT)是目前最常用的认证方式之一,下面用FastAPI给出完整示例:
# FastAPI中使用JWT
from fastapi import FastAPI, Depends, HTTPException, status
from fastapi.security import OAuth2PasswordBearer, OAuth2PasswordRequestForm
from jose import JWTError, jwt
from datetime import datetime, timedelta
from pydantic import BaseModel

app = FastAPI()

# 配置
SECRET_KEY = "your-secret-key"
ALGORITHM = "HS256"
ACCESS_TOKEN_EXPIRE_MINUTES = 30

# 模拟用户数据库
fake_users_db = {
    "alice": {
        "username": "alice",
        "full_name": "Alice Smith",
        "email": "alice@example.com",
        "hashed_password": "fakehashedsecret",
        "disabled": False,
    }
}

# 工具函数
def fake_hash_password(password: str):
    return "fakehashed" + password

def verify_password(plain_password, hashed_password):
    return hashed_password == fake_hash_password(plain_password)

def get_user(db, username: str):
    if username in db:
        user_dict = db[username]
        return user_dict

def create_access_token(data: dict, expires_delta: timedelta = None):
    to_encode = data.copy()
    if expires_delta:
        expire = datetime.utcnow() + expires_delta
    else:
        expire = datetime.utcnow() + timedelta(minutes=15)
    to_encode.update({"exp": expire})
    encoded_jwt = jwt.encode(to_encode, SECRET_KEY, algorithm=ALGORITHM)
    return encoded_jwt

# 依赖
oauth2_scheme = OAuth2PasswordBearer(tokenUrl="token")

async def get_current_user(token: str = Depends(oauth2_scheme)):
    credentials_exception = HTTPException(
        status_code=status.HTTP_401_UNAUTHORIZED,
        detail="Could not validate credentials",
        headers={"WWW-Authenticate": "Bearer"},
    )
    try:
        payload = jwt.decode(token, SECRET_KEY, algorithms=[ALGORITHM])
        username: str = payload.get("sub")
        if username is None:
            raise credentials_exception
    except JWTError:
        raise credentials_exception
    user = get_user(fake_users_db, username=username)
    if user is None:
        raise credentials_exception
    return user

# 路由
@app.post("/token")
async def login(form_data: OAuth2PasswordRequestForm = Depends()):
    user = get_user(fake_users_db, form_data.username)
    if not user:
        raise HTTPException(status_code=400, detail="Incorrect username or password")
    if not verify_password(form_data.password, user["hashed_password"]):
        raise HTTPException(status_code=400, detail="Incorrect username or password")
    access_token_expires = timedelta(minutes=ACCESS_TOKEN_EXPIRE_MINUTES)
    access_token = create_access_token(
        data={"sub": user["username"]}, expires_delta=access_token_expires
    )
    return {"access_token": access_token, "token_type": "bearer"}

@app.get("/users/me")
async def read_users_me(current_user: dict = Depends(get_current_user)):
    return current_user
五、部署
5.1 部署后端
用Docker来容器化Python后端,操作起来稳定又方便:
# Dockerfile
FROM python:3.9-slim

WORKDIR /app

COPY requirements.txt .
RUN pip install --no-cache-dir -r requirements.txt

COPY . .

EXPOSE 8000

CMD ["uvicorn", "app:app", "--host", "0.0.0.0", "--port", "8000"]
5.2 部署前端
前端部署可以交给Vercel、Netlify这类平台,省心省力:
- Vercel:适合部署React、Next.js应用
- Netlify:适合部署Vue、React应用
- GitHub Pages:适合部署静态网站
5.3 完整部署
使用Docker Compose可以一键拉起前后端服务:
# docker-compose.yml
version: '3'
services:
  backend:
    build: ./backend
    ports:
      - "8000:8000"
  frontend:
    build: ./frontend
    ports:
      - "3000:3000"
    depends_on:
      - backend
六、Python与Rust的对比
同时接触Python和Rust,对比学习的效果确实不错:
6.1 前端集成对比
- Python:生态丰富,有FastAPI、Flask等框架
- Rust:有Actix-web、Rocket等框架
- 开发效率:Python开发效率高,Rust开发效率相对较低
- 性能:Rust性能优异,Python性能相对较低
6.2 学习心得
- Python的优势:开发效率高,生态丰富
- Rust的优势:性能优异,内存安全
- 相互借鉴:从Python学习快速开发,从Rust学习性能优化
七、实践项目推荐
7.1 全栈项目
- 博客系统:Python后端 + React/Vue前端
- 电商系统:Python后端 + React/Vue前端
- 社交应用:Python后端 + React/Vue前端
- 数据分析平台:Python后端 + React/Vue前端
八、学习方法和技巧
8.1 学习方法
- 循序渐进:先掌握后端API开发,再攻克前端框架
- 项目实践:通过实际项目巩固知识,比只看书强得多
- 文档阅读:官方文档是最好的老师
- 社区交流:加入社区,别人的经验往往能帮你省不少弯路
8.2 常见问题和解决方法
- CORS问题:配置CORS中间件即可
- 认证问题:使用JWT等认证方式
- 部署问题:用Docker等容器化技术解决环境差异
- 性能问题:优化API设计,合理使用缓存
九、总结
Python与前端技术的集成,确实能构建出功能强大的全栈应用。对于转码者来说,全栈开发能力的价值不言而喻。
整个过程并非一帆风顺,遇到过不少困难和挫折,但通过不断实践和学习,慢慢就掌握了这些技巧。保持学习、保持输出,日积月累,总能看到进步。
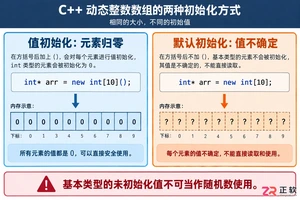
深入解析C++中动态数组的初始化机制,涵盖new操作符的不同用法、基本类型与类对象的初始化差异,以及为何在现代C++开发中应优先使用std::vector。
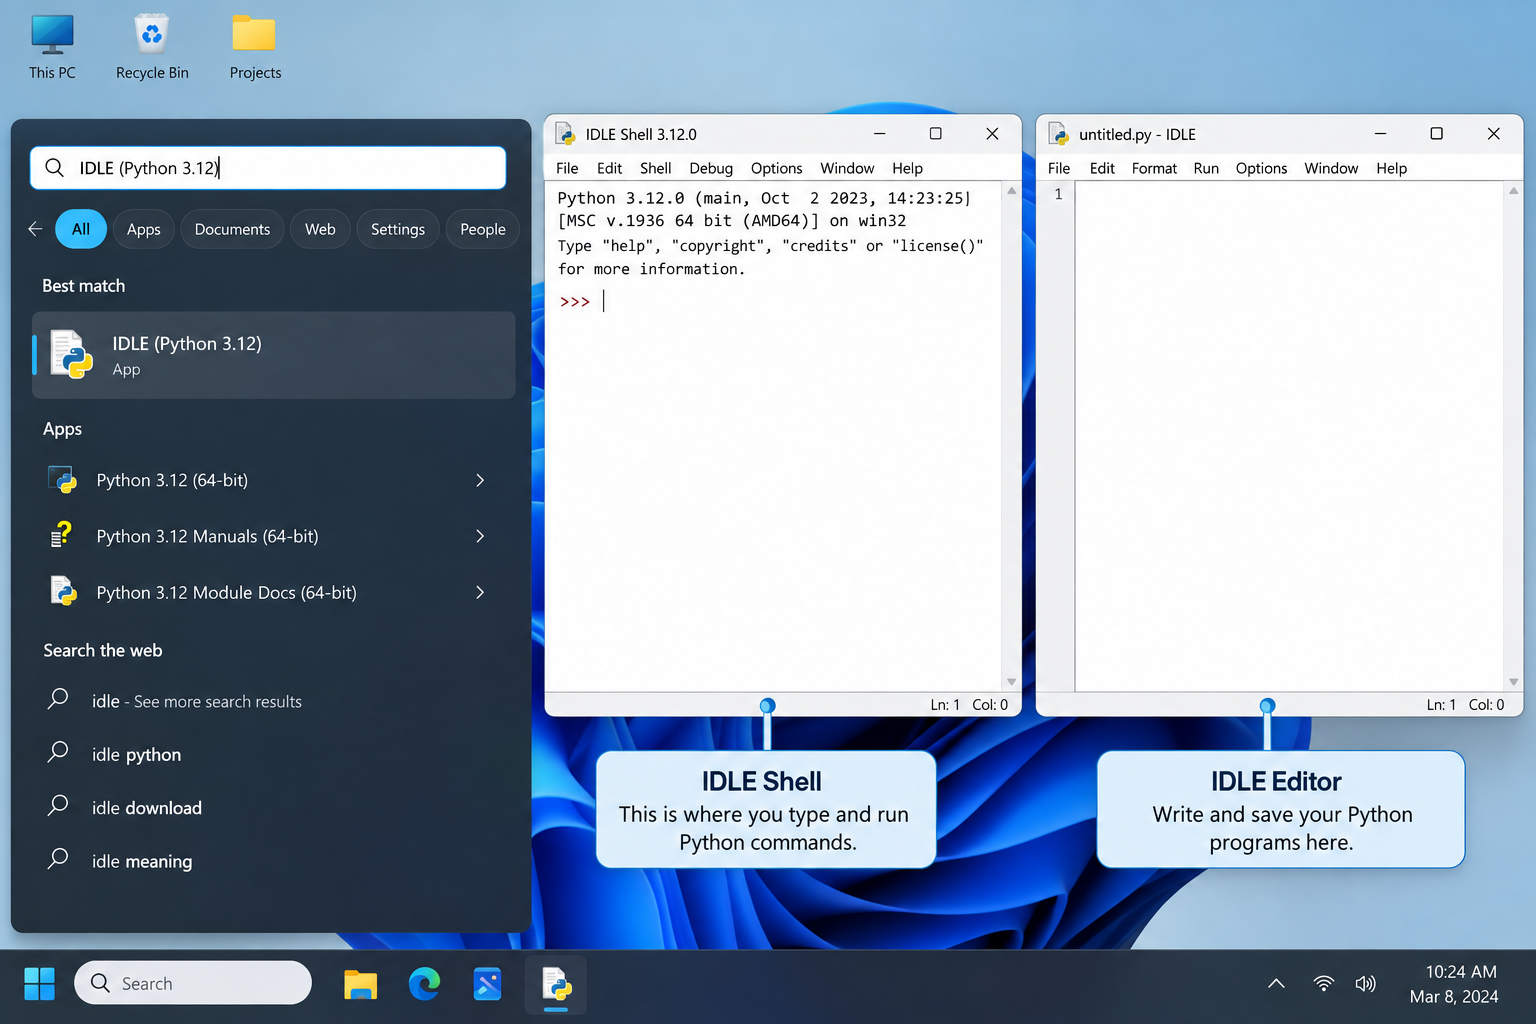
刚在Windows安装好Python却不知道如何启动?本文详细演示如何通过开始菜单找到并打开IDLE集成开发环境,以及如何在PowerShell或命令提示符中使用python和py命令启动交互式解释器、运行.py脚本文件。包含退出解释器的方法及常见启动问题排查,帮助初学者快速验证安装成功并开始编写代码。
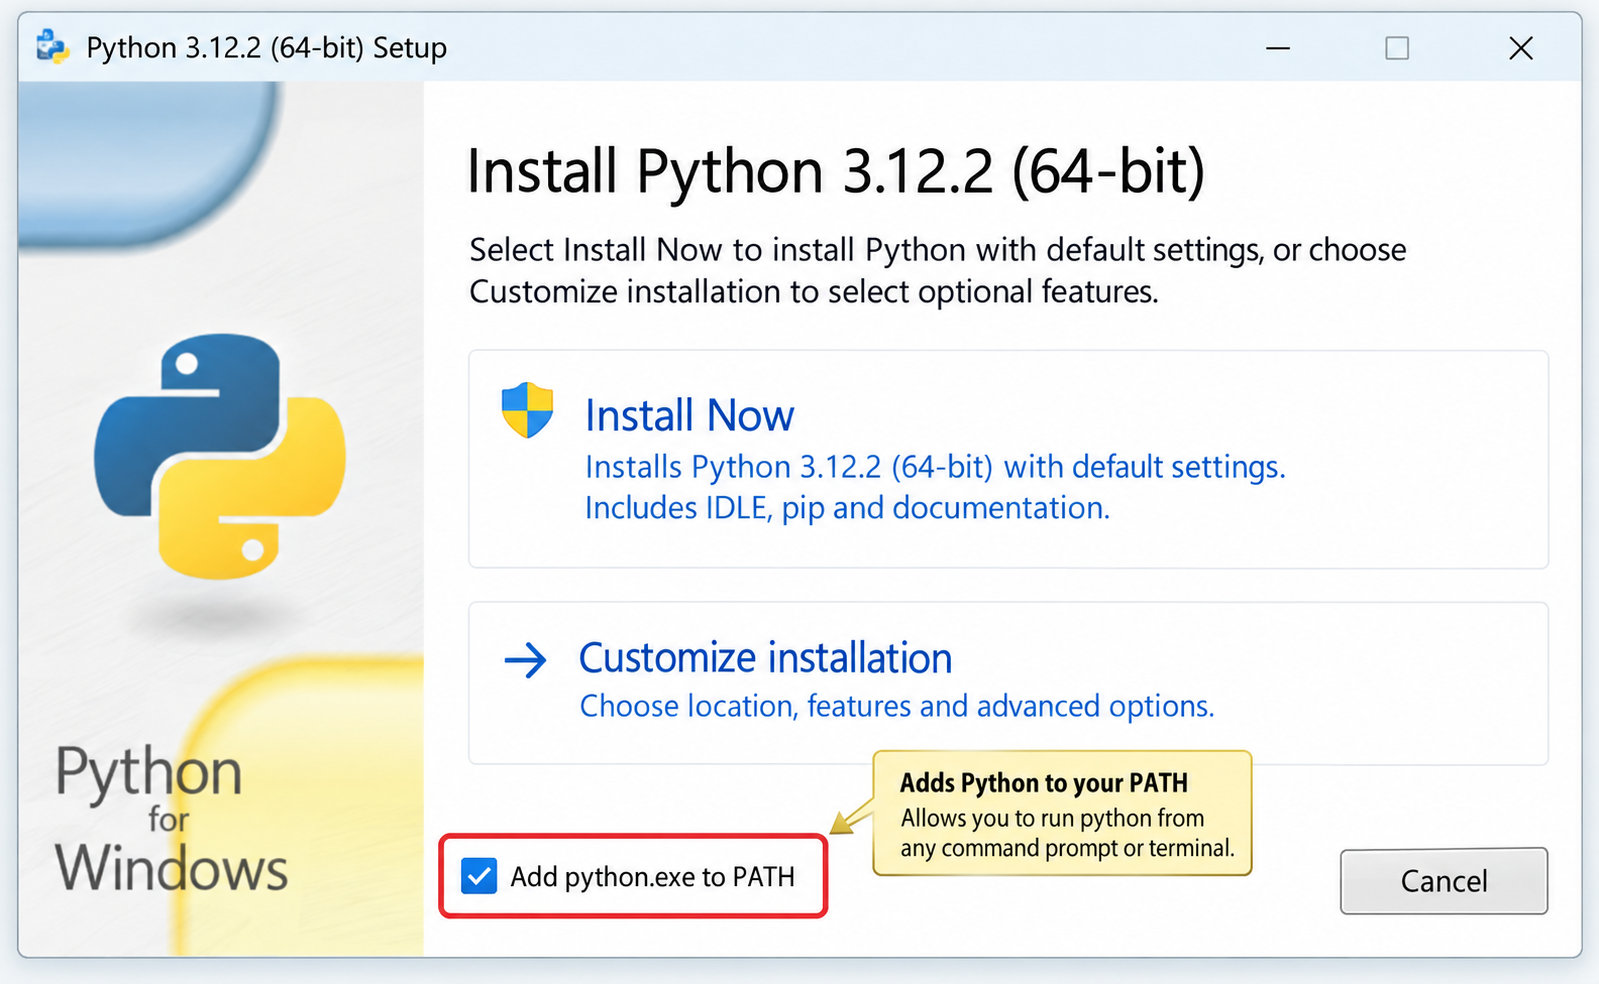
针对Windows初学者的Python安装实战指南。详细讲解如何从Python官网下载匹配架构的安装包,重点演示安装首屏勾选“Add python.exe to PATH”的关键操作,并提供使用python --version和py命令验证环境变量的具体步骤,帮助新手快速搭建开发环境并排查路径问题。

要想确认麒麟OS中Python程序的运行状态以及资源占用情况,我们可以这样做:用ps -ef | grep python来筛选进程;通过top命令,按P键排序查看实时负载;使用pgrep -f "script.py"精准获取PID;借助lsof -p PID验证文件打开状态。另外,还可以结合syst
在Debian系统上配置SSL证书通常涉及以下几个步骤:安装Web服务器:首先,你需要一个Web服务器,比如Apache或Nginx。这里以Apache为例。sudo apt updatesudo apt install apache2获取SSL证书:你可以从Let’s Encrypt免费获取SSL

要想让Python项目在统信UOS上正常运行,得先安装python3、python3-pip、python3-venv、python3-dev以及build-essential等组件。具体操作就是执行sudo apt install命令来一步到位完成安装,同时别忘了配置清华镜像源来给pip加速哦。在
在互联网上的各类网站中,无论大小,基本上都会有一个搜索框,用来给用户对内容进行搜索,小到站点搜索,大到搜索引擎搜索。从简单的来说,搜索功能确实很简单,一个简单的select语句就可以实现数据的搜索。而从复杂的来看,无论是搜索的精度还是搜索的效率,都是有很深的研究范围的。对于简单的搜索功能来说,一个s

立即在终端输入sudo shutdown -c取消倒计时关机,成功后显示“Shutdown cancelled”;若存在pmset重复任务,需再执行sudo pmset repeat cancel清除。Mac因Python脚本执行了os.system("sudo shutdown -h +10")或

之前写过一篇同步场景下用 Python 管理多个固定出口 IP 的实践(ExitPool + requests/httpx),覆盖了健康检查、故障转移和连接池复用。但在实际业务中,越来越多的场景用 asyncio 做高并发采集或批量接口调用——异步事件循环下多出口的管理方式和同步场景完全不同:单线程

写在前面:为什么静态出口 IP 不是"买了就行"不少团队在引入静态出口 IP 产品时,第一反应往往是:“地址配上去,这事就算完了。”可真到了真实业务里,静态出口 IP 真正能体现价值的地方,往往不在分配这一步,而在分配之后怎么管:地址有没有漂移,质量是否达标,某一条线路突然不可用时怎么切换,连接层又






Windows 10 是一款微软推出的经典操作系统,拥有硬件兼容性与多任务处理能力。它更偏向把系统状态查看和常用调节动作放在一起,适合需要持续观察和微调设备状态的场景。

极度公式是一款跨平台专业LaTeX公式识别编辑软件,支持OCR公式识别和多平台编辑。和使用说明,避免使用,享受完整功能与稳定支持。做扫描整理、文字提取和表格转换时,它能把识别后的处理步骤接得更顺,资料录入这类场景会省下不少时间。