

SpringBoot拦截器怎么配置?手把手教你实现自定义拦截器
SpringBoot添加拦截器 在Web开发中,拦截器几乎是绕不开的组件。但在SpringBoot项目里,该怎么配置才能让它生效?这篇文章就来拆解一下。 和普通属性不同,拦截器本身是一个类,所以不能直接在application.properties里配置,得用Ja va Config的方式搞定。Sp
SpringBoot添加拦截器
在Web开发中,拦截器几乎是绕不开的组件。但在SpringBoot项目里,该怎么配置才能让它生效?这篇文章就来拆解一下。

和普通属性不同,拦截器本身是一个类,所以不能直接在application.properties里配置,得用Ja va Config的方式搞定。SpringBoot官方文档里其实有明确说明,摘录一段:
If you want to keep Spring Boot MVC features and you want to add additional MVC configuration (interceptors, formatters, view controllers, and other features), you can add your own @Configuration class of type WebMvcConfigurer but without @EnableWebMvc. If you wish to provide custom instances of RequestMappingHandlerMapping, RequestMappingHandlerAdapter, or ExceptionHandlerExceptionResolver, you can declare a WebMvcRegistrationsAdapter instance to provide such components.
If you want to take complete control of Spring MVC, you can add your own @Configuration annotated with @EnableWebMvc.
简单翻译一下核心意思:
- 如果你希望保留SpringBoot的默认MVC特性,同时又想自定义一些配置(比如拦截器、格式化器、视图控制器、消息转换器等),那就让一个类实现
WebMvcConfigurer,并加上@Configuration注解——但千万不能加@EnableWebMvc。 - 如果想自定义
HandlerMapping、HandlerAdapter、ExceptionResolver这些底层组件,可以通过创建一个WebMvcRegistrationsAdapter实例来实现。 - 如果打算完全接管SpringMVC,不保留SpringBoot的任何默认配置,那就自己写一个配置类,加上
@Configuration和@EnableWebMvc两个注解。
清楚了文档的前提,接下来就是实操。
首先,定义一个拦截器
@Component
//继承HandlerInterceptor
public class MyInterceptor implements HandlerInterceptor {
    @Override
    public boolean preHandle(HttpServletRequest request, HttpServletResponse response, Object handler) throws Exception {
        System.out.println("preHandle method is running!");
        return true;
    }

    @Override
    public void postHandle(HttpServletRequest request, HttpServletResponse response, Object handler, ModelAndView modelAndView) throws Exception {
        System.out.println("postHandle method is running!");
    }

    @Override
    public void afterCompletion(HttpServletRequest request, HttpServletResponse response, Object handler, Exception ex) throws Exception {
        System.out.println("afterCompletion method is running!");
    }
}
这个拦截器实现了HandlerInterceptor接口,覆盖了三个方法:preHandle(请求处理之前)、postHandle(请求处理之后、视图渲染之前)、afterCompletion(整个请求完成之后)。这里只是简单打印日志,方便验证。
然后,定义配置类,注册拦截器
@Configuration
//实现`WebMvcConfigurer`,并且添加`@Configuration`注解
public class MvcConfiguration implements WebMvcConfigurer {

    //注入定义的拦截器
    @Autowired
    private HandlerInterceptor myInterceptor;

    /**
     * 重写接口中的addInterceptors方法,添加自定义拦截器
     * @param registry
     */
    @Override
    public void addInterceptors(InterceptorRegistry registry) {
/*拦截路径*/        registry.addInterceptor(myInterceptor).addPathPatterns("/**");
    }
}
关键点:配置类实现WebMvcConfigurer,重写addInterceptors方法,将拦截器注册进去,并指定拦截路径(这里用/**表示所有请求)。注意不要遗漏@Configuration注解,也一定不要加@EnableWebMvc,否则会关掉SpringBoot的自动配置。
运行看看效果
启动项目,访问任意一个接口,控制台输出:
preHandle method is running!
postHandle method is running!
afterCompletion method is running!
拦截器生效了。不过你会发现只有这三行打印,SpringMVC本身的日志信息并没有出现。原因很简单:SpringMVC的日志级别默认是debug,而SpringBoot默认只显示info及以上级别,所以需要手动调整日志配置。
在application.properties或application.yml中加一行:
# 设置org.springframework包的日志级别为debug
logging.level.org.springframework=debug
再次运行,你就会看到SpringMVC更详细的内部日志了。
总结
配置拦截器其实就两步:写一个拦截器类,再写一个配置类注册它。只要记住不加@EnableWebMvc这个关键点,就不会掉坑里。另外,日志级别调一下,调试时能省不少事。
遇到PHP递归报错时,不要盲目调大max_nesting_level。本文教你区分Xdebug限制、内存耗尽和正则递归错误,提供代码级的终止条件优化与迭代替代方案,彻底解决栈溢出问题。
本文分析PHP递归中static变量导致的状态污染及引用传递引发的共享数据修改问题。提供具体的代码复现、缓存键设计建议及调试打印技巧,帮助开发者避免隐蔽的逻辑错误。
解析PHP递归函数在树形数据处理中的性能瓶颈,提供预加载数据消除I/O、使用显式栈替代深层递归的实战方案,帮助开发者在代码可读性与执行效率间做出合理取舍。
详细讲解在Java单元测试中如何使用Mockito模拟依赖对象,包括引入依赖、创建Mock、打桩返回值、行为验证以及Mock与Spy的核心差异和常见陷阱排查。
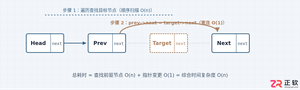
详细分析链表删除节点的时间复杂度,深入探讨单链表与双向链表在不同已知前提下的查找与删除开销,并结合完整代码与清晰图解进行对比总结。
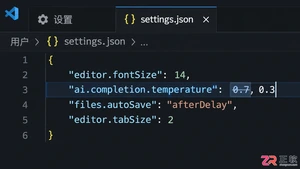
想知道如何让AI写出的代码更贴合你的习惯?本文手把手教你在VS Code中调整Codex相关模型参数,通过修改配置文件优化温度值和令牌限制,解决代码建议不准确或响应慢的问题。
通过实测展示Claude Code在终端中如何理解自然语言指令、自动修改代码文件并处理复杂编程任务,帮助开发者评估其实际辅助能力。
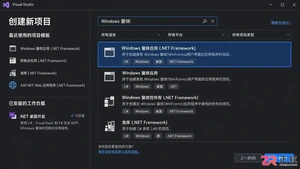
本教程详细讲解如何使用Visual Studio创建WinForms项目,通过添加按钮和标签控件并编写点击事件代码,实现一个基础的计数器功能,适合C#初学者快速上手Windows窗体应用开发。
详解Cursor编辑器中自动补全功能的开启与优化设置,涵盖Tab触发机制、上下文窗口调整及模型切换,帮助开发者解决补全延迟、干扰大等问题,提升编码流畅度。
详解Pandas中数据格式转换的核心方法,包括astype强制转换、to_numeric容错处理及日期解析技巧,解决常见类型错误并提升数据处理效率。




Photoshop 2026 是 Adobe 推出的专业图像处理与视觉设计软件,支持 Windows、macOS 和 iPad 等平台,广泛应用于摄影修图、电商设计、平面海报、数字绘画及视觉合成等创作场景。

Blender 是一款免费开源、跨平台的专业 3D 创作软件,集建模、动画、渲染、视频编辑与视觉合成等功能于一体,广泛应用于影视动画、游戏设计和建筑可视化等领域。软件支持 Cycles 物理渲染器与 Eevee 实时渲染引擎,并提供多边形建模、骨骼绑定、物理模拟等专业工具。Blender 兼容 Windows、macOS 和 Linux 系统,安装包轻巧、运行流畅,依托活跃的全球开发者社区持续更新,是从初学者到专业创作者都值得选择的正版 3D 创作工具。


Photoshop 2026 是 Adobe 推出的专业图像处理与视觉设计软件,支持 Windows、macOS 和 iPad 等平台,广泛应用于摄影修图、电商设计、平面海报、数字绘画及视觉合成等创作场景。
Blender 是一款免费开源、跨平台的专业 3D 创作软件,集建模、动画、渲染、视频编辑与视觉合成等功能于一体,广泛应用于影视动画、游戏设计和建筑可视化等领域。软件支持 Cycles 物理渲染器与 Eevee 实时渲染引擎,并提供多边形建模、骨骼绑定、物理模拟等专业工具。Blender 兼容 Windows、macOS 和 Linux 系统,安装包轻巧、运行流畅,依托活跃的全球开发者社区持续更新,是从初学者到专业创作者都值得选择的正版 3D 创作工具。