

5.2.3 Fragment实例精讲——底部导航栏的实现(方法3)
本节引言 前面已经讲过两种实现底部导航栏的方案,它们应付常规场景没什么问题。但一旦需求变成新浪微博那种样式——比如底部导航栏的 item 上要挂一个红色小点,再叠加消息数量——这两种做法就明显不太够用了。那这类效果,成熟的 App 通常是怎么处理的?可以先打开手机里的开发者选项,勾选显示布局边界,再
本节引言
前面已经讲过两种实现底部导航栏的方案,它们应付常规场景没什么问题。但一旦需求变成新浪微博那种样式——比如底部导航栏的 item 上要挂一个红色小点,再叠加消息数量——这两种做法就明显不太够用了。那这类效果,成熟的 App 通常是怎么处理的?可以先打开手机里的开发者选项,勾选显示布局边界,再去看一眼参考的那个 App,这时候就会发现,它的底部导航栏大致是这样的:
看完上面这张图,其实不难判断:这种底部导航栏并不是用简单的 TextView 或者 RadioGroup 直接拼出来的。更可能的布局思路是,外层套一层 LinearLayout,中间放一个 RelativeLayout,RelativeLayout 里有一个 TextView,然后在这个 TextView 的右上角,再叠一个带红色圆形背景的 TextView,或者干脆就是一个红色小圆点。整体大致就是这么个结构。通常情况下,这些小红点默认应该是不可见的;只有在收到消息推送、对应分类里确实有新内容时,它才会显示出来,同时把相应的消息数量展示出来。接下来,就按这个思路把这种底部导航栏的效果做出来。另外,为了演示更直接一些,这里先不展开 Fragment 的切换效果,顺手也把 Fragment 获取 Activity 中组件这个知识点再复习一遍。
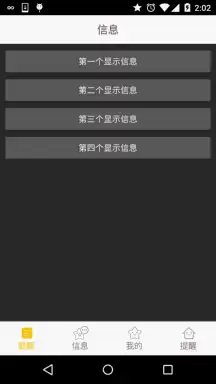
1.实现效果图:
为了方便理解,这里通过点击按钮的形式,模拟收到推送信息,然后显示红色点!
运行效果图:
2.实现流程:
好的,接下来我们就来实现上面这个效果~
Step 1:相关资源文件的准备:
和前面一样,准备好drawable系列的资源:
文字资源:tab_menu_text.xml
图标资源:tab_menu_better.xml
照着把其他三个也撸出来~!
Step 2:编写activity的布局代码:
因为四个选项的TextView以及右上角的红点数字属性都差不多,如下:
我们将他们抽取出来,写到style.xml里:
然后开始编写我们的activity.xml布局:
Step 3:编写Fragment界面布局以及类
Fragment布局由四个普通按钮构成:
fg_my.xml:
接着是自定义的Fragment类,这里的话我们通过getActivity.findViewById()来获得Activity 中的小红点,这里仅仅是简单的控制显示而已! MyFragment.ja va:
public class MyFragment extends Fragment implements View.OnClickListener{
private Context mContext;
    private Button btn_one;
    private Button btn_two;
    private Button btn_three;
    private Button btn_four;
public MyFragment() {
}
@Override
    public View onCreateView(LayoutInflater inflater, ViewGroup container, Bundle sa vedInstanceState) {
        View view = inflater.inflate(R.layout.fg_my,container,false);
        //UI Object
        btn_one = (Button) view.findViewById(R.id.btn_one);
        btn_two = (Button) view.findViewById(R.id.btn_two);
        btn_three = (Button) view.findViewById(R.id.btn_three);
        btn_four = (Button) view.findViewById(R.id.btn_four);
        //Bind Event
        btn_one.setOnClickListener(this);
        btn_two.setOnClickListener(this);
        btn_three.setOnClickListener(this);
        btn_four.setOnClickListener(this);
        return view;
    }
@Override
    public void onClick(View v) {
        switch (v.getId()){
            case R.id.btn_one:
                TextView tab_menu_channel_num = (TextView) getActivity ().findViewById(R.id.tab_menu_channel_num);
                tab_menu_channel_num.setText("11");
                tab_menu_channel_num.setVisibility(View.VISIBLE);
                break;
            case R.id.btn_two:
                TextView tab_menu_message_num = (TextView) getActivity ().findViewById(R.id.tab_menu_message_num);
                tab_menu_message_num.setText("20");
                tab_menu_message_num.setVisibility(View.VISIBLE);
                break;
            case R.id.btn_three:
                TextView tab_menu_better_num = (TextView) getActivity ().findViewById(R.id.tab_menu_better_num);
                tab_menu_better_num.setText("99+");
                tab_menu_better_num.setVisibility(View.VISIBLE);
                break;
            case R.id.btn_four:
                ImageView tab_menu_setting_partner = (ImageView) getActivity ().findViewById(R.id.tab_menu_setting_partner);
                tab_menu_setting_partner.setVisibility(View.VISIBLE);
                break;
        }
    }
}
Step 4:编写MainActivity
我们在这里完成主要的逻辑实现,有些部分和前面TextView实现底部导航栏的效果类似, 就不具体讲解了,代码如下:
MainActivity.ja va:
/**
 * Created by Coder-pig on 2015/8/30 0030.
 */
public class MainActivity extends AppCompatActivity implements View.OnClickListener {
//Activity UI Object
    private LinearLayout ly_tab_menu_channel;
    private TextView tab_menu_channel;
    private TextView tab_menu_channel_num;
    private LinearLayout ly_tab_menu_message;
    private TextView tab_menu_message;
    private TextView tab_menu_message_num;
    private LinearLayout ly_tab_menu_better;
    private TextView tab_menu_better;
    private TextView tab_menu_better_num;
    private LinearLayout ly_tab_menu_setting;
    private TextView tab_menu_setting;
    private ImageView tab_menu_setting_partner;
    private FragmentManager fManager;
    private FragmentTransaction fTransaction;
    private MyFragment fg1;
@Override
    protected void onCreate(Bundle sa vedInstanceState) {
        super.onCreate(sa vedInstanceState);
        setContentView(R.layout.activity_main);
        bindViews();
        ly_tab_menu_channel.performClick();
        fg1 = new MyFragment();
        fManager = getFragmentManager();
        fTransaction = fManager.beginTransaction();
        fTransaction.add(R.id.ly_content, fg1).commit();
}
private void bindViews() {
        ly_tab_menu_channel = (LinearLayout) findViewById(R.id.ly_tab_menu_channel);
        tab_menu_channel = (TextView) findViewById(R.id.tab_menu_channel);
        tab_menu_channel_num = (TextView) findViewById(R.id.tab_menu_channel_num);
        ly_tab_menu_message = (LinearLayout) findViewById(R.id.ly_tab_menu_message);
        tab_menu_message = (TextView) findViewById(R.id.tab_menu_message);
        tab_menu_message_num = (TextView) findViewById(R.id.tab_menu_message_num);
        ly_tab_menu_better = (LinearLayout) findViewById(R.id.ly_tab_menu_better);
        tab_menu_better = (TextView) findViewById(R.id.tab_menu_better);
        tab_menu_better_num = (TextView) findViewById(R.id.tab_menu_better_num);
        ly_tab_menu_setting = (LinearLayout) findViewById(R.id.ly_tab_menu_setting);
        tab_menu_setting = (TextView) findViewById(R.id.tab_menu_setting);
        tab_menu_setting_partner = (ImageView) findViewById(R.id.tab_menu_setting_partner);
ly_tab_menu_channel.setOnClickListener(this);
        ly_tab_menu_message.setOnClickListener(this);
        ly_tab_menu_better.setOnClickListener(this);
        ly_tab_menu_setting.setOnClickListener(this);
}
@Override
    public void onClick(View v) {
        switch (v.getId()) {
            case R.id.ly_tab_menu_channel:
                setSelected();
                tab_menu_channel.setSelected(true);
                tab_menu_channel_num.setVisibility(View.INVISIBLE);
                break;
            case R.id.ly_tab_menu_message:
                setSelected();
                tab_menu_message.setSelected(true);
                tab_menu_message_num.setVisibility(View.INVISIBLE);
                break;
            case R.id.ly_tab_menu_better:
                setSelected();
                tab_menu_better.setSelected(true);
                tab_menu_better_num.setVisibility(View.INVISIBLE);
                break;
            case R.id.ly_tab_menu_setting:
                setSelected();
                tab_menu_setting.setSelected(true);
                tab_menu_setting_partner.setVisibility(View.INVISIBLE);
                break;
        }
    }
//重置所有文本的选中状态
    private void setSelected() {
        tab_menu_channel.setSelected(false);
        tab_menu_message.setSelected(false);
        tab_menu_better.setSelected(false);
        tab_menu_setting.setSelected(false);
    }
}
好的,至此,就大功告成了~
3.代码下载:
FragmentDemo3.zip:FragmentDemo3.zip下载
4.本节小结:
好的,本节相比前面两节稍微复杂了一点,不过还是比较容易弄懂的! 另外,关于实现普通底部导航栏的实现例子就写这么多吧,下一节开始我们来写下 在此基础上的根据手势操作切换页面的例子,嗯,就说这么多,谢谢~
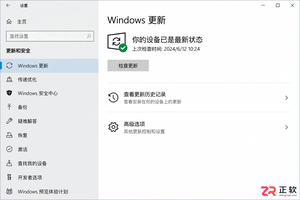
Windows 10更新弹窗频繁影响工作?无需禁用服务,只需调整活动时间、安排重启和优化通知设置,即可有效减少干扰并保持系统安全。
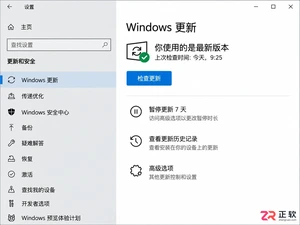
想知道Win10自动更新是否被关闭?不要只看任务栏。本文教你通过“设置-更新和安全”、“高级选项”及“services.msc服务”三处位置,准确判断系统更新状态是暂停、运行还是受组织策略管理。
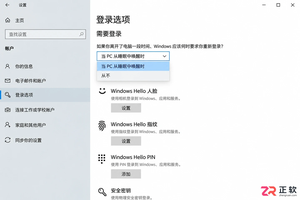
想知道Win10能否只取消休眠唤醒密码而保留开机密码?本教程详解如何通过系统设置和netplwiz工具,分别控制开机登录与睡眠唤醒后的验证要求,实现灵活的安全策略。
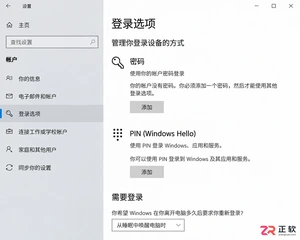
Win10取消开机密码后想恢复?本教程详解如何通过netplwiz恢复开机输入框、重新设置空密码账户、配置PIN码及调整睡眠唤醒登录策略,步骤清晰,即改即验。
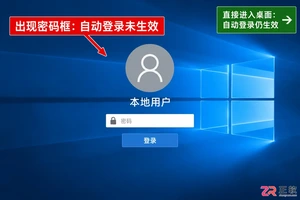
想恢复Win10开机密码保护?本文详解如何通过注册表修改AutoAdminLogon值取消自动登录,配合netplwiz工具复核,避免凭据泄露风险,适合家用及办公场景参考。
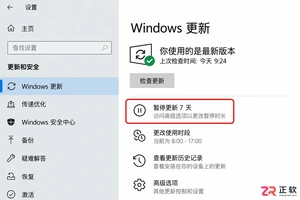
Win10一开机就占用网速下载更新?本文教你通过设置暂停更新、调整活动时间及标记计费网络来缓解干扰。区分家庭版与专业版操作差异,避免强制停止服务带来的系统风险,让更新在合适的时间进行。
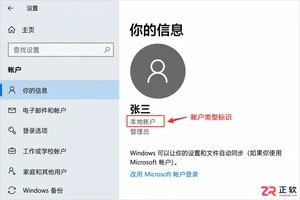
Win10取消开机密码时提示验证失败?可能是因为输错了Microsoft账户密码或误用了PIN码。本文详解如何确认账户类型、正确输入凭据及检查自动登录设置,帮你解决验证报错问题。

Windows 10忘记开机密码如何处理?本文根据账户类型(Microsoft账户/本地账户/PIN)提供官方支持的恢复步骤,包括在线重置、安全问题回答及管理员重置方法,避免数据丢失风险。
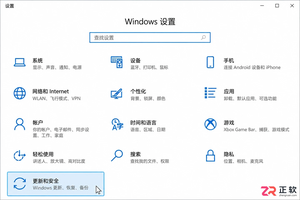
Windows 10更新提示频繁弹窗怎么办?本文详解如何通过Windows更新高级选项、系统通知设置及暂停更新功能,精准关闭不必要的重启提醒和横幅通知,同时确保系统安全更新不受影响。适用于家庭及个人用户,区分个人设置与企业策略管理。
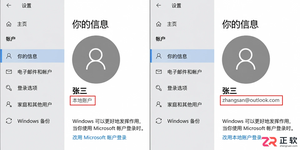
Win10家庭版如何取消开机密码?本文详解本地账户清空密码步骤及Microsoft账户自动登录设置方法,分析安全风险与例外情况,帮助用户在便捷与安全间做出合理选择。




Photoshop 2026 是 Adobe 推出的专业图像处理与视觉设计软件,支持 Windows、macOS 和 iPad 等平台,广泛应用于摄影修图、电商设计、平面海报、数字绘画及视觉合成等创作场景。

Blender 是一款免费开源、跨平台的专业 3D 创作软件,集建模、动画、渲染、视频编辑与视觉合成等功能于一体,广泛应用于影视动画、游戏设计和建筑可视化等领域。软件支持 Cycles 物理渲染器与 Eevee 实时渲染引擎,并提供多边形建模、骨骼绑定、物理模拟等专业工具。Blender 兼容 Windows、macOS 和 Linux 系统,安装包轻巧、运行流畅,依托活跃的全球开发者社区持续更新,是从初学者到专业创作者都值得选择的正版 3D 创作工具。


Photoshop 2026 是 Adobe 推出的专业图像处理与视觉设计软件,支持 Windows、macOS 和 iPad 等平台,广泛应用于摄影修图、电商设计、平面海报、数字绘画及视觉合成等创作场景。
Blender 是一款免费开源、跨平台的专业 3D 创作软件,集建模、动画、渲染、视频编辑与视觉合成等功能于一体,广泛应用于影视动画、游戏设计和建筑可视化等领域。软件支持 Cycles 物理渲染器与 Eevee 实时渲染引擎,并提供多边形建模、骨骼绑定、物理模拟等专业工具。Blender 兼容 Windows、macOS 和 Linux 系统,安装包轻巧、运行流畅,依托活跃的全球开发者社区持续更新,是从初学者到专业创作者都值得选择的正版 3D 创作工具。