

官方总结鸿蒙应用开发常见问题与实现方法典型案例
1自定义Dialog的布局1.1 问题描述如何实现自定义的Dialog?1.2 实现方法添加自定义Dialog代码CommonDialog commonDialog = new CommonDialog(this);Component component = LayoutScatter.getIns
1.1 问题描述
如何实现自定义的Dialog?
1.2 实现方法
添加自定义Dialog代码
CommonDialog commonDialog = new   CommonDialog(this);

Component component =   LayoutScatter.getInstance(getContext())

                   .parse(ResourceTable.Layout_dialog_custom_layout,   null, true);

commonDialog.setSize(800, 500);

commonDialog.setContentCustomComponent(component);

commonDialog.show();
自定义Dialog的布局文件
ohos:height="match_content"
ohos:padding="10vp"
ohos:background_element="@graphic:grey"
ohos:orientation="vertical">
ohos:height="match_content"
ohos:text="Dialog标题"
ohos:text_color="$color:Black"
ohos:text_style="bold"
ohos:text_size="40fp"/>
ohos:height="match_parent"
ohos:text="自定义Dialog内容"
ohos:text_color="$color:Black"
ohos:text_style="bold"
ohos:weight="1"
ohos:text_alignment="vertical_center"
ohos:top_margin="30vp"
ohos:bottom_margin="30vp"
ohos:left_margin="10vp"
ohos:right_margin="10vp"
ohos:text_size="30fp"/>
ohos:width="match_parent"
ohos:orientation="horizontal">
ohos:text="取消"
ohos:text_size="30fp"
ohos:padding="10vp"
ohos:text_color="$color:White"
ohos:weight="1"
ohos:margin="10vp"
ohos:background_element="$graphic:yellow"
ohos:height="match_content"/>
ohos:text="确定"
ohos:text_size="30fp"
ohos:weight="1"
ohos:padding="10vp"
ohos:text_color="$color:White"
ohos:margin="10vp"
ohos:background_element="$graphic:green"
ohos:height="match_content"/>
1.3 实际效果
2.1 问题描述
在xml布局中,若设置控件的ohos:background_element="$color:yellow",是无法生效的。目前,背景颜色仅支持以$graphic方式进行设置,而不支持以$color方式设置。
2.2 实现方法
方式1:xml中设置控件背景颜色使用$graphic
ohos:text="控件按钮"
ohos:text_size="30fp"
ohos:padding="10vp"
ohos:text_color="$color:White"
ohos:background_element="$graphic:yellow"
ohos:height="match_content"/>资源文件graphic中yellow.xml代码如下:
方式2:纯代码设置控件颜色
DirectionalLayout.LayoutConfig   config = new   DirectionalLayout.LayoutConfig(DirectionalLayout.LayoutConfig.MATCH_CONTENT,   DirectionalLayout.LayoutConfig.MATCH_CONTENT);

config.setMargins(30, 10, 10, 10);
ShapeElement element = new   ShapeElement();
element.setRgbColor(new RgbColor(255,   111, 0));
Text text = new Text(this);
text.setText("xml添加背景");
text.setTextColor(new Color(0xFFFFFFFF));
text.setTextSize(40);
text.setPadding(30, 20, 30, 20);
text.setTextAlignment(TextAlignment.CENTER);
text.setBackground(element);
text.setLayoutConfig(config);
2.3 实际效果
3.1 问题描述
ScrollView嵌套DirectionalLayout如何进行滚动?
3.2 实现方法
- 使用xml布局,需要将ScrollView的高度设置成“match_parent”,ScrollView子布局的高度设置成“match_content”
ohos:width="match_parent"
ohos:height="match_parent"
ohos:orientation="vertical">
ohos:height="match_content"
ohos:orientation="vertical">
...
- 使用代码添加,则需要给ScrollView和子布局设置LayoutConfig
ComponentContainer.LayoutConfig   scrollConfig = new   ComponentContainer.LayoutConfig(DirectionalLayout.LayoutConfig.MATCH_PARENT,   DirectionalLayout.LayoutConfig.MATCH_PARENT);

scrollView.setLayoutConfig(scrollConfig);

DirectionalLayout.LayoutConfig config =   new   DirectionalLayout.LayoutConfig(DirectionalLayout.LayoutConfig.MATCH_PARENT,   DirectionalLayout.LayoutConfig.MATCH_CONTENT);

myLayout.setLayoutConfig(config);

...

scrollView.addComponent(myLayout);

super.setUIContent(scrollView);
3.3 实际效果
4.1 问题描述
如何实现加载和显示网络图片?
4.2 实现方法
- 在config.json中添加网络权限
{
    "module": {
      "reqPermissions": [
        {
          "name": "ohos.permission.INTERNET"
        }
      ]
  }
}- 获取并设置网络图片
String   urlImage = "https://www.harmonyos.com/resource/image/community/20201009-164134eSpace.jpg";

HttpURLConnection   connection = null;

try {
         URL url = new URL(urlImage);
         URLConnection urlConnection =   url.openConnection();
         if (urlConnection instanceof   HttpURLConnection) {
                   connection =   (HttpURLConnection) urlConnection;
         }
         if (connection != null) {
                   connection.connect();
                   // 之后可进行url的其他操作
                   // 得到服务器返回过来的流对象
                   InputStream inputStream =   urlConnection.getInputStream();
                   ImageSource imageSource = ImageSource.create(inputStream,   new ImageSource.SourceOptions());
                   ImageSource.DecodingOptions   decodingOptions = new ImageSource.DecodingOptions();
                   decodingOptions.desiredPixelFormat   = PixelFormat.ARGB_8888;
                   // 普通解码叠加旋转、缩放、裁剪
                   PixelMap pixelMap = imageSource.createPixelmap(decodingOptions);
                   // 普通解码
                   getUITaskDispatcher().syncDispatch(()   -> {
                            Image image = new   Image(HttpImageSlice.this);
                            DirectionalLayout.LayoutConfig   config = new DirectionalLayout.LayoutConfig(DirectionalLayout.LayoutConfig.MATCH_CONTENT,   DirectionalLayout.LayoutConfig.MATCH_CONTENT);
                       config.setMargins(10, 10,   10, 10);
                            image.setLayoutConfig(config);
                            image.setPixelMap(pixelMap);
                            myLayout.addComponent(image);
                            pixelMap.release();
                   });
         }

}   catch (Exception e) {
         e.printStackTrace();
}
4.3 实际效果
5.1 问题描述
ListContainer列表组件如何使用?
5.2 实现方法
在xml文件中声明组件
ohos:width="match_parent"
ohos:height="match_parent"
ohos:orientation="vertical">
ohos:orientation="vertical"
ohos:width="match_parent"
ohos:height="match_parent"/>
获取 ListContainer 组件,并设置itemProvider
private void initView() {
mListContainer = (ListContainer) findComponentById(ResourceTable.Id_list_container);
ListItemProvider listItemProvider = new ListItemProvider();
mListContainer.setItemProvider(listItemProvider);
}
自定义 ListItemProvider 继承 RecycleItemProvider
class ListItemProvider extends RecycleItemProvider {
    @Override
    public int getCount() {
        return data.size();
    }
    @Override
    public long getItemId(int i) {
        return 0;
    }
    @Override
    public Component getComponent(int position, Component convertView, ComponentContainer componentContainer) {
        Component component = LayoutScatter.getInstance(getContext())
                .parse(ResourceTable.Layout_layout_container_item, null, false);
        if (!(component instanceof ComponentContainer)) {
            return null;
        }
        ComponentContainer rootLayout = (ComponentContainer) component;
        Text rightText = (Text) rootLayout.findComponentById(ResourceTable.Id_content);
        rightText.setText(data.get(position));
        return component;
    }
}
5.3 实际效果
6.1 问题描述
如何读取应用的资源文件?
6.2 实现方法
- 对于图片文件,建议放到base/media目录下,Image组件可以直接设置,方法如下。
Image image = (Image) findComponentById(ResourceTable.Id_component_image);
image.setPixelMap(ResourceTable.Media_huawei);- 对于rawfile文件的读写,请参考下面的方法:
ohos.global.resource.ResourceManager resourceManager = getApplicationContext().getResourceManager();
ohos.global.resource.RawFileEntry rawFileEntry = resourceManager.getRawFileEntry("resources/rawfile/test.png");
RawFileDescriptor rawFileDescriptor = rawFileEntry.openRawFileDescriptor();
// 或者
Resource resource = rawFileEntry.openRawFile();
6.3 实际效果
7.1 问题描述
使用JS开发时,如何获取位置信息?
7.2 实现方法
- 导入获取位置模块,并调用getLocation方法获取位置信息
import geolocation from '@system.geolocation';
export default {
    data: {
        longitude: 0.0,
        latitude: 0.0
    },
    onInit() {
        this.getLocation();
    },
    getLocation() {
        var temp = this;
        geolocation.getLocation({
            success: function(data) {
                console.info("get location success, longitude: " + data.longitude +", latitude: " + data.latitude);
                temp.longitude = data.longitude
                temp.latitude = data.latitude;
            },
            fail: function(data, code) {
                console.error("get location failed, code: " + code + ",  data: " + data);
            },
            complete: function() {
                console.info("get location complete");
            }
        });
    }
}- 在config.json中增加获取位置信息的权限
"reqPermissions": [
  {
    "name": "ohos.permission.LOCATION"
  }
],
7.3 实际效果
8.1 问题描述
开发一个应用支持左右滑动的操作,但是在模拟器中右滑时,默认跳转到系统页面,并退出应用,如何禁用系统右滑?
8.2 实现方法
覆盖MainAbility中的onTouchEvent方法,实现如下
@Override
protected boolean onTouchEvent(TouchEvent event) {
    super.onTouchEvent(event);
    return true;
}
8.3 实际效果
9 Text控件中文字换行9.1 问题描述
Text控件中文字目前不支持n换行,如何进行换行?
9.2 实现方法
可以使用系统自动换行,保持两行文字长度一致,实现如下
ohos:height="match_parent"
ohos:orientation="vertical">
ohos:width="150vp"
ohos:height="match_content"
ohos:multiple_lines="true"
ohos:max_text_lines="2"
ohos:auto_font_size="true"
ohos:text="目前车辆尊享服务已过期, 车主续费后才可继续使用"/>
9.3 实际效果
10.1 问题描述
定义了一个公共的XML布局文件,如何在其他XML布局文件中引用这个公共的XML布局文件?
10.2 实现方法
可以通过include标签引用其他的XML布局文件,示例如下:
ohos:width="match_parent"
ohos:height="match_content"/>
10.3 实际效果
NA
11 自定义Swtich控件的颜色11.1 问题描述
如何自定义Swtich控件的开关两个状态下的按钮颜色?
11.2 实现方法
需在资源文件graphic文件下,分别创建bg_element.xml和fg_element.xml,其中bg_element.xml文件的具体内容如下
ohos:shape="rectangle">
fg_element.xml文件内容如下
ohos:shape="oval">
代码实现自定义颜色:
private void setupSwitch() {

    mSwitch = (Switch) findComponentById(ResourceTable.Id_switch_custom);

    Element elementBackground = ElementScatter.getInstance(this).parse(ResourceTable.Graphic_bg_element);

    mSwitch.setTrackElement(elementBackground);

    Element elementThumb = ElementScatter.getInstance(this).parse(ResourceTable.Graphic_fg_element);

    mSwitch.setThumbElement(elementThumb);

    mSwitch.setClickedListener(new Component.ClickedListener() {

        @Override

        public void onClick(Component component) {

            Log.i("switch: " + mSwitch.isChecked());

        }

    });

}
11.3 实际效果
12.1 问题描述
如何播放本地视频文件和网络视频?
12.2 实现方法
创建布局文件video_player_layout.xml,内容如下
ohos:width="match_parent"
ohos:height="match_parent"
ohos:orientation="vertical">
定义下面的变量,内容如下:
private static Player mPlayer;
private SurfaceProvider mSurfaceProvider;
private DependentLayout mLayout;
实现SurfaceOps.Callback接口,代码如下:
class VideoSurfaceCallback implements SurfaceOps.Callback {
    @Override
    public void surfaceCreated(SurfaceOps surfaceOps) {
        Log.i("surfaceCreated() called.");
        if (mSurfaceProvider.getSurfaceOps().isPresent()) {
            Surface surface = mSurfaceProvider.getSurfaceOps().get().getSurface();
            playUrl(surface);
        }
    }
    @Override
    public void surfaceChanged(SurfaceOps surfaceOps, int i, int i1, int i2) {
        Log.i("surfaceChanged() called.");
    }
    @Override
    public void surfaceDestroyed(SurfaceOps surfaceOps) {
        Log.i("surfaceDestroyed() called.");
    }
}
实现Player.IplayerCallback接口,代码如下:
private class VideoPlayerCallback implements Player.IPlayerCallback {
    @Override
    public void onPrepared() {
        Log.i("onPrepared");
    }
    @Override
    public void onMessage(int i, int i1) {
        Log.i("onMessage");
    }
    @Override
    public void onError(int i, int i1) {
        Log.i("onError: i=" + i + ", i1=" + i1);
    }
    @Override
    public void onResolutionChanged(int i, int i1) {
        Log.i("onResolutionChanged");
    }
    @Override
    public void onPlayBackComplete() {
        Log.i("onPlayBackComplete");
        if (mPlayer != null) {
            mPlayer.stop();
            mPlayer = null;
        }
    }
    @Override
    public void onRewindToComplete() {
        Log.i("onRewindToComplete");
    }
    @Override
    public void onBufferingChange(int i) {
        Log.i("onBufferingChange");
    }
    @Override
    public void onNewTimedMetaData(Player.MediaTimedMetaData mediaTimedMetaData) {
        Log.i("onNewTimedMetaData");
    }
    @Override
    public void onMediaTimeIncontinuity(Player.MediaTimeInfo mediaTimeInfo) {
        Log.i("onMediaTimeIncontinuity");
    }
}
实现播放本地文件的方法,其中test.mp4文件放到资源文件目录下,内容如下:
private void playLocalFile(Surface surface) {
    try {
        RawFileDescriptor filDescriptor = getResourceManager().getRawFileEntry("resources/rawfile/test.mp4").openRawFileDescriptor();
        Source source = new Source(filDescriptor.getFileDescriptor(),filDescriptor.getStartPosition(),filDescriptor.getFileSize());
        mPlayer.setSource(source);
        mPlayer.setVideoSurface(surface);
        mPlayer.setPlayerCallback(new VideoPlayerCallback());
        mPlayer.prepare();
        mSurfaceProvider.setTop(0);
        mPlayer.play();
    } catch (Exception e) {
        Log.e("playUrl Exception:" + e.getMessage());
    }
}
实现播放网络URL的方法,其中video url为视频资源URL,内容如下:
private void playUrl(Surface surface) {

    try {
        Source source = new Source("video url");
        mPlayer.setSource(source);
        mPlayer.setVideoSurface(surface);
        mPlayer.setPlayerCallback(new VideoPlayerCallback());
        mPlayer.prepare();
        mSurfaceProvider.setTop(0);
        mPlayer.play();
    } catch (Exception e) {
        Log.e("playUrl Exception:" + e.getMessage());
    }
}
播放网络视频,需要申请网络使用权限,在config.json中增加如下内容:
"reqPermissions": [
      {
        "name": "ohos.permission.INTERNET"
      },
]
12.3 实际效果

Windows 11 家庭版和专业版在安装步骤上并无本质差异,主要区别在于产品密钥激活和功能解锁。本教程指导你如何检查硬件兼容性、使用官方媒体创建工具制作安装盘,以及在安装过程中正确选择版本。同时解析安装后如何验证激活状态,以及从家庭版升级到专业版的正规路径,确保系统稳定且合规。
除了开始菜单的变化,Windows 11在TPM 2.0安全要求、窗口贴靠布局、驱动兼容性以及系统更新策略上与Windows 10有显著不同。本文详解两者实质差异,助你判断是否值得升级。
详解Windows 10家庭版和专业版在关闭或暂停自动更新时的操作区别。涵盖通用的暂停更新、活动时间设置,以及专业版独有的组策略管理入口,帮助不同版本用户合理控制更新节奏,避免系统安全风险。
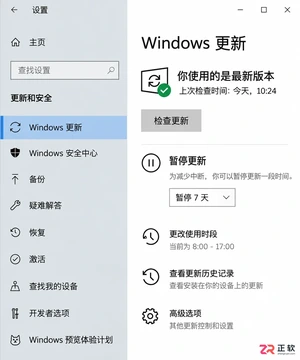
想知道Win10暂停更新最长能设多久?官方支持最长暂停35天。本文图文演示如何在设置中开启暂停、确认生效日期,以及到期后如何恢复更新或调整活动时间以避免打扰。
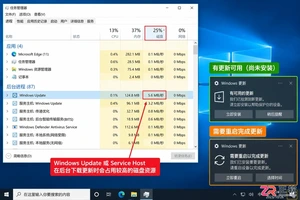
本教程介绍如何在Windows 10中通过暂停更新、设置活动时间及安排重启时间来减少更新弹窗提醒。包含通知隐藏技巧及更新失败排查步骤,帮助你在保持系统安全的同时减少工作打扰。
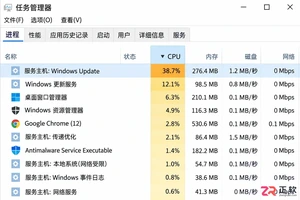
Windows 10 更新时 CPU 占用过高怎么办?本教程演示如何通过任务管理器确认更新进程,使用“暂停更新”功能临时停止后台活动,并设置“活动时间”防止自动重启干扰工作。提供安全的故障排查步骤,避免直接禁用系统服务带来的风险。
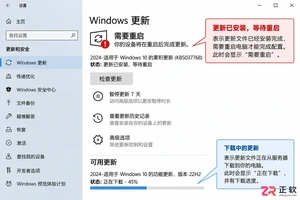
Win10玩游戏时突然弹出更新重启提示?不要强制关机。本文教你如何通过设置“活动时间”避免自动重启,利用“安排重启”规划空闲时间,以及合理使用“暂停更新”功能。区分不同状态下的应对策略,既保护游戏进度又维持系统安全。
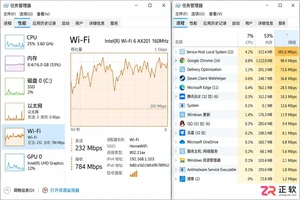
Win10自动更新抢占带宽导致游戏卡顿或网页打不开?本教程教你通过任务管理器确认更新进程,利用暂停更新、按流量计费连接和传递优化带宽限制,精准控制Windows Update下载速度,解决网络拥堵问题。
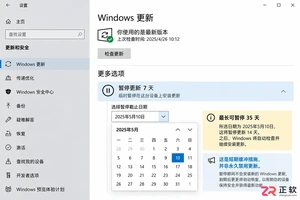
Win10家庭版用户常受强制更新困扰。本文详解如何利用系统自带的暂停更新、活动时间和安排重启功能,在不破坏系统稳定性的前提下减少更新打扰,并分析注册表修改的风险及系统支持现状。
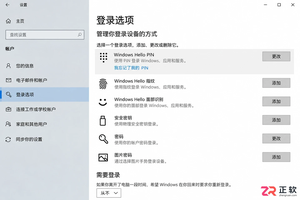
Windows 10更新后开机突然要求输入密码?本文解析自动登录失效的真实原因,提供通过netplwiz重新保存凭据、关闭Windows Hello干扰及排查账户策略的完整步骤,助你恢复免密进入桌面。




Photoshop 2026 是 Adobe 推出的专业图像处理与视觉设计软件,支持 Windows、macOS 和 iPad 等平台,广泛应用于摄影修图、电商设计、平面海报、数字绘画及视觉合成等创作场景。

Blender 是一款免费开源、跨平台的专业 3D 创作软件,集建模、动画、渲染、视频编辑与视觉合成等功能于一体,广泛应用于影视动画、游戏设计和建筑可视化等领域。软件支持 Cycles 物理渲染器与 Eevee 实时渲染引擎,并提供多边形建模、骨骼绑定、物理模拟等专业工具。Blender 兼容 Windows、macOS 和 Linux 系统,安装包轻巧、运行流畅,依托活跃的全球开发者社区持续更新,是从初学者到专业创作者都值得选择的正版 3D 创作工具。


Photoshop 2026 是 Adobe 推出的专业图像处理与视觉设计软件,支持 Windows、macOS 和 iPad 等平台,广泛应用于摄影修图、电商设计、平面海报、数字绘画及视觉合成等创作场景。
Blender 是一款免费开源、跨平台的专业 3D 创作软件,集建模、动画、渲染、视频编辑与视觉合成等功能于一体,广泛应用于影视动画、游戏设计和建筑可视化等领域。软件支持 Cycles 物理渲染器与 Eevee 实时渲染引擎,并提供多边形建模、骨骼绑定、物理模拟等专业工具。Blender 兼容 Windows、macOS 和 Linux 系统,安装包轻巧、运行流畅,依托活跃的全球开发者社区持续更新,是从初学者到专业创作者都值得选择的正版 3D 创作工具。