

硬盘安装OpenBSD 3.6的方法
先说说这次安装所基于的硬件环境:40G硬盘、1G内存,再加一个USB光驱。系统方面,Windows XP占10G(FAT32格式),FreeBSD占15G,剩下的都是自由空间。说白了,就是在一台已经装了双系统的机器上再塞进一个OpenBSD 3.6。核心思路很简单:不用刻盘、不用U盘,直接从硬盘引导
先说说这次安装所基于的硬件环境:40G硬盘、1G内存,再加一个USB光驱。系统方面,Windows XP占10G(FAT32格式),FreeBSD占15G,剩下的都是自由空间。说白了,就是在一台已经装了双系统的机器上再塞进一个OpenBSD 3.6。
核心思路很简单:不用刻盘、不用U盘,直接从硬盘引导安装。具体步骤是这样的——
1. 先在C盘下建一个目录C:\OpenBSD3.6\i386,注意大小写不能错。然后把官方站点上i386目录下的所有文件都下载到这里。
2. 重启机器,进入Grub for DOS(没有的话先装一个),按 c 进入GRUB命令行模式,你会看到:
grub>
3. 接着输入下面三行命令,启动OpenBSD的安装程序:
grub>map (hd0,0)/OpenBSD3.6/i386/cdrom36.fs (fd0)
grub>chainloader (hd0,0)/OpenBSD/i386/cdrom36.fs
grub>rootnoverify (fd0)
grub>boot
4. 这时候你已经成功进入OpenBSD的安装界面了,屏幕显示:
erase ^?, werase ^W, kill ^U, intr ^C, status ^T
(I)nstall, (U)pgrade or (S)hell?
5. 按 i 开始安装。接下来是一串问答:
Terminal type? [vt220] 回车
Do you wish to select a keyboard encoding table? [no] 回车
Proceed with install? [no] yes
Which one is the root disk? (or 'done') [wd0] 回车
Do you want to use *all* of wd0 for OpenBSD? [no] 回车
6. 这里就进入分区环节了。系统会把当前硬盘的分区表列出来,大致是下面这样:
Disk: wd0
geometry: 4864/255/63 [78140160 Sectors]
Offset: 0
Signature: 0xAA55
         Starting       Ending        LBA Info:
 #: id  C   H   S -   C   H   S [       start:        size ]
------------------------------------------------------------------------
*0: 0C   0   1   1 - 1304 254  63 [         63:    20964762 ] Win95 FAT32
 1: A5 1305   0   1 - 3263 254  63 [   20964825:    31471335 ] FreeBSD
 2: A6 3264   0   1 - 4862 254  63 [   52436160:    25687935 ] OpenBSD
 3: 00   0   0   0 -    0   0   0 [          0:           0 ] unused
以及OpenBSD内部的disklabel:
16 partitions:
#            size       offset     fstype   [fsize bsize  cpg]
 a:     21494576     52436160     4.2BSD     2048 16384   16   # /
 b:      4209424     73930736       swap
 c:     25688880     52436160     unused       0     0
 d:     78140160            0     unused       0     0
 e:     20964762           63      MSDOS
 f:     31471335     20964825     unknown
注意一下:这里的 e 其实就是Windows XP的C盘,文件系统类型显示为MSDOS。
7. 确认分区后,系统会给出警告——接下来要格式化这些分区,所有数据都会被销毁。确认后继续:
The next step *DESTROYS* all existing data on these partitions!
Are you really sure that you're ready to proceed? [no] yes
System hostname? (short form, e.g. 'foo') # OpenBSD
Configure the network? [yes] yes
DNS domain name? (e.g. 'bar.com') [my.domain] com
DNS nameserver? (IP address or 'none') [none] 202.96.128.68
Use the nameserver now? [yes] 回车
Edit hosts with ed? [no] 回车
Do you want to do any manual network configuration? [no] 回车
Password for root account? (will not echo) # 输入两次密码
Password for root account? (again)
8. 当问到“安装介质放在哪里”时,选择 disk:
Where are the install sets? (or 'done') d
然后选择硬盘设备:
A vailable disks are: wd0.
Which one contains the install sets? (or 'done') [wd0] 回车
9. 接着指定分区,这里选择 e(也就是C盘所在的分区):
Partition? [a] e
10. 文件系统类型选 msdos:
Which filesystem type? [default] msdos
11. 输入路径的时候注意大小写:
Pathname to the sets? (or 'done') OpenBSD3.6/i386
12. 选择要安装的软件包。这里可以直接输入 all 全选,或者一一确认:
The following sets are a vailable. Enter 'all' to select all, or 'done'.
File name? (or 'done') 回车
Ready to install sets? [yes] 回车
Where are the install sets? (or 'done') [done] 回车
13. 最后是安装后的配置——启动sshd、是否使用X Window、时区等:
Start sshd(8) by default? [yes] 回车
Do you expect to run the X Window System? [yes] no
What timezone are you in? ('?' for list) [Canada/Mountain] Asia/Shanghai
等所有包安装完成,重启系统,OpenBSD 3.6就正式入驻你的硬盘了。整个过程不依赖光驱或U盘,全靠Grub引导加载内核镜像,算是非常经典的硬盘安装方式。
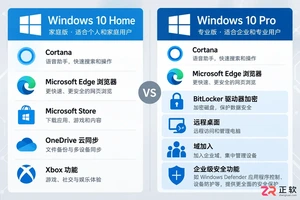
想知道如何将 Windows 10 家庭版升级到专业版?本文详解通过微软商店购买和输入产品密钥两种官方升级方法,说明数据保留情况、成本计算及升级后如何验证 BitLocker 和远程桌面等功能,助您安全获取专业版权限。
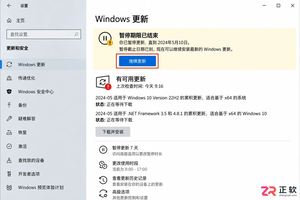
Windows 10 自动更新突然重新启用怎么办?本文详解暂停35天期限结束、误点继续更新、重启后任务续跑及公司域策略覆盖等常见原因,提供查看更新历史、设置活动时间和正确使用疑难解答的操作指南,帮助用户在支持结束前安全管理系统更新。
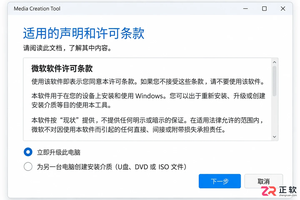
解决 Media Creation Tool 在下载 Windows 镜像时速度慢、中断或报错的问题。本文按操作顺序指导用户检查网络连接、系统权限、磁盘空间及 U 盘状态,确保顺利制作可启动安装介质。
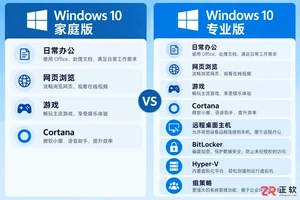
不确定该选Windows 10家庭版还是专业版?本文解析两者在远程连接、磁盘加密和虚拟化等方面的实际差异,帮你避开性能误区,根据真实使用场景做出最具性价比的选择。
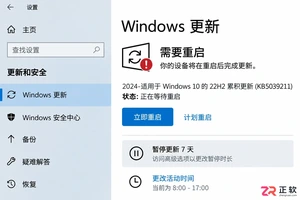
Win10断电重启后总是自动继续更新怎么办?别强行关机,先等恢复完成。教你用暂停更新、设置活动时间和按流量计费连接,减少更新对工作的打扰。注意Win10支持已终止,长期不更新有风险。
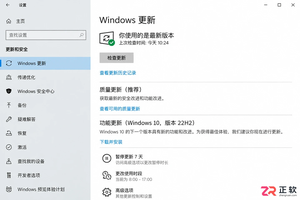
解析Windows 10功能更新与质量更新的区别。说明个人家庭版无法永久单独关闭功能更新,专业版可通过组策略延迟功能升级。提醒用户关注Win10支持终止时间,避免误用禁用服务导致安全风险。
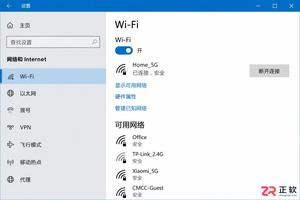
想知道Win10连手机热点时如何避免偷跑流量?只需将热点网络设为“按流量计费的连接”,即可限制Windows Update自动下载非优先更新。本文提供详细界面导览与设置步骤,助你精准控制后台数据消耗。
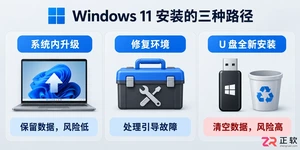
详解 Windows 11 安装的三种路径风险,指导如何制作官方安装介质、正确进入启动菜单、安全清理磁盘分区以及装后验证激活状态,帮助用户避免数据丢失和安装失败。
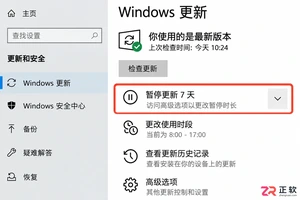
想只关闭Win10大版本升级但保留安全补丁?本文区分功能更新与质量更新,详解专业版组策略配置方法,并说明家庭版限制及Win10停止支持后的应对建议。
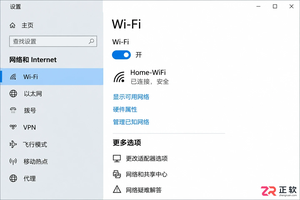
Win10笔记本外出使用手机热点时,如何防止自动下载更新包消耗流量?本文详解通过设置“按流量计费的连接”和“暂停更新”来精准控制流量,对比传递优化限速效果,并解释为何不应直接禁用Windows Update服务。




Photoshop 2026 是 Adobe 推出的专业图像处理与视觉设计软件,支持 Windows、macOS 和 iPad 等平台,广泛应用于摄影修图、电商设计、平面海报、数字绘画及视觉合成等创作场景。

Blender 是一款免费开源、跨平台的专业 3D 创作软件,集建模、动画、渲染、视频编辑与视觉合成等功能于一体,广泛应用于影视动画、游戏设计和建筑可视化等领域。软件支持 Cycles 物理渲染器与 Eevee 实时渲染引擎,并提供多边形建模、骨骼绑定、物理模拟等专业工具。Blender 兼容 Windows、macOS 和 Linux 系统,安装包轻巧、运行流畅,依托活跃的全球开发者社区持续更新,是从初学者到专业创作者都值得选择的正版 3D 创作工具。


Photoshop 2026 是 Adobe 推出的专业图像处理与视觉设计软件,支持 Windows、macOS 和 iPad 等平台,广泛应用于摄影修图、电商设计、平面海报、数字绘画及视觉合成等创作场景。
Blender 是一款免费开源、跨平台的专业 3D 创作软件,集建模、动画、渲染、视频编辑与视觉合成等功能于一体,广泛应用于影视动画、游戏设计和建筑可视化等领域。软件支持 Cycles 物理渲染器与 Eevee 实时渲染引擎,并提供多边形建模、骨骼绑定、物理模拟等专业工具。Blender 兼容 Windows、macOS 和 Linux 系统,安装包轻巧、运行流畅,依托活跃的全球开发者社区持续更新,是从初学者到专业创作者都值得选择的正版 3D 创作工具。