

SpringBoot集成Redis6.0的实现示例
Redis6.0引入多线程I/O、ACL权限控制及RESP3协议。SpringBoot通过添加依赖、配置连接池及序列化器集成Redis,实现字符串、哈希、列表等数据结构操作,支持事务与管道批量处理。结合缓存注解可提升应用性能,需防范缓存穿透与雪崩。
前言
Redis 作为一款高性能的键值存储数据库,在缓存、会话管理、消息队列等场景中的地位,早已无需多言。而 Redis 6.0 的发布,更是带来了多线程 I/O、ACL 权限控制、RESP3 协议等一系列重磅更新。那么,当 Spring Boot 遇上 Redis 6.0,究竟能碰撞出怎样的火花?这篇文章将围绕集成方法和最佳实践展开,希望能帮你少走一些弯路。
1. Redis 6.0 新特性
1.1 多线程 I/O
Redis 6.0 引入了多线程 I/O,主要解决了高并发场景下的网络处理瓶颈。说白了,就是让 Redis 在处理大量客户端请求时,不再那么“单薄”。
# 查看 Redis 版本
redis-server --version
# 配置多线程 I/O
# 在 redis.conf 中设置
io-threads 4
io-threads-do-reads yes
1.2 ACL 权限控制
ACL(Access Control List)的加入,让 Redis 的权限管理变得精细得多。你可以为不同用户分配不同的操作权限,这在多租户或安全要求较高的场景下尤为重要。
# 创建用户并设置权限
ACL SETUSER alice on >password ~* +@all
# 查看用户权限
ACL GETUSER alice
# 登录验证
AUTH alice password
1.3 RESP3 协议
RESP3 协议带来了更丰富的数据类型和更高效的通信方式,算是为后续的功能演进铺好了路。
1.4 其他新特性
- 客户端缓存:支持客户端缓存,减少网络往返
- SSL 支持:内置 SSL 支持,提高安全性
- 时间序列数据结构:优化时间序列数据的存储和查询
2. Spring Boot 与 Redis 集成
2.1 添加依赖
集成工作,从引入依赖开始。Spring Boot 对 Redis 的支持非常成熟,只需要在 pom.xml 中加入对应的 starter 即可。
    org.springframework.boot
    spring-boot-starter-data-redis


    io.lettuce
    lettuce-core


    redis.clients
    jedis
2.2 配置 Redis
接下来是配置项。无论是单机、哨兵还是集群模式,Spring Boot 都提供了简洁的配置方式。这里以单机模式为例:
spring:
  redis:
    host: localhost
    port: 6379
    password: password
    database: 0
    timeout: 10000
    lettuce:
      pool:
        max-active: 8
        max-wait: -1
        max-idle: 8
        min-idle: 0
2.3 Redis 模板配置
RedisTemplate 是 Spring Data Redis 的核心操作类。配置好序列化器,才能避免存入 Redis 的数据出现乱码或无法反序列化的问题。
@Configuration
public class RedisConfig {
    @Bean
    public RedisTemplate redisTemplate(RedisConnectionFactory redisConnectionFactory) {
        RedisTemplate template = new RedisTemplate<>();
        template.setConnectionFactory(redisConnectionFactory);
        // 设置序列化器
        template.setKeySerializer(new StringRedisSerializer());
        template.setValueSerializer(new Jackson2JsonRedisSerializer<>(Object.class));
        template.setHashKeySerializer(new StringRedisSerializer());
        template.setHashValueSerializer(new Jackson2JsonRedisSerializer<>(Object.class));
        template.afterPropertiesSet();
        return template;
    }
    @Bean
    public StringRedisTemplate stringRedisTemplate(RedisConnectionFactory redisConnectionFactory) {
        StringRedisTemplate template = new StringRedisTemplate();
        template.setConnectionFactory(redisConnectionFactory);
        return template;
    }
}
3. Redis 操作示例
3.1 基本操作
从字符串到哈希,从列表到集合,Spring Data Redis 对这些数据结构的操作都进行了封装,用起来相当顺手。
@Service
public class RedisService {
private final RedisTemplate redisTemplate;
private final StringRedisTemplate stringRedisTemplate;
@Autowired
public RedisService(RedisTemplate redisTemplate, StringRedisTemplate stringRedisTemplate) {
this.redisTemplate = redisTemplate;
this.stringRedisTemplate = stringRedisTemplate;
}
// 字符串操作
public void setString(String key, String value) {
stringRedisTemplate.opsForValue().set(key, value);
}
public String getString(String key) {
return stringRedisTemplate.opsForValue().get(key);
}
// 哈希操作
public void setHash(String key, String hashKey, Object value) {
redisTemplate.opsForHash().put(key, hashKey, value);
}
public Object getHash(String key, String hashKey) {
return redisTemplate.opsForHash().get(key, hashKey);
}
// 列表操作
public void addToList(String key, Object value) {
redisTemplate.opsForList().rightPush(key, value);
}
public List
3.2 事务操作
Redis 的事务机制虽然简单,但配合 Spring 的 SessionCallback 使用,也能保证一组操作的原子性。
@Service
public class RedisTransactionService {
private final RedisTemplate redisTemplate;
@Autowired
public RedisTransactionService(RedisTemplate redisTemplate) {
this.redisTemplate = redisTemplate;
}
public void executeTransaction() {
redisTemplate.execute(new SessionCallback
3.3 管道操作
当需要批量操作时,管道(Pipeline)可以显著减少网络往返次数,提升吞吐量。
@Service
public class RedisPipelineService {
private final RedisTemplate redisTemplate;
@Autowired
public RedisPipelineService(RedisTemplate redisTemplate) {
this.redisTemplate = redisTemplate;
}
public List
4. Redis 缓存集成
4.1 缓存配置
Spring 的缓存抽象层与 Redis 的集成,是提升应用性能的利器。通过简单的注解,就能实现声明式缓存。
@Configuration
@EnableCaching
public class CacheConfig {
    @Bean
    public CacheManager cacheManager(RedisConnectionFactory redisConnectionFactory) {
        RedisCacheConfiguration config = RedisCacheConfiguration.defaultCacheConfig()
            .entryTtl(Duration.ofMinutes(10))
            .prefixCacheNameWith("cache:")
            .serializeValuesWith(RedisSerializationContext.SerializationPair.fromSerializer(new Jackson2JsonRedisSerializer<>(Object.class)));
        return RedisCacheManager.builder(redisConnectionFactory)
            .cacheDefaults(config)
            .build();
    }
}
4.2 使用缓存
@Cacheable、@CachePut、@CacheEvict 这几个注解,几乎是日常开发中的标配。用起来简单,但背后的逻辑可不少,比如缓存穿透、缓存雪崩的防范,都需要在设计时考虑进去。
@Service
public class UserService {
    private final UserRepository userRepository;
    @Autowired
    public UserService(UserRepository userRepository) {
        this.userRepository = userRepository;
    }
    @Cacheable(value = "users", key = "#id")
    public User getUserById(Long id) {
        return userRepository.findById(id)
            .orElseThrow(() -> new UsernameNotFoundException("User not found"));
    }
    @CachePut(value = "users", key = "#user.id")
    public User sa veUser(User user) {
        return userRepository.sa ve(user);
    }
    @CacheEvict(value = "users", key = "#id")
    public void deleteUser(Long id) {
        userRepository.deleteById(id);
    }
}
5. Redis 消息队列
5.1 配置消息监听器
利用 Redis 的发布/订阅功能,可以快速实现一个轻量级消息队列。配置好监听器容器,一切就绪。
@Configuration
public class RedisMessageListenerConfig {
    @Bean
    public RedisMessageListenerContainer redisMessageListenerContainer(RedisConnectionFactory redisConnectionFactory) {
        RedisMessageListenerContainer container = new RedisMessageListenerContainer();
        container.setConnectionFactory(redisConnectionFactory);
        return container;
    }
    @Bean
    public MessageListenerAdapter messageListenerAdapter() {
        return new MessageListenerAdapter(new RedisMessageListener());
    }
}
5.2 消息监听器
public class RedisMessageListener implements MessageListener {
    @Override
    public void onMessage(Message message, byte[] pattern) {
        String channel = new String(message.getChannel());
        String body = new String(message.getBody());
        System.out.println("Received message from channel " + channel + ": " + body);
    }
}
5.3 发送消息
@Service
public class RedisMessageService {
    private final RedisTemplate redisTemplate;
    @Autowired
    public RedisMessageService(RedisTemplate redisTemplate) {
        this.redisTemplate = redisTemplate;
    }
    public void sendMessage(String channel, Object message) {
        redisTemplate.convertAndSend(channel, message);
    }
}
6. Redis 分布式锁
6.1 实现分布式锁
分布式锁是解决并发冲突的常见手段。基于 Redis 的 SETNX 命令和 Lua 脚本,可以构建一个可靠的分布式锁实现。
@Service
public class RedisLockService {
    private final RedisTemplate redisTemplate;
    @Autowired
    public RedisLockService(RedisTemplate redisTemplate) {
        this.redisTemplate = redisTemplate;
    }
    public boolean acquireLock(String lockKey, String requestId, long expireTime) {
        Boolean result = redisTemplate.opsForValue().setIfAbsent(lockKey, requestId, expireTime, TimeUnit.MILLISECONDS);
        return result != null && result;
    }
    public boolean releaseLock(String lockKey, String requestId) {
        String script = "if redis.call('get', KEYS[1]) == ARGV[1] then return redis.call('del', KEYS[1]) else return 0 end";
        RedisScript redisScript = RedisScript.of(script, Long.class);
        Long result = redisTemplate.execute(redisScript, Collections.singletonList(lockKey), requestId);
        return result != null && result > 0;
    }
}
6.2 使用分布式锁
@Service
public class OrderService {
    private final RedisLockService redisLockService;
    @Autowired
    public OrderService(RedisLockService redisLockService) {
        this.redisLockService = redisLockService;
    }
    public void createOrder(Order order) {
        String lockKey = "order:lock:" + order.getProductId();
        String requestId = UUID.randomUUID().toString();
        try {
            if (redisLockService.acquireLock(lockKey, requestId, 5000)) {
                // 执行业务逻辑
                System.out.println("Acquired lock, processing order");
                // 模拟业务处理
                Thread.sleep(2000);
            } else {
                throw new RuntimeException("Failed to acquire lock");
            }
        } catch (InterruptedException e) {
            Thread.currentThread().interrupt();
            throw new RuntimeException(e);
        } finally {
            redisLockService.releaseLock(lockKey, requestId);
        }
    }
}
7. Redis 6.0 高级特性
7.1 客户端缓存
Redis 6.0 的客户端缓存特性,允许客户端在本地缓存部分数据,进一步降低网络延迟。不过,这个功能对客户端的实现要求比较高,需要谨慎评估。
@Service
public class RedisClientCacheService {
    private final RedisTemplate redisTemplate;
    @Autowired
    public RedisClientCacheService(RedisTemplate redisTemplate) {
        this.redisTemplate = redisTemplate;
    }
    public void enableClientCache() {
        // 启用客户端缓存
        redisTemplate.execute((RedisCallback) connection -> {
            connection.setClientName("client1");
            return null;
        });
    }
}
7.2 ACL 权限控制
在 Spring Boot 中配置 Redis 的 ACL 认证,主要是在连接工厂层面设置好用户名和密码。
@Configuration
public class RedisAclConfig {
    @Bean
    public LettuceConnectionFactory redisConnectionFactory() {
        RedisStandaloneConfiguration config = new RedisStandaloneConfiguration();
        config.setHostName("localhost");
        config.setPort(6379);
        config.setPassword(RedisPassword.of("password"));
        config.setDatabase(0);
        LettuceClientConfiguration clientConfig = LettuceClientConfiguration.builder()
            .commandTimeout(Duration.ofSeconds(10))
            .build();
        return new LettuceConnectionFactory(config, clientConfig);
    }
}
8. 最佳实践
8.1 连接池配置
连接池的配置需要根据业务压力来调整。以下是一个比较通用的配置示例,但具体数值还是需要结合压测结果来定。
spring:
  redis:
    lettuce:
      pool:
        max-active: 100
        max-wait: 10000
        max-idle: 50
        min-idle: 10
8.2 序列化配置
序列化是 Redis 集成中极容易出问题的一环。推荐使用 Jackson2JsonRedisSerializer 并将 ObjectMapper 的 visibility 配置好,这样可以避免很多类型转换的坑。
@Configuration
public class RedisSerializationConfig {
@Bean
public RedisTemplate redisTemplate(RedisConnectionFactory redisConnectionFactory) {
RedisTemplate template = new RedisTemplate<>();
template.setConnectionFactory(redisConnectionFactory);
// 使用 Jackson2JsonRedisSerializer 序列化值
Jackson2JsonRedisSerializer
8.3 错误处理
高可用架构中,Redis 发生故障是不可避免的。合理的错误处理机制,能防止一个 Redis 异常拖垮整个服务。
@Service
public class RedisErrorHandlingService {
    private final RedisTemplate redisTemplate;
    @Autowired
    public RedisErrorHandlingService(RedisTemplate redisTemplate) {
        this.redisTemplate = redisTemplate;
    }
    public Object getWithErrorHandling(String key) {
        try {
            return redisTemplate.opsForValue().get(key);
        } catch (RedisConnectionFailureException e) {
            // 处理连接失败
            System.err.println("Redis connection failed: " + e.getMessage());
            return null;
        } catch (RedisSystemException e) {
            // 处理系统错误
            System.err.println("Redis system error: " + e.getMessage());
            return null;
        }
    }
}
9. 案例分析
9.1 缓存系统
某电商系统使用 Redis 作为缓存,主要包括:
- 商品缓存:缓存商品信息,提高查询性能
- 用户缓存:缓存用户信息,减少数据库查询
- 订单缓存:缓存订单信息,提高订单处理速度
- 热点数据缓存:缓存热点商品数据,应对高并发
9.2 会话管理
某 Web 应用使用 Redis 管理会话,主要包括:
- 会话存储:将会话数据存储在 Redis 中
- 会话过期:设置会话过期时间,自动清理过期会话
- 会话共享:在多实例部署中实现会话共享
9.3 消息队列
某系统使用 Redis 作为消息队列,主要包括:
- 任务队列:处理异步任务
- 事件通知:发送系统事件通知
- 消息广播:向多个消费者广播消息
10. 性能优化
10.1 连接管理
- 使用连接池:配置合理的连接池大小
- 连接超时:设置合理的连接超时时间
- 连接验证:定期验证连接有效性
10.2 数据结构选择
- 选择合适的数据结构:根据业务场景选择合适的 Redis 数据结构
- 避免大键:避免存储过大的键值对
- 使用管道:批量执行命令,减少网络往返
10.3 缓存策略
- 缓存过期:设置合理的缓存过期时间
- 缓存预热:在系统启动时预热缓存
- 缓存更新:使用合适的缓存更新策略
11. 监控与维护
11.1 监控指标
- 内存使用:监控 Redis 内存使用情况
- 命令执行:监控命令执行次数和耗时
- 连接数:监控 Redis 连接数
- 命中率:监控缓存命中率
11.2 维护操作
- 数据备份:定期备份 Redis 数据
- 数据清理:清理过期数据和无用数据
- 性能优化:根据监控结果优化 Redis 配置
12. 未来趋势
12.1 Redis 7.0 新特性
Redis 7.0 带来了许多新特性,如:
- 时间序列数据结构:更强大的时间序列数据支持
- RDB 快照改进:更高效的 RDB 快照
- 内存管理改进:更智能的内存管理
12.2 Spring Data Redis 改进
Spring Data Redis 不断改进,提供更强大的功能:
- 反应式支持:更好的反应式编程支持
- 函数式编程:支持函数式编程风格
- 更丰富的 API:提供更丰富的 Redis 操作 API
结语
Spring Boot 与 Redis 6.0 的集成,是构建高性能、可扩展应用的重要一环。从新特性的理解,到集成方案的落地,再到性能优化和监控维护,每一步都值得深入琢磨。希望这篇文章能帮你建立起一个清晰的技术框架,在实际项目中能更从容地应对各种挑战。
遇到PHP递归报错时,不要盲目调大max_nesting_level。本文教你区分Xdebug限制、内存耗尽和正则递归错误,提供代码级的终止条件优化与迭代替代方案,彻底解决栈溢出问题。
本文分析PHP递归中static变量导致的状态污染及引用传递引发的共享数据修改问题。提供具体的代码复现、缓存键设计建议及调试打印技巧,帮助开发者避免隐蔽的逻辑错误。
解析PHP递归函数在树形数据处理中的性能瓶颈,提供预加载数据消除I/O、使用显式栈替代深层递归的实战方案,帮助开发者在代码可读性与执行效率间做出合理取舍。
详细讲解在Java单元测试中如何使用Mockito模拟依赖对象,包括引入依赖、创建Mock、打桩返回值、行为验证以及Mock与Spy的核心差异和常见陷阱排查。
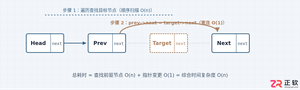
详细分析链表删除节点的时间复杂度,深入探讨单链表与双向链表在不同已知前提下的查找与删除开销,并结合完整代码与清晰图解进行对比总结。
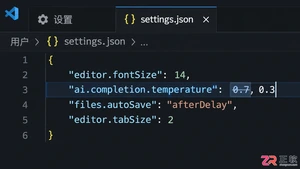
想知道如何让AI写出的代码更贴合你的习惯?本文手把手教你在VS Code中调整Codex相关模型参数,通过修改配置文件优化温度值和令牌限制,解决代码建议不准确或响应慢的问题。
通过实测展示Claude Code在终端中如何理解自然语言指令、自动修改代码文件并处理复杂编程任务,帮助开发者评估其实际辅助能力。
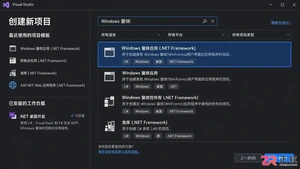
本教程详细讲解如何使用Visual Studio创建WinForms项目,通过添加按钮和标签控件并编写点击事件代码,实现一个基础的计数器功能,适合C#初学者快速上手Windows窗体应用开发。
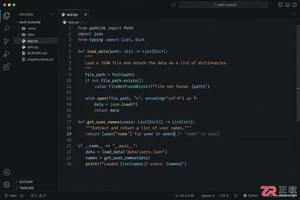
详解Cursor编辑器中自动补全功能的开启与优化设置,涵盖Tab触发机制、上下文窗口调整及模型切换,帮助开发者解决补全延迟、干扰大等问题,提升编码流畅度。
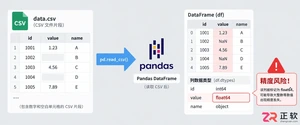
详解Pandas中数据格式转换的核心方法,包括astype强制转换、to_numeric容错处理及日期解析技巧,解决常见类型错误并提升数据处理效率。




Photoshop 2026 是 Adobe 推出的专业图像处理与视觉设计软件,支持 Windows、macOS 和 iPad 等平台,广泛应用于摄影修图、电商设计、平面海报、数字绘画及视觉合成等创作场景。

Blender 是一款免费开源、跨平台的专业 3D 创作软件,集建模、动画、渲染、视频编辑与视觉合成等功能于一体,广泛应用于影视动画、游戏设计和建筑可视化等领域。软件支持 Cycles 物理渲染器与 Eevee 实时渲染引擎,并提供多边形建模、骨骼绑定、物理模拟等专业工具。Blender 兼容 Windows、macOS 和 Linux 系统,安装包轻巧、运行流畅,依托活跃的全球开发者社区持续更新,是从初学者到专业创作者都值得选择的正版 3D 创作工具。


Photoshop 2026 是 Adobe 推出的专业图像处理与视觉设计软件,支持 Windows、macOS 和 iPad 等平台,广泛应用于摄影修图、电商设计、平面海报、数字绘画及视觉合成等创作场景。
Blender 是一款免费开源、跨平台的专业 3D 创作软件,集建模、动画、渲染、视频编辑与视觉合成等功能于一体,广泛应用于影视动画、游戏设计和建筑可视化等领域。软件支持 Cycles 物理渲染器与 Eevee 实时渲染引擎,并提供多边形建模、骨骼绑定、物理模拟等专业工具。Blender 兼容 Windows、macOS 和 Linux 系统,安装包轻巧、运行流畅,依托活跃的全球开发者社区持续更新,是从初学者到专业创作者都值得选择的正版 3D 创作工具。