

Ubuntu Java游戏开发入门指南
本教程详细介绍了在Ubuntu上搭建Java游戏开发环境的步骤:首先安装OpenJDK17并配置环境变量,然后选择IntelliJIDEA等IDE,安装Maven或Gradle构建工具,以及JavaFX或LibGDX等图形库。最后通过编写一个可移动的蓝色矩形示例来验证整个环境配置成功即可。
Ubuntu Ja va Game Development Beginner’s Guide
So you want to start making games with Ja va on Ubuntu? Good choice. Whether you're a total beginner or just switching from Windows/macOS, this guide walks through the whole setup—from installing the JDK to writing a simple moving-rectangle game. No fluff, just the steps that actually work.
1. Install Ja va Development Kit (JDK)
The JDK is the bedrock of everything. It gives you the compiler (ja vac) and the runtime (ja va) to build and run Ja va programs. For game development, stick with an LTS version like OpenJDK 17 or 21. They're stable, well-supported, and play nice with modern libraries.
Steps:
- Update your system packages first:
sudo apt update && sudo apt upgrade -y - Install OpenJDK 17 (or your preferred version):
sudo apt install openjdk-17-jdk -y - Verify the installation: run
ja va -versionandja vac -versionin the terminal. You should see something like:openjdk version "17.0.11" 2024-10-15 OpenJDK Runtime Environment (build 17.0.11+9-Ubuntu-0ubuntu2.24.04) OpenJDK 64-Bit Server VM (build 17.0.11+9-Ubuntu-0ubuntu2.24.04, mixed mode)
2. Configure Environment Variables
Setting JA VA_HOME is one of those small steps that sa ves you headaches later. Tools like Ma ven, Gradle, and IDEs rely on it to find your JDK.
Steps:
- Find the exact JDK path: run
sudo update-alternatives --config ja vaand copy the path before/bin/ja va(e.g.,/usr/lib/jvm/ja va-17-openjdk-amd64). - Edit your shell config file:
nano ~/.bashrc(or~/.zshrcif you use zsh). - Add these two lines at the end:
export JA VA_HOME="/usr/lib/jvm/ja va-17-openjdk-amd64" export PATH="$JA VA_HOME/bin:$PATH" - Apply the changes:
source ~/.bashrc. - Verify: run
echo $JA VA_HOME—it should output your JDK path.
3. Choose an Integrated Development Environment (IDE)
You can write code in a text editor, but an IDE makes debugging, project management, and refactoring much smoother. Here are the top picks for Ja va game development on Ubuntu:
Recommended IDEs:
- IntelliJ IDEA Community Edition – free, feature-rich, and works great with Ja vaFX (for 2D) and LWJGL (for 3D). Install via Snap:
sudo snap install intellij-idea-community --classic - Eclipse – open-source and lightweight. Snap install:
sudo snap install eclipse --classic - NetBeans – user-friendly and has built-in Ja vaFX support. Download from netbeans.apache.org.
4. Set Up Build Tools
Once you move beyond a single-file project, you'll want a build tool to handle dependencies and compilation. For game projects, Ma ven or Gradle is pretty much mandatory.
Install Ma ven:
sudo apt install ma ven -yVerify with mvn -version.
Install Gradle:
sudo apt install gradle -yVerify with gradle -version.
5. Install Essential Libraries/Frameworks
You don't want to reinvent the wheel. These libraries handle graphics, input, and audio so you can focus on the game logic.
For 2D Games:
- Ja vaFX – built into OpenJDK 11+, so no extra installation needed. It provides UI components and basic graphics.
- LibGDX – a cross-platform framework that supports both 2D and 3D. Add it to your project via Ma ven/Gradle:
    com.badlogicgames.gdx
    gdx
    1.13.1
For 3D Games:
- LWJGL (Lightweight Ja va Game Library) – gives you OpenGL bindings and input handling. Ma ven dependency:
    org.lwjgl
    lwjgl
    3.4.2
6. Write and Run a Simple Game
Let's put it all together with a minimal 2D game using Ja vaFX. It's a blue rectangle you can move with arrow keys—simple, but it proves the setup works.
Example: Moving Rectangle Game
- Create a new Ja va project in your IDE (e.g., IntelliJ IDEA).
- Add Ja vaFX dependencies if your IDE doesn't include them by default.
- Write the game code (
Main.ja va):import ja vafx.application.Application; import ja vafx.scene.Scene; import ja vafx.scene.layout.Pane; import ja vafx.scene.paint.Color; import ja vafx.scene.shape.Rectangle; import ja vafx.stage.Stage; public class Main extends Application { @Override public void start(Stage primaryStage) { Pane root = new Pane(); Rectangle rect = new Rectangle(50, 50, 50, 50); rect.setFill(Color.BLUE); // Move rectangle with arrow keys rect.setOnKeyPressed(event -> { switch (event.getCode()) { case UP: rect.setY(rect.getY() - 10); break; case DOWN: rect.setY(rect.getY() + 10); break; case LEFT: rect.setX(rect.getX() - 10); break; case RIGHT: rect.setX(rect.getX() + 10); break; } }); root.getChildren().add(rect); Scene scene = new Scene(root, 800, 600); scene.setOnKeyPressed(event -> rect.requestFocus()); // Focus on rectangle primaryStage.setTitle("Simple Ja vaFX Game"); primaryStage.setScene(scene); primaryStage.show(); } public static void main(String[] args) { launch(args); } } - Run the program: right-click the
Mainclass and select "Run". A window appears with a blue rectangle that moves when you press arrow keys.
7. Next Steps for Game Development
- Learn game loops: use
AnimationTimer(Ja vaFX) or LWJGL'sglfwSwapBuffersfor smooth animations. - Add assets: image files (PNG/JPG) for sprites, audio files (WA V/MP3) for sound effects/music. LibGDX makes this painless.
- Explore frameworks: dive deeper into LibGDX (for 2D/3D) or LWJGL (for advanced 3D) to build more complex games.
- Join communities: forums like r/gamedev or LibGDX Discord are great for support and feedback.
Follow these steps and you'll ha ve a fully functional Ja va game development environment on Ubuntu. Start small, experiment with the libraries, and gradually build up. Happy coding!
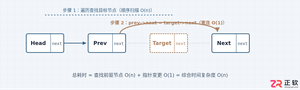
详细分析链表删除节点的时间复杂度,深入探讨单链表与双向链表在不同已知前提下的查找与删除开销,并结合完整代码与清晰图解进行对比总结。
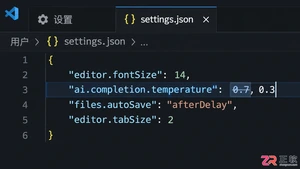
想知道如何让AI写出的代码更贴合你的习惯?本文手把手教你在VS Code中调整Codex相关模型参数,通过修改配置文件优化温度值和令牌限制,解决代码建议不准确或响应慢的问题。
通过实测展示Claude Code在终端中如何理解自然语言指令、自动修改代码文件并处理复杂编程任务,帮助开发者评估其实际辅助能力。
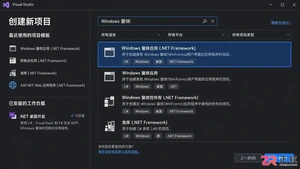
本教程详细讲解如何使用Visual Studio创建WinForms项目,通过添加按钮和标签控件并编写点击事件代码,实现一个基础的计数器功能,适合C#初学者快速上手Windows窗体应用开发。
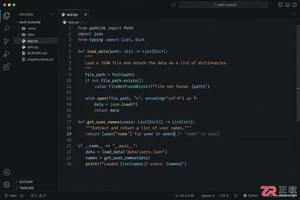
详解Cursor编辑器中自动补全功能的开启与优化设置,涵盖Tab触发机制、上下文窗口调整及模型切换,帮助开发者解决补全延迟、干扰大等问题,提升编码流畅度。
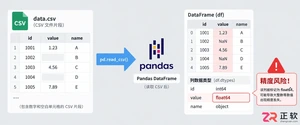
详解Pandas中数据格式转换的核心方法,包括astype强制转换、to_numeric容错处理及日期解析技巧,解决常见类型错误并提升数据处理效率。
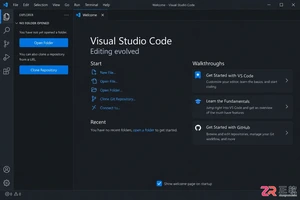
详细介绍在Visual Studio Code中安装Chinese (Simplified)语言包的方法,包括通过扩展市场搜索、安装及自动重启切换至简体中文界面的完整步骤,帮助开发者快速将编辑器本地化。
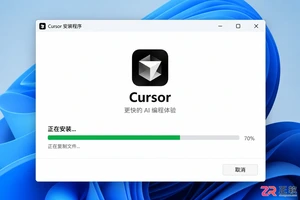
针对Cursor安装包默认锁定C盘且无路径选择界面的问题,提供通过手动移动文件并创建目录联结(Symbolic Link)的解决方案,实现将软件安装在其他磁盘分区。
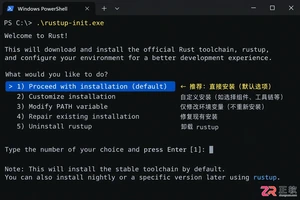
详解Windows系统下Rust语言的安装步骤,重点解析rustup工具链管理机制,解决环境变量配置错误及MSVC链接器缺失问题,提供可复制的命令验证方法与常见报错的因果排查思路。
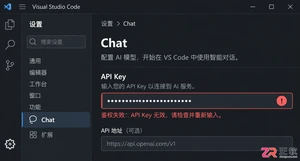
详解VS Code中Chat插件的安装与核心配置步骤,重点解决API连接失败、响应慢等常见问题,通过优化上下文设置提升代码生成质量,适合希望集成AI辅助工具的开发者阅读。




Photoshop 2026 是 Adobe 推出的专业图像处理与视觉设计软件,支持 Windows、macOS 和 iPad 等平台,广泛应用于摄影修图、电商设计、平面海报、数字绘画及视觉合成等创作场景。

Blender 是一款免费开源、跨平台的专业 3D 创作软件,集建模、动画、渲染、视频编辑与视觉合成等功能于一体,广泛应用于影视动画、游戏设计和建筑可视化等领域。软件支持 Cycles 物理渲染器与 Eevee 实时渲染引擎,并提供多边形建模、骨骼绑定、物理模拟等专业工具。Blender 兼容 Windows、macOS 和 Linux 系统,安装包轻巧、运行流畅,依托活跃的全球开发者社区持续更新,是从初学者到专业创作者都值得选择的正版 3D 创作工具。


Photoshop 2026 是 Adobe 推出的专业图像处理与视觉设计软件,支持 Windows、macOS 和 iPad 等平台,广泛应用于摄影修图、电商设计、平面海报、数字绘画及视觉合成等创作场景。
Blender 是一款免费开源、跨平台的专业 3D 创作软件,集建模、动画、渲染、视频编辑与视觉合成等功能于一体,广泛应用于影视动画、游戏设计和建筑可视化等领域。软件支持 Cycles 物理渲染器与 Eevee 实时渲染引擎,并提供多边形建模、骨骼绑定、物理模拟等专业工具。Blender 兼容 Windows、macOS 和 Linux 系统,安装包轻巧、运行流畅,依托活跃的全球开发者社区持续更新,是从初学者到专业创作者都值得选择的正版 3D 创作工具。