

Netmiko高效配置Cisco路由器SSH指南
本文详细介绍了如何使用Python的Netmiko库通过SSH连接Cisco路由器并进行配置,重点阐述了Netmiko自动处理特权模式和全局配置模式的机制,避免了手动输入en和conft的错误。文章还涵盖了接口IP地址、OSPF协议及ACL的配置方法,并提供了完整的示例代码、配置保存与比较的最佳实践,以及常见的错误处理策略,旨在帮助网络工程师高效自动化Cisco设备的管理。

本文详细介绍了如何使用Python的Netmiko库通过SSH连接Cisco路由器并进行配置,重点阐述了Netmiko自动处理特权模式和全局配置模式的机制,避免了手动输入`en`和`conf t`的错误。文章还涵盖了接口IP地址、OSPF协议及ACL的配置方法,并提供了完整的示例代码、配置保存与比较的最佳实践,以及常见的错误处理策略,旨在帮助网络工程师高效自动化Cisco设备的管理。
1. 理解Netmiko的配置模式处理机制
在使用Netmiko库对Cisco设备进行配置时,一个常见的误区是尝试在发送配置命令前手动输入en(enable)和conf t(configure terminal)命令。Netmiko被设计为简化设备自动化,它在建立连接后会自动处理进入特权模式和全局配置模式的步骤。
当您通过ConnectHandler成功连接到Cisco IOS设备并提供secret密码时,Netmiko会自动:
- 进入特权模式(enable)。
- 进入全局配置模式(configure terminal)。
因此,在您通过net_connect.send_config_set()方法发送配置命令列表时,这些命令将直接在全局配置模式下执行,无需在命令列表中包含en或conf t。如果尝试手动发送这些命令,Netmiko可能会因预期外的输出或命令冲突而导致超时错误。
错误示例 (应避免):
loopback_config = [
    'en\n'  # Netmiko会自动处理
    'conf t\n' # Netmiko会自动处理
    'interface Loopback0\n',
    'ip address 192.168.57.101 255.255.255.0\n',
    'exit\n'
]
正确的做法是直接提供配置命令,Netmiko将负责将其送达正确的配置模式。
2. 建立SSH连接与设备认证
Netmiko通过ConnectHandler类建立与网络设备的连接。为了实现安全的远程管理,通常推荐使用SSH协议。
关键参数:
- device_type: 指定设备类型,对于Cisco IOS设备使用cisco_ios。如果需要Telnet连接,则使用cisco_ios_telnet。
- host: 目标设备的IP地址或主机名。
- username: 用于登录设备的用户名。
- password: 用于登录设备的密码。
- secret: 进入特权模式(enable mode)所需的密码。
- port: 连接端口,SSH默认为22,Telnet默认为23。Netmiko通常会根据device_type自动选择。
- timeout: 操作超时时间(秒),用于控制Netmiko等待设备响应的时间,防止长时间阻塞。
示例代码片段:
from netmiko import ConnectHandler
import getpass
import logging

logging.basicConfig(level=logging.INFO)

def establish_connection(host, username, password, secret, device_type='cisco_ios', port=22, timeout=60):
    """
    建立与Cisco设备的连接。
    """
    device = {
        'device_type': device_type,
        'host': host,
        'username': username,
        'password': password,
        'secret': secret,
        'port': port,
        'timeout': timeout,
    }
    try:
        net_connect = ConnectHandler(**device)
        logging.info('Connection established successfully.')
        return net_connect
    except Exception as e:
        logging.error(f'Failed to establish connection: {e}')
        raise

# 在主函数中调用
# net_connect = establish_connection(host, username, password, secret)
3. 执行设备配置
Netmiko的send_config_set()方法是发送配置命令列表的首选方式。它会逐条发送命令,并等待设备响应,确保命令被正确执行。
配置示例:
3.1 配置Loopback接口
Loopback接口是逻辑接口,常用于OSPF等路由协议的Router ID或设备管理地址,其状态始终为UP。
loopback_config = [
    'interface Loopback0',
    'ip address 192.168.57.101 255.255.255.0',
    'no shutdown', # 确保接口开启
    'exit'
]
3.2 配置物理接口
配置物理接口需要指定接口名称和IP地址。
interface_config = [
    'interface GigabitEthernet0/0',
    'ip address 192.168.58.101 255.255.255.0',
    'no shutdown',
    'exit',
    'interface GigabitEthernet0/1',
    'ip address 192.168.59.101 255.255.255.0',
    'no shutdown',
    'exit'
]
3.3 配置OSPF协议
OSPF(Open Shortest Path First)是一种内部网关协议,用于在大型网络中动态交换路由信息。配置OSPF通常涉及定义进程ID、Router ID(通常是Loopback接口IP)和宣告网络。
ospf_config = [
    'router ospf 1', # OSPF进程ID
    'router-id 192.168.57.101', # 使用Loopback接口IP作为Router ID
    'network 192.168.57.0 0.0.0.255 area 0', # 宣告Loopback网络
    'network 192.168.58.0 0.0.0.255 area 0', # 宣告GigabitEthernet0/0网络
    'network 192.168.59.0 0.0.0.255 area 0', # 宣告GigabitEthernet0/1网络
    'exit'
]
3.4 配置访问控制列表 (ACL)
ACL用于过滤网络流量,提供安全控制。
acl_config = [
    'ip access-list extended MY_ACL',
    'permit ip 192.168.56.130 0.0.0.0 any', # 注意:这里原始问题中的掩码是255.255.255.0,但ACL中通常使用反向掩码,0.0.0.0表示精确匹配主机。
                                         # 如果要匹配192.168.56.130/24,则为 permit ip 192.168.56.0 0.0.0.255 any
    'deny ip any any',
    'exit'
]
整合配置并发送: 将所有配置命令列表合并,然后通过send_config_set()发送。
def configure_device(net_connect):
    """
    发送配置命令到设备。
    """
    loopback_config = [
        'interface Loopback0',
        'ip address 192.168.57.101 255.255.255.0',
        'no shutdown',
        'exit'
    ]

    interface_config = [
        'interface GigabitEthernet0/0',
        'ip address 192.168.58.101 255.255.255.0',
        'no shutdown',
        'exit',
        'interface GigabitEthernet0/1',
        'ip address 192.168.59.101 255.255.255.0',
        'no shutdown',
        'exit'
    ]

    ospf_config = [
        'router ospf 1',
        'router-id 192.168.57.101',
        'network 192.168.57.0 0.0.0.255 area 0',
        'network 192.168.58.0 0.0.0.255 area 0',
        'network 192.168.59.0 0.0.0.255 area 0',
        'exit'
    ]

    acl_config = [
        'ip access-list extended MY_ACL',
        'permit ip 192.168.56.130 0.0.0.0 any',
        'deny ip any any',
        'exit'
    ]

    all_configs = loopback_config + interface_config + ospf_config + acl_config
    logging.info('Sending configuration commands...')
    output = net_connect.send_config_set(all_configs)
    print(output)
    logging.info('Configuration commands sent.')
4. 配置保存与比较的最佳实践
自动化配置后,验证配置是否成功并持久化非常重要。
4.1 保存运行配置
使用send_command()获取设备的当前运行配置,并将其保存到本地文件。
def save_config_to_file(config_content, filename):
    """
    将配置内容保存到本地文件。
    """
    with open(filename, 'w') as f:
        f.write(config_content)
    logging.info(f'Configuration saved to {filename}')

# 在连接建立后:
# running_configuration = net_connect.send_command('show running-config')
# save_config_to_file(running_configuration, 'router_running_config.txt')
4.2 比较配置差异
比较当前运行配置与之前保存的基线配置(或期望配置)是验证变更的有效手段。Python的difflib库可以帮助实现这一点。
import difflib

def show_differences(config1, config2, label1='Config 1', label2='Config 2'):
    """
    显示两个配置字符串之间的差异。
    """
    difference = difflib.Differ()
    diff = list(difference.compare(config1.splitlines(), config2.splitlines()))

    has_diff = False
    for line in diff:
        if line.startswith('- ') or line.startswith('+ '):
            logging.warning(f'Difference found: {line}')
            has_diff = True
    if not has_diff:
        logging.info(f'No significant differences found between {label1} and {label2}.')
    return has_diff

# 示例:比较运行配置与本地保存的配置
# if running_configuration and local_config:
#     if running_configuration == local_config:
#         logging.info('The running configuration is the same as the local configuration.')
#     else:
#         logging.warning('The running configuration does not match the local configuration:')
#         show_differences(local_config, running_configuration, 'Local Config', 'Running Config')
5. 错误处理与连接管理
5.1 使用with语句进行连接管理
Netmiko的ConnectHandler支持上下文管理器(with语句)。使用with语句可以确保连接在代码块执行完毕后自动关闭,即使发生异常也能正确处理,避免了手动调用net_connect.disconnect()可能导致的资源泄露或net_connect未定义错误。
推荐用法:
try:
    with ConnectHandler(**device) as net_connect:
        logging.info('Connection established')
        # 在此处执行所有配置和命令操作
        configure_device(net_connect)
        # ... 其他操作
except Exception as e:
    logging.error(f'An error occurred: {e}')
在这种模式下,您无需显式调用net_connect.disconnect()。如果需要显式断开,且确保net_connect已定义,则应将其放在with块内部,例如在所有操作完成后,但在with块结束前。但通常情况下,with语句的自动关闭机制已经足够。
5.2 增强的错误处理
在整个自动化脚本中,应包含健壮的try-except块来捕获可能发生的网络连接问题、认证失败或命令执行错误。
6. 完整示例代码
以下是一个整合了上述所有概念的完整Python脚本,用于通过SSH连接Cisco路由器并进行配置、保存和比较。
import logging
import getpass
import difflib

from netmiko import ConnectHandler

# 配置日志
logging.basicConfig(level=logging.INFO, format='%(asctime)s - %(levelname)s - %(message)s')

def save_config_to_file(config_content, filename):
    """
    将配置内容保存到本地文件。
    """
    try:
        with open(filename, 'w') as config_file:
            config_file.write(config_content)
        logging.info(f'Configuration saved to {filename}')
    except IOError as e:
        logging.error(f'Failed to save configuration to {filename}: {e}')

def show_differences(config1, config2, label1='Config A', label2='Config B'):
    """
    显示两个配置字符串之间的差异。
    """
    difference = difflib.Differ()
    diff = list(difference.compare(config1.splitlines(), config2.splitlines()))

    has_diff = False
    for line in diff:
        if line.startswith('- ') or line.startswith('+ '):
            logging.warning(f'Difference found: {line}')
            has_diff = True
    if not has_diff:
        logging.info(f'No significant differences found between {label1} and {label2}.')
    return has_diff

def configure_device(net_connect):
    """
    发送预定义的配置命令到设备。
    """
    loopback_config = [
        'interface Loopback0',
        'ip address 192.168.57.101 255.255.255.0',
        'no shutdown',
        'exit'
    ]

    interface_config = [
        'interface GigabitEthernet0/0',
        'ip address 192.168.58.101 255.255.255.0',
        'no shutdown',
        'exit',
        'interface GigabitEthernet0/1',
        'ip address 192.168.59.101 255.255.255.0',
        'no shutdown',
        'exit'
    ]

    ospf_config = [
        'router ospf 1',
        'router-id 192.168.57.101',
        'network 192.168.57.0 0.0.0.255 area 0',
        'network 192.168.58.0 0.0.0.255 area 0',
        'network 192.168.59.0 0.0.0.255 area 0',
        'exit'
    ]

    acl_config = [
        'ip access-list extended MY_ACL',
        'permit ip 192.168.56.130 0.0.0.0 any', # 精确匹配主机
        'deny ip any any',
        'exit'
    ]

    all_configs = loopback_config + interface_config + ospf_config + acl_config

    logging.info('Sending configuration commands...')
    try:
        output = net_connect.send_config_set(all_configs)
        print("\n--- Configuration Output ---\n", output)
        logging.info('Configuration commands sent successfully.')
    except Exception as e:
        logging.error(f'Error sending configuration commands: {e}')
        raise # 重新抛出异常,以便主函数捕获

def main():
    host = '192.168.56.101' # 请替换为您的Cisco路由器IP地址
    username = input('Please enter your username: ')
    password = getpass.getpass('Please enter your password: ')
    secret = getpass.getpass('Please enter your enable secret: ') # enable密码

    # 允许用户选择连接类型,但SSH更推荐
    choice = input('Would you like to connect by using telnet or ssh? (ssh/telnet): ').lower()
    if choice == 'telnet':
        device_type = 'cisco_ios_telnet'
        port = 23
    elif choice == 'ssh':
        device_type = 'cisco_ios'
        port = 22
    else:
        logging.error('Invalid choice. Defaulting to SSH.')
        device_type = 'cisco_ios'
        port = 22

    device = {
        'device_type': device_type,
        'host': host,
        'username': username,
        'password': password,
        'secret': secret,
        'port': port,
        'timeout': 100, # 增加超时时间以应对网络延迟或复杂配置
    }

    try:
        # 使用with语句确保连接自动关闭
        with ConnectHandler(**device) as net_connect:
            logging.info('Connection established to device.')

            # 发送配置命令
            configure_device(net_connect)

            # 获取并保存运行配置
            logging.info('Retrieving running configuration...')
            running_configuration = net_connect.send_command('show running-config')
            if running_configuration:
                remote_config_file_name = f'{host}_running_config.txt'
                save_config_to_file(running_configuration, remote_config_file_name)
                logging.info(f'Running configuration saved to {remote_config_file_name}')

                # 尝试加载本地基线配置进行比较
                local_config_file_name = 'baseline_config.txt' # 假设存在一个基线配置文件
                try:
                    with open(local_config_file_name, 'r') as local_config_file:
                        local_config = local_config_file.read()

                    logging.info('Comparing running configuration with local baseline...')
                    show_differences(local_config, running_configuration, 'Local Baseline', 'Running Config')

                except FileNotFoundError:
                    logging.warning(f'Local baseline configuration file ({local_config_file_name}) not found. Skipping comparison.')
                except Exception as e:
                    logging.error(f'Error reading local baseline configuration: {e}')
            else:
                logging.error('Failed to retrieve running configuration from device.')

    except Exception as e:
        logging.error(f'An error occurred during device interaction: {e}')
    finally:
        logging.info('The connection process has concluded.')

if __name__ == "__main__":
    main()
总结
通过Netmiko库自动化Cisco路由器的配置是一个强大且高效的工具。掌握其核心机制,如自动处理配置模式、正确使用send_config_set()和send_command()方法,以及利用with语句管理连接,是编写健壮自动化脚本的关键。同时,结合日志记录、错误处理、配置保存与比较等最佳实践,可以大大提高网络管理的效率和可靠性。始终确保在生产环境中运行自动化脚本前,在测试环境中进行充分的验证。
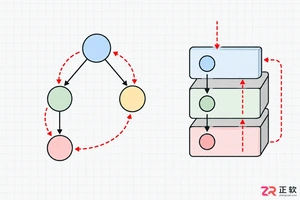
解析PHP递归函数在树形数据处理中的性能瓶颈,提供预加载数据消除I/O、使用显式栈替代深层递归的实战方案,帮助开发者在代码可读性与执行效率间做出合理取舍。
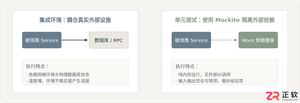
详细讲解在Java单元测试中如何使用Mockito模拟依赖对象,包括引入依赖、创建Mock、打桩返回值、行为验证以及Mock与Spy的核心差异和常见陷阱排查。

详细分析链表删除节点的时间复杂度,深入探讨单链表与双向链表在不同已知前提下的查找与删除开销,并结合完整代码与清晰图解进行对比总结。
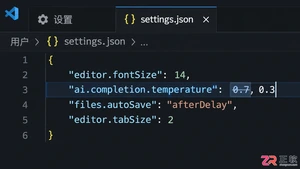
想知道如何让AI写出的代码更贴合你的习惯?本文手把手教你在VS Code中调整Codex相关模型参数,通过修改配置文件优化温度值和令牌限制,解决代码建议不准确或响应慢的问题。

通过实测展示Claude Code在终端中如何理解自然语言指令、自动修改代码文件并处理复杂编程任务,帮助开发者评估其实际辅助能力。
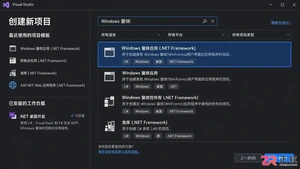
本教程详细讲解如何使用Visual Studio创建WinForms项目,通过添加按钮和标签控件并编写点击事件代码,实现一个基础的计数器功能,适合C#初学者快速上手Windows窗体应用开发。
详解Cursor编辑器中自动补全功能的开启与优化设置,涵盖Tab触发机制、上下文窗口调整及模型切换,帮助开发者解决补全延迟、干扰大等问题,提升编码流畅度。
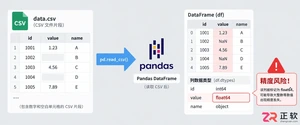
详解Pandas中数据格式转换的核心方法,包括astype强制转换、to_numeric容错处理及日期解析技巧,解决常见类型错误并提升数据处理效率。
详细介绍在Visual Studio Code中安装Chinese (Simplified)语言包的方法,包括通过扩展市场搜索、安装及自动重启切换至简体中文界面的完整步骤,帮助开发者快速将编辑器本地化。

针对Cursor安装包默认锁定C盘且无路径选择界面的问题,提供通过手动移动文件并创建目录联结(Symbolic Link)的解决方案,实现将软件安装在其他磁盘分区。




Photoshop 2026 是 Adobe 推出的专业图像处理与视觉设计软件,支持 Windows、macOS 和 iPad 等平台,广泛应用于摄影修图、电商设计、平面海报、数字绘画及视觉合成等创作场景。

Blender 是一款免费开源、跨平台的专业 3D 创作软件,集建模、动画、渲染、视频编辑与视觉合成等功能于一体,广泛应用于影视动画、游戏设计和建筑可视化等领域。软件支持 Cycles 物理渲染器与 Eevee 实时渲染引擎,并提供多边形建模、骨骼绑定、物理模拟等专业工具。Blender 兼容 Windows、macOS 和 Linux 系统,安装包轻巧、运行流畅,依托活跃的全球开发者社区持续更新,是从初学者到专业创作者都值得选择的正版 3D 创作工具。


Photoshop 2026 是 Adobe 推出的专业图像处理与视觉设计软件,支持 Windows、macOS 和 iPad 等平台,广泛应用于摄影修图、电商设计、平面海报、数字绘画及视觉合成等创作场景。
Blender 是一款免费开源、跨平台的专业 3D 创作软件,集建模、动画、渲染、视频编辑与视觉合成等功能于一体,广泛应用于影视动画、游戏设计和建筑可视化等领域。软件支持 Cycles 物理渲染器与 Eevee 实时渲染引擎,并提供多边形建模、骨骼绑定、物理模拟等专业工具。Blender 兼容 Windows、macOS 和 Linux 系统,安装包轻巧、运行流畅,依托活跃的全球开发者社区持续更新,是从初学者到专业创作者都值得选择的正版 3D 创作工具。