

Python使用pyttsx3库实现文本转语音的完整教程
pyttsx3是一个Python离线文本转语音库,无需网络和API,支持中英文及Windows、Mac、Linux跨平台使用。可灵活调节语速、音量和语音,安装后仅需三行代码即可实现语音合成,还能保存为音频文件并支持批量朗读,高效且易用。
从安装到实战,一篇搞定!支持中英文,附完整代码示例
pyttsx3 是什么
一句话总结:pyttsx3 是 Python 生态里最受欢迎的 离线文本转语音(TTS)库。不用联网、不用申请任何 API,装好就能让电脑开口说话,而且中英文都支持,Windows、Mac、Linux 通吃。
看看它的核心特点,你就知道为什么这么多人选它了:
| 特性 | 说明 |
|---|---|
| 离线运行 | 无需联网,无需API |
| 支持中文 | 完美支持中英文 |
| 跨平台 | Windows / Mac / Linux |
| 速度快 | 实时语音合成 |
| 可定制 | 语速、音量、语音均可调 |
安装步骤
方式1:pip 安装(推荐)
# 基础安装
pip install pyttsx3
# Windows 用户额外安装(必须!)
pip install pypiwin32
# 如果遇到版本问题,使用稳定版
pip install pyttsx3==2.90
方式2:虚拟环境安装(最佳实践)
# 创建虚拟环境
python -m venv tts_env
# 激活环境
# Windows:
tts_envScriptsactivate
# Mac/Linux:
source tts_env/bin/activate
# 安装
pip install pyttsx3 pypiwin32
验证安装
import pyttsx3
print(pyttsx3.__version__)  # 应输出 2.90 或更高
装好没?来,跑个最简单的例子,3 行代码就能让你电脑说话——
快速开始(3行代码)
import pyttsx3

engine = pyttsx3.init()
engine.say("Hello, 我是Python!")
engine.runAndWait()
运行后,你的电脑就会说话了! ? 是不是很酷?
核心参数详解
知道了怎么让它说话,接下来就是调教它——让声音更顺耳。核心参数其实就三个:音量、语速、语音。一个个来看。
参数1:调整音量(0.0 ~ 1.0)
import pyttsx3

engine = pyttsx3.init()

# 查看当前音量
volume = engine.getProperty('volume')
print(f"当前音量: {volume}")  # 默认 1.0

# 设置音量(0.0 = 静音,1.0 = 最大)
engine.setProperty('volume', 0.5)  # 50% 音量

engine.say("这是半音量的语音")
engine.runAndWait()
| 音量值 | 效果 |
|---|---|
| 0.0 | ? 静音 |
| 0.3 | ? 小声 |
| 0.7 | ? 正常 |
| 1.0 | ? 最大 |
参数2:调整语速(50 ~ 300)
import pyttsx3

engine = pyttsx3.init()

# 查看当前语速
rate = engine.getProperty('rate')
print(f"当前语速: {rate}")  # 默认 200

# 设置语速
engine.setProperty('rate', 150)  # 变慢
engine.say("这是慢速语音")
engine.runAndWait()

engine.setProperty('rate', 250)  # 变快
engine.say("这是快速语音")
engine.runAndWait()
| 语速值 | 效果 |
|---|---|
| 50 | ? 极慢(像树懒) |
| 150 | ? 慢速(适合教学) |
| 200 | ? 默认(正常说话) |
| 300 | ? 极快(像松鼠) |
参数3:切换语音(中英文)
import pyttsx3

engine = pyttsx3.init()

# 查看所有可用语音
voices = engine.getProperty('voices')
for i, voice in enumerate(voices):
    print(f"[{i}] {voice.name}")
    print(f"    ID: {voice.id}n")

# 切换到中文语音(通常索引为 1)
engine.setProperty('voice', voices[1].id)
engine.say("你好,这是中文语音")
engine.runAndWait()

# 切换到英文语音(通常索引为 0)
engine.setProperty('voice', voices[0].id)
engine.say("Hello, this is English")
engine.runAndWait()
输出示例(Windows):
[0] Microsoft Da vid
ID: HKEY_LOCAL_MACHINESOFTWAREMicrosoftSpeechVoicesTokensTTS_MS_EN-US_DA VID_11.0
[1] Microsoft Huihui
ID: HKEY_LOCAL_MACHINESOFTWAREMicrosoftSpeechVoicesTokensTTS_MS_ZH-CN_HUIHUI_11.0
注意:如果你发现没有中文语音,别急——后面常见错误部分有解决方案。
进阶功能
光能说话还不够?那就来点高级操作:把语音保存成文件、实现暂停续播、批量朗读……统统安排上。
功能1:保存为音频文件
import pyttsx3

engine = pyttsx3.init()

# 保存为 MP3 文件
engine.sa ve_to_file("你好,这是保存的音频", "output.mp3")
engine.runAndWait()

print("✅ 音频已保存到 output.mp3")
功能2:暂停和继续
import pyttsx3

engine = pyttsx3.init()

engine.say("这是第一句")
engine.runAndWait()

engine.say("这是第二句")
engine.runAndWait()

# 暂停
engine.stop()

# 继续(需要重新初始化)
engine = pyttsx3.init()
engine.say("这是第三句")
engine.runAndWait()
需要说明的是:pyttsx3 的暂停/继续能力比较有限,实际使用中更常见的策略是分段朗读。
功能3:批量朗读文本
import pyttsx3

def read_text(text, lang='cn'):
    engine = pyttsx3.init()

    voices = engine.getProperty('voices')
    engine.setProperty('voice', voices[1].id if lang == 'cn' else voices[0].id)
    engine.setProperty('rate', 150)

    engine.say(text)
    engine.runAndWait()

# 批量朗读
texts = [
    "第一句:Python真好用",
    "第二句:文本转语音太酷了",
    "第三句:Hello World"
]

for text in texts:
    read_text(text)
完整实战案例
理论知识够了?直接上三个真实场景的完整代码,copy 过去就能用。
案例1:智能语音助手类
import pyttsx3

class VoiceAssistant:
    def __init__(self):
        self.engine = pyttsx3.init()
        self.voices = self.engine.getProperty('voices')

    def speak(self, text, lang='cn', rate=150, volume=0.8):
        """通用朗读方法"""
        # 设置语音
        voice_id = self.voices[1].id if lang == 'cn' else self.voices[0].id
        self.engine.setProperty('voice', voice_id)

        # 设置参数
        self.engine.setProperty('rate', rate)
        self.engine.setProperty('volume', volume)

        # 朗读
        self.engine.say(text)
        self.engine.runAndWait()

    def speak_cn(self, text):
        """中文朗读"""
        self.speak(text, lang='cn')

    def speak_en(self, text):
        """英文朗读"""
        self.speak(text, lang='en')

    def sa ve_audio(self, text, filename):
        """保存音频"""
        self.engine.sa ve_to_file(text, filename)
        self.engine.runAndWait()

# ? 使用示例
assistant = VoiceAssistant()

assistant.speak_cn("你好,我是你的智能语音助手!")
assistant.speak_en("Hello, I am your voice assistant!")
assistant.sa ve_audio("测试保存", "test.mp3")
案例2:阅读器(朗读文本文件)
import pyttsx3

def read_file(filepath, lang='cn'):
    """朗读文本文件"""
    try:
        with open(filepath, 'r', encoding='utf-8') as f:
            text = f.read()

        engine = pyttsx3.init()
        voices = engine.getProperty('voices')

        voice_id = voices[1].id if lang == 'cn' else voices[0].id
        engine.setProperty('voice', voice_id)
        engine.setProperty('rate', 150)

        engine.say(text)
        engine.runAndWait()

        print(f"✅ 已朗读文件: {filepath}")

    except FileNotFoundError:
        print(f"❌ 文件不存在: {filepath}")

# 使用
read_file("article.txt", lang='cn')
案例3:语音闹钟
import pyttsx3
import time

def voice_alarm(hour, minute, message):
    """语音闹钟"""
    engine = pyttsx3.init()
    engine.setProperty('rate', 180)
    engine.setProperty('volume', 1.0)

    while True:
        now = time.localtime()
        if now.tm_hour == hour and now.tm_min == minute:
            engine.say(f"闹钟响了!{message}")
            engine.runAndWait()
            break
        time.sleep(30)  # 每30秒检查一次

# 设置早上7:30的闹钟
voice_alarm(7, 30, "起床啦!新的一天开始了!")
常见错误及解决方案
新手最容易踩的坑,这里一次性列出来,省得你到处搜。
错误1:SyntaxError: invalid syntax(海象运算符)
原因:Python 版本 < 3.8
解决:
pip install pyttsx3==2.90
错误2:_ctypes.COMError: (-2147200966, ...)
原因:找不到可用语音
解决:
import pyttsx3

engine = pyttsx3.init()

# ? 关键:手动设置语音
voices = engine.getProperty('voices')
engine.setProperty('voice', voices[0].id)

engine.say("测试成功")
engine.runAndWait()
错误3:KeyError: None
原因:驱动初始化失败
解决:
pip uninstall pyttsx3 -y
pip install pyttsx3==2.90
pip install pypiwin32
错误4:没有中文语音
解决:
Win + I→ 时间和语言 → 语音- 点击 “添加语音”
- 搜索 “Chinese” 并安装
- 重启电脑
总结速查表
最后一张表,把最常用的操作整理好了,以后直接拿来用。
| 操作 | 代码 |
|---|---|
| 初始化 | engine = pyttsx3.init() |
| 说话 | engine.say("文本") |
| 执行 | engine.runAndWait() |
| 语速 | engine.setProperty('rate', 150) |
| 音量 | engine.setProperty('volume', 0.8) |
| 切换语音 | engine.setProperty('voice', voices[0].id) |
| 保存文件 | engine.sa ve_to_file("文本", "file.mp3") |
| 查看语音 | voices = engine.getProperty('voices') |
延伸推荐
如果 pyttsx3 满足不了你,还有这些库可以试试,各有千秋:
| 库 | 特点 | 适用场景 |
|---|---|---|
| pyttsx3 | 离线、可定制 | 桌面应用、嵌入式 |
| gTTS | 联网、音质好 | 在线服务、API |
| edge-tts | 微软语音、自然 | 高质量语音生成 |
| pyttsx4 | pyttsx3 升级版 | 未来替代方案 |
详解 CodeKit 在 macOS 下的安装步骤、项目导入方法、Sass与JavaScript编译设置及浏览器自动刷新功能,助您快速搭建高效的前端开发环境。
详解Windows环境下安装OpenAI Codex CLI的步骤,包括WSL环境检查、Node.js/npm配置、npm全局安装命令及首次启动验证,适合开发者快速上手。
学习如何配置 NativeRest REST API 客户端。涵盖 Windows/macOS/Linux 安装后的工作区创建、环境变量管理、请求编辑及响应查看步骤,帮助开发者快速完成基础环境搭建与连通性测试。
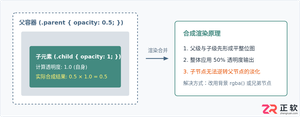
深入解析CSS中设置透明度的核心属性opacity,剖析子元素继承、事件穿透、层叠上下文等关键注意事项,并提供与rgba、hsla的实用选型对比。
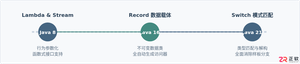
本文通过具体的旧版与新版代码对比,详细剖析Java 8引入的Lambda表达式、Java 14/16引入的Record类,以及Java 12至21逐步演进完善的Switch表达式与模式匹配,展示代码简化路径与避坑要点。
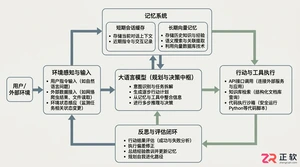
系统梳理AI智能体开发培训的核心知识模块、技术栈选型与典型实战项目,解析低代码平台与纯代码框架的差异,提供从零构建可落地智能体的完整学习与实施路径。
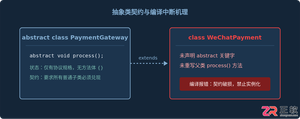
针对Java开发中常见的“子类未实现抽象方法”编译错误,深入分析报错原因,提供重写实现、声明抽象子类两种标准修复路径,并总结参数签名、访问修饰符等典型避坑要点。
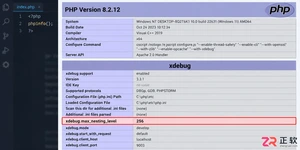
遇到PHP递归报错时,不要盲目调大max_nesting_level。本文教你区分Xdebug限制、内存耗尽和正则递归错误,提供代码级的终止条件优化与迭代替代方案,彻底解决栈溢出问题。
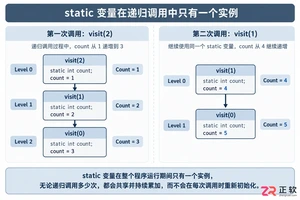
本文分析PHP递归中static变量导致的状态污染及引用传递引发的共享数据修改问题。提供具体的代码复现、缓存键设计建议及调试打印技巧,帮助开发者避免隐蔽的逻辑错误。




Photoshop 2026 是 Adobe 推出的专业图像处理与视觉设计软件,支持 Windows、macOS 和 iPad 等平台,广泛应用于摄影修图、电商设计、平面海报、数字绘画及视觉合成等创作场景。

Blender 是一款免费开源、跨平台的专业 3D 创作软件,集建模、动画、渲染、视频编辑与视觉合成等功能于一体,广泛应用于影视动画、游戏设计和建筑可视化等领域。软件支持 Cycles 物理渲染器与 Eevee 实时渲染引擎,并提供多边形建模、骨骼绑定、物理模拟等专业工具。Blender 兼容 Windows、macOS 和 Linux 系统,安装包轻巧、运行流畅,依托活跃的全球开发者社区持续更新,是从初学者到专业创作者都值得选择的正版 3D 创作工具。


Photoshop 2026 是 Adobe 推出的专业图像处理与视觉设计软件,支持 Windows、macOS 和 iPad 等平台,广泛应用于摄影修图、电商设计、平面海报、数字绘画及视觉合成等创作场景。
Blender 是一款免费开源、跨平台的专业 3D 创作软件,集建模、动画、渲染、视频编辑与视觉合成等功能于一体,广泛应用于影视动画、游戏设计和建筑可视化等领域。软件支持 Cycles 物理渲染器与 Eevee 实时渲染引擎,并提供多边形建模、骨骼绑定、物理模拟等专业工具。Blender 兼容 Windows、macOS 和 Linux 系统,安装包轻巧、运行流畅,依托活跃的全球开发者社区持续更新,是从初学者到专业创作者都值得选择的正版 3D 创作工具。