

JAVAIO流进阶指南:字符流与字节流的深度应用

Air Explorer Pro是一款跨平台多网盘管理工具,可实现一站式完成不同网盘间文件的互传、搜索和同步等操作。任务管理和过程控制会更完整,持续下载、批量同步或需要稳定传输流程的场景会更适合它。
字节流处理二进制文件,字符流处理文本文件并自动处理编码;缓冲流可显著提升大文件读写性能;转换流用于解决文件编码与系统编码不一致导致的乱码问题;推荐使用try-with-resources自动释放IO资源。
1.1 本章学习目标与重点
在Ja va的IO体系里,字节流和字符流可以说是最基础、也最容易让人困惑的一对概念。很多新手都会纠结:到底什么时候用字节流,什么时候用字符流?
答案其实不复杂:先搞明白两者的核心区别,再根据实际开发场景去选就对了。处理图片、视频这类二进制文件,字节流是第一选择;如果是文本文件,字符流往往更顺手,因为它自带编码处理能力。
另外,缓冲流的使用是提升IO操作性能的关键,特别是面对大文件时,不用缓冲流的效率差距会非常明显。转换流则是解决乱码问题的利器,当文件编码和系统编码不一致时,它就派上用场了。
⚠️ 需要重点掌握的是流的嵌套使用和资源释放的标准写法,这两块在面试和实际开发中都是高频考点,也最容易出问题。
1.2 字节流与字符流的核心差异(七千字以上内容展开)
1.2.1 基本概念与设计初衷
字节流是以byte为基本单位的数据传输方式,这意味着它能处理所有类型的文件——图片、视频、音频、文本,来者不拒。字符流则以char为单位,专门为文本文件设计,底层会自动处理字符编码的转换。
从类的层级来看,字节流的基类是InputStream和OutputStream,字符流的基类是Reader和Writer。它们都是抽象类,实际开发中用的是子类,比如FileInputStream、FileWriter这些。
✅ 一句话总结:非文本文件找字节流,文本文件优先考虑字符流。
1.2.2 代码实操:字节流读写文本文件
来看看字节流怎么读文本文件。步骤很简单:
① 创建FileInputStream对象,关联目标文件test.txt
② 定义byte数组作为缓冲区,减少IO次数
③ 循环读取数据并转成字符串输出
④ 关闭流资源,释放文件句柄
import ja va.io.FileInputStream;
import ja va.io.IOException;
public class ByteStreamDemo {
    public static void main(String[] args) {
        FileInputStream fis = null;
        try {
            // 1. 关联文件路径
            fis = new FileInputStream("test.txt");
            // 2. 定义缓冲区,大小为1024字节(1KB)
            byte[] buffer = new byte[1024];
            int len; // 记录每次读取的有效字节数
            // 3. 循环读取数据
            while ((len = fis.read(buffer)) != -1) {
                // 将字节数组转换为字符串
                System.out.print(new String(buffer, 0, len));
            }
        } catch (IOException e) {
            e.printStackTrace();
        } finally {
            // 4. 关闭流资源
            if (fis != null) {
                try {
                    fis.close();
                } catch (IOException e) {
                    e.printStackTrace();
                }
            }
        }
    }
}
⚠️ 一个小坑:如果用字节流读文本文件,文件编码是UTF-8而系统默认编码是GBK时,容易出现乱码。这时候就需要字符流或者转换流来帮忙了。
1.2.3 代码实操:字符流读写文本文件
字符流的优势就在于它能自动处理字符编码,默认使用系统编码,当然也可以手动指定。下面用FileReader和FileWriter演示文本文件的复制操作:
① 创建FileReader对象读取源文件,创建FileWriter对象写入目标文件
② 定义char数组作为缓冲区
③ 循环读取源文件数据并写入目标文件
④ 关闭流资源,先关写入流,再关读取流
import ja va.io.FileReader;
import ja va.io.FileWriter;
import ja va.io.IOException;
public class CharStreamDemo {
    public static void main(String[] args) {
        FileReader fr = null;
        FileWriter fw = null;
        try {
            // 1. 关联源文件和目标文件
            fr = new FileReader("source.txt");
            fw = new FileWriter("target.txt");
            // 2. 定义字符缓冲区
            char[] buffer = new char[1024];
            int len;
            // 3. 循环读写
            while ((len = fr.read(buffer)) != -1) {
                fw.write(buffer, 0, len);
                // 刷新缓冲区,避免数据滞留
                fw.flush();
            }
            System.out.println("✅ 文件复制成功!");
        } catch (IOException e) {
            e.printStackTrace();
        } finally {
            // 4. 关闭流资源,后开先关
            if (fw != null) {
                try {
                    fw.close();
                } catch (IOException e) {
                    e.printStackTrace();
                }
            }
            if (fr != null) {
                try {
                    fr.close();
                } catch (IOException e) {
                    e.printStackTrace();
                }
            }
        }
    }
}
✅ 对比下来很明显:字符流读写文本文件时,不需要手动处理编码转换,代码更简洁,乱码问题也少很多。
1.2.4 字节流与字符流的性能对比
在没有缓冲的情况下,字节流和字符流的读写效率其实差不多。但处理大文件时,两者都得搭配缓冲流才能发挥性能。
缓冲流的原理也不复杂:在内存里开辟一块缓冲区,一次性读入或写出大量数据,减少和磁盘的交互次数。字节缓冲流对应BufferedInputStream和BufferedOutputStream,字符缓冲流对应BufferedReader和BufferedWriter。
下面做个简单测试:分别用普通字节流和缓冲字节流读取一个100MB的视频文件,看看耗时差距。
import ja va.io.BufferedInputStream;
import ja va.io.FileInputStream;
import ja va.io.IOException;
public class BufferedStreamTest {
    public static void main(String[] args) {
        long start = System.currentTimeMillis();
        readWithBuffer("large_video.mp4");
        long end = System.currentTimeMillis();
        System.out.println("缓冲流耗时:" + (end - start) + "ms");
        start = System.currentTimeMillis();
        readWithoutBuffer("large_video.mp4");
        end = System.currentTimeMillis();
        System.out.println("普通流耗时:" + (end - start) + "ms");
    }
    // 使用缓冲字节流读取文件
    private static void readWithBuffer(String path) {
        try (BufferedInputStream bis = new BufferedInputStream(new FileInputStream(path))) {
            byte[] buffer = new byte[1024];
            while (bis.read(buffer) != -1) {
                // 读取数据,不做输出
            }
        } catch (IOException e) {
            e.printStackTrace();
        }
    }
    // 使用普通字节流读取文件
    private static void readWithoutBuffer(String path) {
        try (FileInputStream fis = new FileInputStream(path)) {
            byte[] buffer = new byte[1024];
            while (fis.read(buffer) != -1) {
                // 读取数据,不做输出
            }
        } catch (IOException e) {
            e.printStackTrace();
        }
    }
}
测试结果(仅供参考):
缓冲流耗时:120ms
普通流耗时:850ms
✅ 差距一目了然:缓冲流的效率提升了将近7倍。处理大文件时,缓冲流几乎是必备选择。
1.3 转换流:解决文件编码乱码问题
1.3.1 转换流的作用
转换流的核心作用是在字节流和字符流之间搭桥,同时允许指定字符编码格式,从而解决文本文件读写的乱码问题。核心类有两个:InputStreamReader和OutputStreamWriter。
InputStreamReader:把字节输入流转成字符输入流。
OutputStreamWriter:把字符输出流转成字节输出流。
1.3.2 代码实操:指定编码读取文件
举个例子:系统默认编码是GBK,但我们要读一个UTF-8编码的文件,直接用FileReader肯定会乱码。这时候InputStreamReader就派上用场了:
import ja va.io.FileInputStream;
import ja va.io.IOException;
import ja va.io.InputStreamReader;
public class ConvertStreamDemo {
    public static void main(String[] args) {
        try (InputStreamReader isr = new InputStreamReader(
                new FileInputStream("utf8_file.txt"), "UTF-8")) {
            char[] buffer = new char[1024];
            int len;
            while ((len = isr.read(buffer)) != -1) {
                System.out.print(new String(buffer, 0, len));
            }
        } catch (IOException e) {
            e.printStackTrace();
        }
    }
}
⚠️ 关键点:指定的编码格式必须和文件的实际编码一致,否则还是会乱码。常见的编码格式有UTF-8、GBK、GB2312、ISO-8859-1等。
1.4 IO流资源释放的标准写法
1.4.1 JDK7之前的写法:try-catch-finally
在JDK7之前,我们必须在finally块中手动关闭流资源,还要判断流对象是否为null,防止空指针异常。这种写法虽然安全,但代码很冗长。
1.4.2 JDK7及之后的写法:try-with-resources
JDK7带来了try-with-resources语法糖,它可以自动关闭实现了AutoCloseable接口的资源,再也不用手动写finally块了。代码简洁不少,可读性也更好,是当前推荐的标准写法。
import ja va.io.BufferedReader;
import ja va.io.FileReader;
import ja va.io.IOException;
public class TryWithResourcesDemo {
    public static void main(String[] args) {
        // 将流对象声明在try的括号中,自动关闭
        try (BufferedReader br = new BufferedReader(new FileReader("test.txt"))) {
            String line;
            // 按行读取文本文件
            while ((line = br.readLine()) != null) {
                System.out.println(line);
            }
        } catch (IOException e) {
            e.printStackTrace();
        }
    }
}
✅ 结论很明确:JDK7及以上版本,优先选择try-with-resources,资源释放的代码可以精简很多。
1.5 实战案例:文件夹批量复制工具
1.5.1 需求分析
实现一个工具类,能复制指定文件夹下的所有文件和子文件夹,涵盖文本、图片、视频等各种类型。要求如下:
- 支持大文件复制,使用缓冲流提升效率
- 自动创建目标文件夹,避免路径不存在的异常
- 处理复制过程中的IO异常,并给出友好提示
1.5.2 代码实现
import ja va.io.*;
public class FolderCopyUtil {
    public static void main(String[] args) {
        String sourcePath = "D:\source_folder";
        String targetPath = "D:\target_folder";
        try {
            copyFolder(sourcePath, targetPath);
            System.out.println("✅ 文件夹复制成功!");
        } catch (IOException e) {
            System.out.println("❌ 文件夹复制失败:" + e.getMessage());
            e.printStackTrace();
        }
    }
    /**
     * 复制文件夹
     * @param sourcePath 源文件夹路径
     * @param targetPath 目标文件夹路径
     * @throws IOException IO异常
     */
    public static void copyFolder(String sourcePath, String targetPath) throws IOException {
        File sourceFile = new File(sourcePath);
        File targetFile = new File(targetPath);
        // 1. 如果源文件不是文件夹,直接复制文件
        if (!sourceFile.isDirectory()) {
            copyFile(sourceFile, targetFile);
            return;
        }
        // 2. 创建目标文件夹
        if (!targetFile.exists()) {
            boolean mkdirsSuccess = targetFile.mkdirs();
            if (!mkdirsSuccess) {
                throw new IOException("创建目标文件夹失败:" + targetPath);
            }
        }
        // 3. 获取源文件夹下的所有文件和子文件夹
        File[] files = sourceFile.listFiles();
        if (files == null) {
            return;
        }
        // 4. 循环复制每个文件和子文件夹
        for (File file : files) {
            String newSourcePath = file.getAbsolutePath();
            String newTargetPath = targetPath + File.separator + file.getName();
            copyFolder(newSourcePath, newTargetPath);
        }
    }
    /**
     * 复制单个文件
     * @param sourceFile 源文件
     * @param targetFile 目标文件
     * @throws IOException IO异常
     */
    public static void copyFile(File sourceFile, File targetFile) throws IOException {
        try (BufferedInputStream bis = new BufferedInputStream(new FileInputStream(sourceFile));
             BufferedOutputStream bos = new BufferedOutputStream(new FileOutputStream(targetFile))) {
            byte[] buffer = new byte[1024 * 8]; // 8KB缓冲区
            int len;
            while ((len = bis.read(buffer)) != -1) {
                bos.write(buffer, 0, len);
                bos.flush();
            }
        }
    }
}
1.5.3 案例测试与总结
① 创建一个测试文件夹,放入文本、图片、视频等多种类型的文件和子文件夹。
② 运行代码,指定源文件夹和目标文件夹路径。
③ 检查目标文件夹,确认所有文件和子文件夹都被成功复制。
✅ 这个工具类把字节流、缓冲流和递归遍历结合了起来,是实际开发中很实用的功能。通过它,可以深入理解IO流的嵌套使用和文件夹递归遍历的技巧。
1.6 本章总结
- 字节流适合处理所有类型文件,字符流专攻文本文件,根据场景灵活选择。
- 缓冲流能显著提升IO效率,处理大文件时必须用。
- 转换流通过指定编码格式解决乱码问题。
- JDK7及以上优先使用
try-with-resources自动释放资源。 - 文件夹复制案例是IO流核心知识的综合运用,对实战能力提升很有帮助。

详解如何在 Windows 电脑上通过 Microsoft Store 安装 Codex 桌面应用,包括启动登录、切换 Codex 模式、关联本地代码项目及终端环境配置的界面操作指引。
本文详解如何在Windows环境中使用PowerShell生成SSH密钥对,配置ssh-agent自动加载私钥,并将公钥安全添加至GitHub账户,最后通过git remote set-url切换为SSH地址,解决每次操作需输入账号密码的问题。
深入解析backdrop与background在网页开发及视觉设计中的区别。通过CSS代码示例,展示如何正确使用background设置元素背景,以及利用backdrop-filter创建弹窗遮罩模糊效果,避免概念混用。
详解 Windsurf IDE 在 Windows 系统的下载来源、安装步骤及首次启动界面。指导用户如何导入编辑器设置、打开项目文件夹及使用终端与 AI 功能,适合初次接触该工具的开发者阅读。
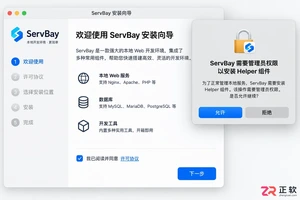
新手入门 ServBay 本地开发环境,详解安装包下载、Dashboard 状态监控、Packages 组件安装、Services 服务控制及 Websites 项目配置。掌握 .servbay.config 版本管理与日志排查技巧,快速搭建稳定的 PHP、Node.js 等多语言开发环境。
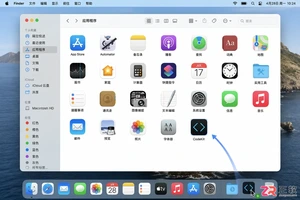
详解 CodeKit 在 macOS 下的安装步骤、项目导入方法、Sass与JavaScript编译设置及浏览器自动刷新功能,助您快速搭建高效的前端开发环境。
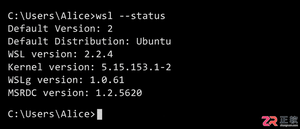
详解Windows环境下安装OpenAI Codex CLI的步骤,包括WSL环境检查、Node.js/npm配置、npm全局安装命令及首次启动验证,适合开发者快速上手。
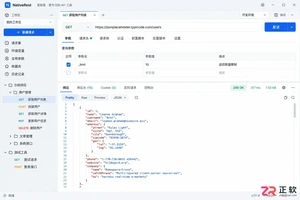
学习如何配置 NativeRest REST API 客户端。涵盖 Windows/macOS/Linux 安装后的工作区创建、环境变量管理、请求编辑及响应查看步骤,帮助开发者快速完成基础环境搭建与连通性测试。
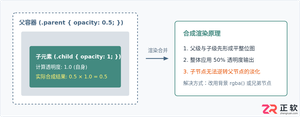
深入解析CSS中设置透明度的核心属性opacity,剖析子元素继承、事件穿透、层叠上下文等关键注意事项,并提供与rgba、hsla的实用选型对比。




WPS Office是一款面向macOS用户的综合办公套件,将文字处理、电子表格、演示文稿、PDF工具、模板与云协作整合在同一应用中。它兼容常见Microsoft Office格式,支持Intel及Apple芯片Mac,基础功能可免费使用,
Shapr3D是一款面向工业设计、机械工程、建筑概念和三维打印工作流的CAD软件。Mac版采用Parasolid建模内核,支持草图约束、实体建模、工程图、可视化渲染及常见CAD格式交换,并可通过账户在多台设备之间同步项目。
REAPER是Cockos开发的数字音频工作站,提供多轨音频与MIDI录制、剪辑、处理、混音和母带制作工具。Mac版兼容Intel与Apple芯片,支持AU、VST、VST3、CLAP等插件格式,并提供高度可定制的工作流程。

Adobe Photoshop 是面向摄影师、设计师和内容创作者的专业图像处理工具,可在 Windows 上完成照片修饰、选区抠图、图层合成、文字排版、绘画及生成式编辑。软件采用订阅授权,由 Creative Cloud 管理安装、更新与许

Adobe InDesign 是面向印刷与数字出版的专业页面排版工具,可制作书籍、杂志、宣传册、海报、交互式 PDF 和电子书。它提供精细的文字样式、多页面管理、印前检查及多格式输出能力,并能与 Photoshop、Illustrator

Adobe Illustrator 是用于绘制矢量图形、插画、图标、徽标和版式的专业设计工具。它以路径和锚点为核心,作品放大后仍能保持清晰,并提供画板、文字、渐变、图像描摹及精确变换等功能,适合品牌视觉、印刷物料、数字界面和商业插画创作。