

Python自动化处理之批量图片水印、压缩、格式转换
利用Python的Pillow库可批量处理图片,包括添加文字或图片水印、压缩至指定质量与尺寸、转换为WebP格式、生成缩略图,并能将各步骤组合成自动化流水线,高效完成日常图片处理任务。
日常工作中,批量处理图片几乎是个绕不开的活儿——给产品图打水印、把图片压缩到适合上传的大小、批量换个格式。要是靠手动一张张来,几百张图够折腾一整天。但用 Python 的 Pillow 库,也就是几秒钟的事,几百张图“唰”一下搞定。
一、批量添加水印
先聊聊最常用的水印功能。不管是给原创图片打上版权声明,还是给公司产品图加个品牌标识,都能用代码一次性完成。
1. 文字水印
文字水印的实现其实不复杂。核心思路是生成一个半透明文字图层,然后叠加到原图上。代码里的WatermarkProcessor类封装了整个流程,你只需要指定输入和输出目录就行。
from PIL import Image, ImageDraw, ImageFont
import os

class WatermarkProcessor:
    """批量水印处理器"""

    def __init__(self, input_dir, output_dir):
        self.input_dir = input_dir
        self.output_dir = output_dir
        os.makedirs(output_dir, exist_ok=True)

    def add_text_watermark(self, text="版权所有", opacity=80):
        """添加文字水印"""
        for f in os.listdir(self.input_dir):
            if not f.lower().endswith((".jpg", ".jpeg", ".png")):
                continue

            img = Image.open(os.path.join(self.input_dir, f)).convert("RGBA")

            # 创建水印层
            watermark = Image.new("RGBA", img.size, (0, 0, 0, 0))
            draw = ImageDraw.Draw(watermark)

            # 字体大小 = 图片宽度的 1/20
            font_size = max(img.width // 20, 20)
            try:
                font = ImageFont.truetype("C:/Windows/Fonts/msyh.ttc", font_size)
            except:
                font = ImageFont.load_default()

            # 计算文字尺寸
            bbox = draw.textbbox((0, 0), text, font=font)
            text_w, text_h = bbox[2] - bbox[0], bbox[3] - bbox[1]

            # 在右下角添加
            margin = 20
            x = img.width - text_w - margin
            y = img.height - text_h - margin

            # 绘制半透明文字
            draw.text((x, y), text, font=font, fill=(255, 255, 255, opacity))

            # 合并原图和水印
            result = Image.alpha_composite(img, watermark).convert("RGB")

            out_path = os.path.join(self.output_dir, f"wm_{f}")
            result.sa ve(out_path, quality=95)
            print(f"已添加水印: {f}")

    def add_image_watermark(self, watermark_file, position="右下角"):
        """添加图片水印(如 Logo)"""
        wm = Image.open(watermark_file).convert("RGBA")

        for f in os.listdir(self.input_dir):
            if not f.lower().endswith((".jpg", ".jpeg", ".png")):
                continue

            img = Image.open(os.path.join(self.input_dir, f)).convert("RGBA")

            # 水印缩放为图片宽度的 1/5
            wm_resized = wm.resize((img.width // 5, int(wm.height * img.width // 5 / wm.width)),
                                    Image.LANCZOS)

            # 定位
            margin = 20
            if position == "右下角":
                x = img.width - wm_resized.width - margin
                y = img.height - wm_resized.height - margin
            elif position == "左上角":
                x = y = margin
            elif position == "居中":
                x = (img.width - wm_resized.width) // 2
                y = (img.height - wm_resized.height) // 2

            # 粘贴水印
            img.paste(wm_resized, (x, y), wm_resized)

            out_path = os.path.join(self.output_dir, f"logo_{f}")
            img.convert("RGB").sa ve(out_path, quality=95)
            print(f"已添加 Logo: {f}")

# 使用
processor = WatermarkProcessor("原始图片", "加水印")
processor.add_text_watermark("张老师技术栈")
这里有个小细节值得注意:水印文字的透明度(opacity参数)建议不要设得太高,否则会遮挡原图内容。通常60-80比较合适,既能看清版权信息,又不会喧宾夺主。
二、批量压缩图片
说到图片压缩,很多人第一反应是“质量调低就行了”。但实际上,体积和画质之间如何平衡,得看具体场景。
1. 压缩到指定质量
下面这个batch_compress函数,可以一次性处理整个目录的图片。除了设置quality参数,还可以限制最大宽度——对网页端展示来说,一个1920px的图往往就够了。
def batch_compress(input_dir, output_dir, quality=60, max_width=1920):
    """批量压缩图片"""
    os.makedirs(output_dir, exist_ok=True)

    for f in os.listdir(input_dir):
        if not f.lower().endswith((".jpg", ".jpeg", ".png")):
            continue

        filepath = os.path.join(input_dir, f)
        img = Image.open(filepath)

        # 限制最大宽度
        if img.width > max_width:
            ratio = max_width / img.width
            new_size = (max_width, int(img.height * ratio))
            img = img.resize(new_size, Image.LANCZOS)

        # 保存(quality 越低文件越小)
        out_path = os.path.join(output_dir, f"compressed_{f}")
        img.sa ve(out_path, quality=quality, optimize=True)

        original_size = os.path.getsize(filepath)
        compressed_size = os.path.getsize(out_path)
        ratio = (1 - compressed_size / original_size) * 100
        print(f"{f}: {original_size//1024}KB → {compressed_size//1024}KB (压缩 {ratio:.0f}%)")

# 使用
batch_compress("产品图片", "压缩后", quality=60, max_width=1200)
从输出信息里能看到每次压缩的比例,方便你根据效果调整参数。
2. 批量转 WebP 格式(更小的体积)
WebP 格式的好处是体积比 JPG 小很多,但画质几乎无损。如果你的目标平台支持 WebP(现在主流浏览器基本都支持了),那用它来替代 JPG 是降低带宽成本的利器。
def convert_to_webp(input_dir, output_dir, quality=80):
    """批量转换为 WebP 格式"""
    os.makedirs(output_dir, exist_ok=True)

    for f in os.listdir(input_dir):
        if not f.lower().endswith((".jpg", ".jpeg", ".png")):
            continue

        img = Image.open(os.path.join(input_dir, f))
        out_name = os.path.splitext(f)[0] + ".webp"
        out_path = os.path.join(output_dir, out_name)

        img.sa ve(out_path, "webp", quality=quality)

        original_size = os.path.getsize(os.path.join(input_dir, f))
        webp_size = os.path.getsize(out_path)
        print(f"{f}: {original_size//1024}KB → webp({webp_size//1024}KB)")
三、批量格式转换
有时候从设计部门拿到的图是.bmp或者.webp,但项目需要的是.png。一个脚本就能解决所有格式统一的问题。
def batch_convert_format(input_dir, output_dir, target_format="png"):
    """批量转换图片格式"""
    os.makedirs(output_dir, exist_ok=True)
    count = 0

    for f in os.listdir(input_dir):
        name, ext = os.path.splitext(f)
        if ext.lower() not in (".jpg", ".jpeg", ".png", ".bmp", ".webp"):
            continue

        try:
            img = Image.open(os.path.join(input_dir, f))
            out_path = os.path.join(output_dir, f"{name}.{target_format}")
            img.sa ve(out_path)
            count += 1
        except Exception as e:
            print(f"转换失败 {f}: {e}")

    print(f"已完成 {count} 张图片 → {target_format} 格式")
四、批量创建缩略图
缩略图是列表页、首页等场景的刚需。不需要每张图都加载原尺寸,一张300x300的缩略图就能提供足够的信息量。Pillow 自带的thumbnail方法很聪明,它会保持原图比例,不会把图片拉伸变形。
def batch_create_thumbnails(input_dir, output_dir, size=(300, 300)):
    """批量创建缩略图"""
    os.makedirs(output_dir, exist_ok=True)

    for f in os.listdir(input_dir):
        if not f.lower().endswith((".jpg", ".jpeg", ".png")):
            continue

        img = Image.open(os.path.join(input_dir, f))
        img.thumbnail(size, Image.LANCZOS)

        out_path = os.path.join(output_dir, f"thumb_{f}")
        img.sa ve(out_path, quality=85)

    print(f"缩略图已生成,尺寸: {size[0]}×{size[1]}")
五、自动化工作流
如果只做单个操作,那还算不上“批量处理”。真正的高效,是把这些步骤串成一个流水线。比如商品图片的处理流程通常会是:先加水印 → 压缩 → 生成缩略图 → 转成 WebP。每个步骤的输出目录相互独立,方便检查中间结果。
def product_image_pipeline(input_dir, output_base):
    """商品图片处理流水线"""
    # 1. 创建输出目录
    steps = ["水印", "压缩", "缩略图", "WebP"]
    dirs = {s: os.path.join(output_base, s) for s in steps}
    for d in dirs.values():
        os.makedirs(d, exist_ok=True)

    # 2. 批量加水印
    print("步骤 1/4: 添加水印...")
    wm = WatermarkProcessor(input_dir, dirs["水印"])
    wm.add_text_watermark("版权所有", opacity=60)

    # 3. 批量压缩
    print("步骤 2/4: 压缩图片...")
    batch_compress(dirs["水印"], dirs["压缩"], quality=65)

    # 4. 创建缩略图
    print("步骤 3/4: 生成缩略图...")
    batch_create_thumbnails(dirs["水印"], dirs["缩略图"], (300, 300))

    # 5. 转 WebP
    print("步骤 4/4: 转换 WebP...")
    convert_to_webp(dirs["压缩"], dirs["WebP"])

    print(f"n全部完成!输出目录: {output_base}")

# 使用
product_image_pipeline("原始图片", "成品输出")
这样做的好处是:一旦流水线搭建好,往后每次只要把原始图片丢进输入目录,跑一下脚本,所有输出就自动分类保存了。
六、不同场景的压缩建议
很多人在压缩图片时犯的一个错误是“一刀切”。实际上,不同用途的图片对画质和体积的要求完全不同。这里整理了一份参考表,直接照着调参数就行。
| 用途 | 格式 | 质量 | 最大宽 | 说明 |
|---|---|---|---|---|
| 微信分享 | JPG | 80% | 1080 | 压缩比高,加载快 |
| 商品详情页 | WebP | 85% | 1200 | 体积比 JPG 小 30% |
| 缩略图 | JPG | 60% | 300 | 列表页快速展示 |
| 打印存档 | PNG | 95% | 原尺寸 | 无损保存 |
| 朋友圈 | JPG | 85% | 1440 | 画质和体积的平衡 |
七、处理速度对比
如果你的图片数量动辄上千,单线程处理可能有点慢。这时候可以考虑多线程加速。下面这个简单的基准对比,能让你直观看到两者差距。
import time

def benchmark():
    """对比不同处理方式的速度"""
    input_dir = "测试图片"
    files = [f for f in os.listdir(input_dir) if f.endswith(".jpg")]

    # 单线程
    start = time.time()
    for f in files:
        img = Image.open(os.path.join(input_dir, f))
        img.thumbnail((800, 800))
    print(f"单线程: {time.time() - start:.1f}s")

    # 多线程
    from concurrent.futures import ThreadPoolExecutor
    start = time.time()
    with ThreadPoolExecutor(max_workers=8) as executor:
        def process(f):
            img = Image.open(os.path.join(input_dir, f))
            img.thumbnail((800, 800))
        executor.map(process, files)
    print(f"多线程: {time.time() - start:.1f}s")
通常情况下,多线程能节省50%以上的时间。当然,max_workers可以根据你机器的CPU核心数适当调整。
八、完整工具类
最后,把前面所有功能整合到一个ImageBatchProcessor类中。这样平时用起来就更顺手了,只需要定义好操作链,一句代码就能跑完整套流程。
class ImageBatchProcessor:
    """图片批量处理工具箱"""

    def __init__(self, input_dir, output_dir):
        self.input_dir = input_dir
        self.output_dir = output_dir
        os.makedirs(output_dir, exist_ok=True)

    def get_images(self):
        return [f for f in os.listdir(self.input_dir)
                if f.lower().endswith((".jpg", ".jpeg", ".png", ".webp"))]

    def process(self, operations):
        """
        按顺序执行多个操作
        operations: [("resize", {"width": 800}), ("watermark", {"text": "版权"})]
        """
        for f in self.get_images():
            img = Image.open(os.path.join(self.input_dir, f))

            for op_name, params in operations:
                if op_name == "resize":
                    img.thumbnail((params["width"], params["height"] or params["width"]))
                elif op_name == "watermark":
                    # 添加水印逻辑
                    pass
                elif op_name == "compress":
                    img.sa ve(os.path.join(self.output_dir, f),
                            quality=params.get("quality", 85))
                    continue

            img.sa ve(os.path.join(self.output_dir, f))
            print(f"处理完成: {f}")

# 使用
processor = ImageBatchProcessor("输入", "输出")
processor.process([
    ("resize", {"width": 1200, "height": 1200}),
    ("compress", {"quality": 80}),
])
从文字水印到格式转换,从单步操作到流水线,Pillow 这套工具链可以说覆盖了日常图片处理的绝大多数需求。代码量不大,但每段都能直接拿到项目里用。
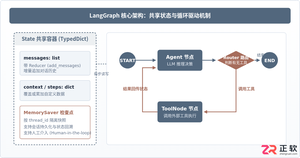
本篇LangGraph Python中文入门教程详解,系统梳理StateGraph状态机定义、节点编写、边与条件路由、检查点持久化(MemorySaver)等核心机制,提供从环境安装到完整循环智能体构建的代码示例与实操指导。
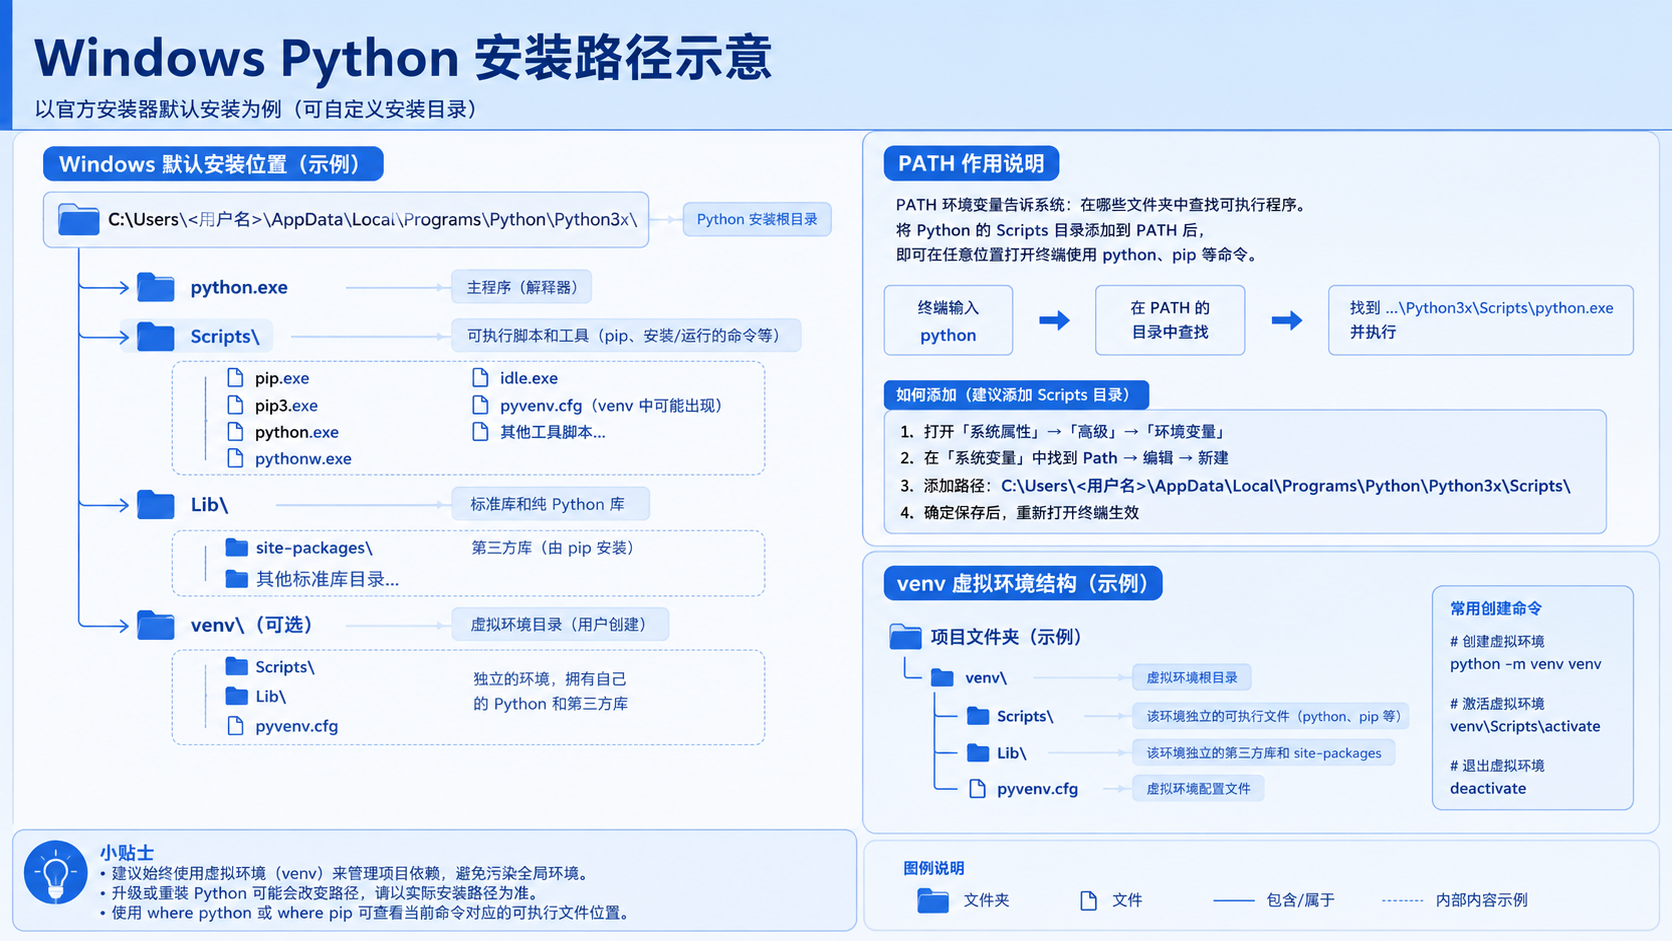
面向后端开发者,基于 Python 官方文档说明如何在 Windows 上安装 Python、创建 venv 虚拟环境及使用 pip 管理依赖。包含可复制命令、验证方法及工具选择边界,避免常见配置误区。
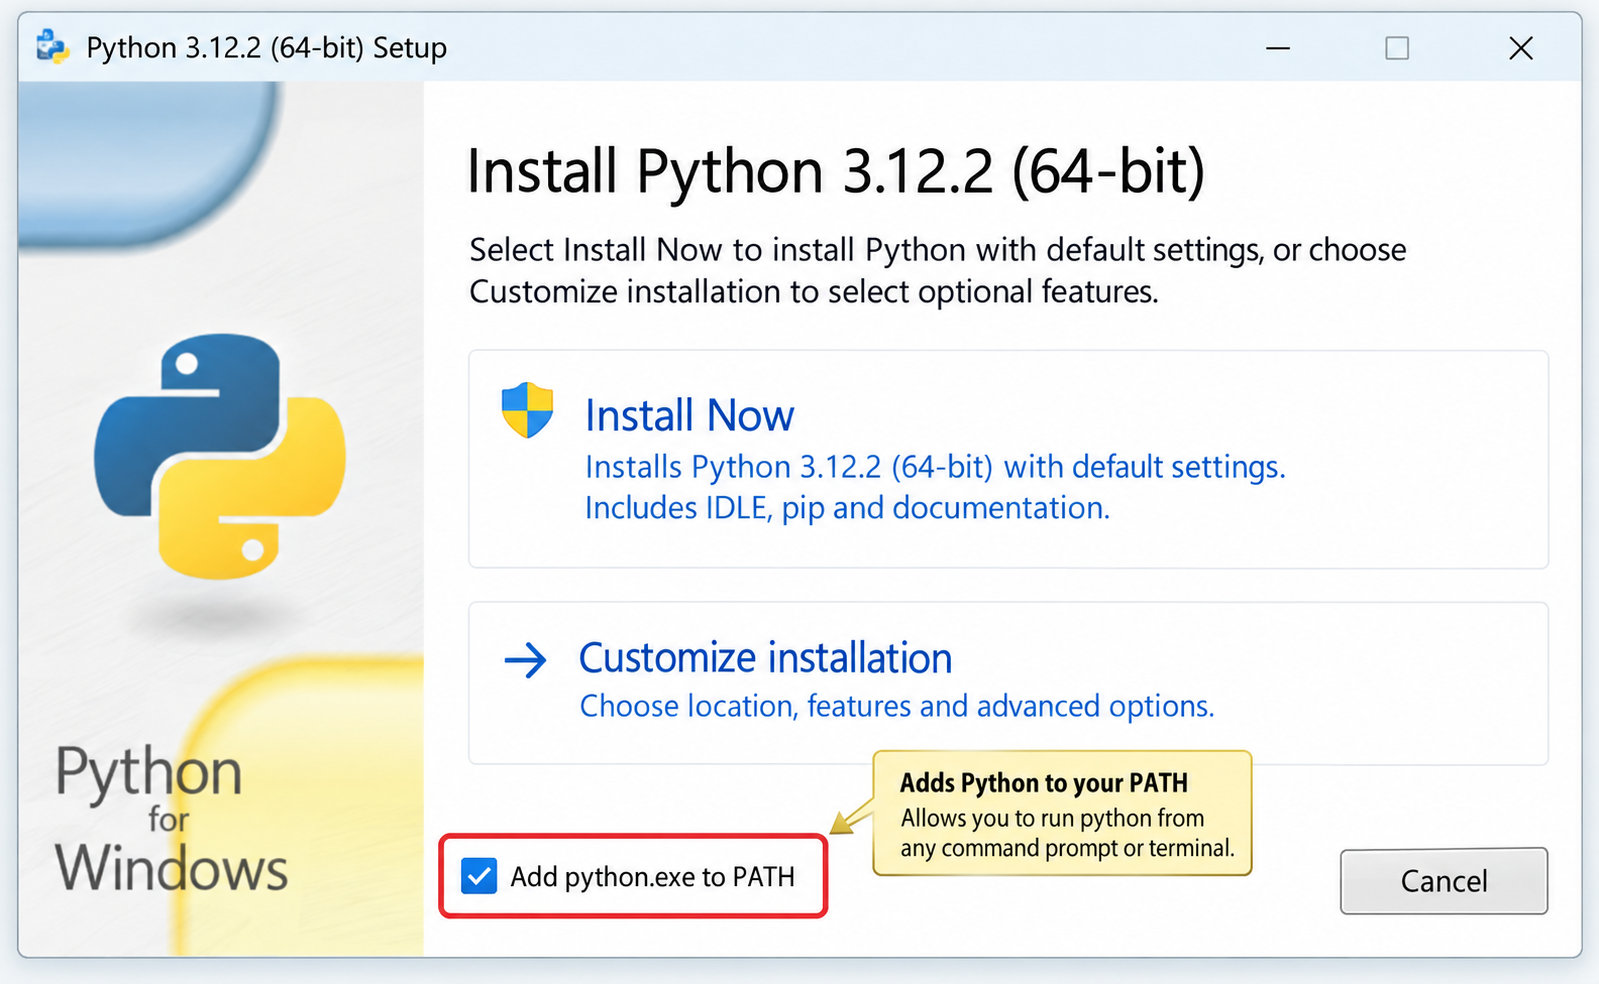
针对Windows初学者的Python安装实战指南。详细讲解如何从Python官网下载匹配架构的安装包,重点演示安装首屏勾选“Add python.exe to PATH”的关键操作,并提供使用python --version和py命令验证环境变量的具体步骤,帮助新手快速搭建开发环境并排查路径问题。
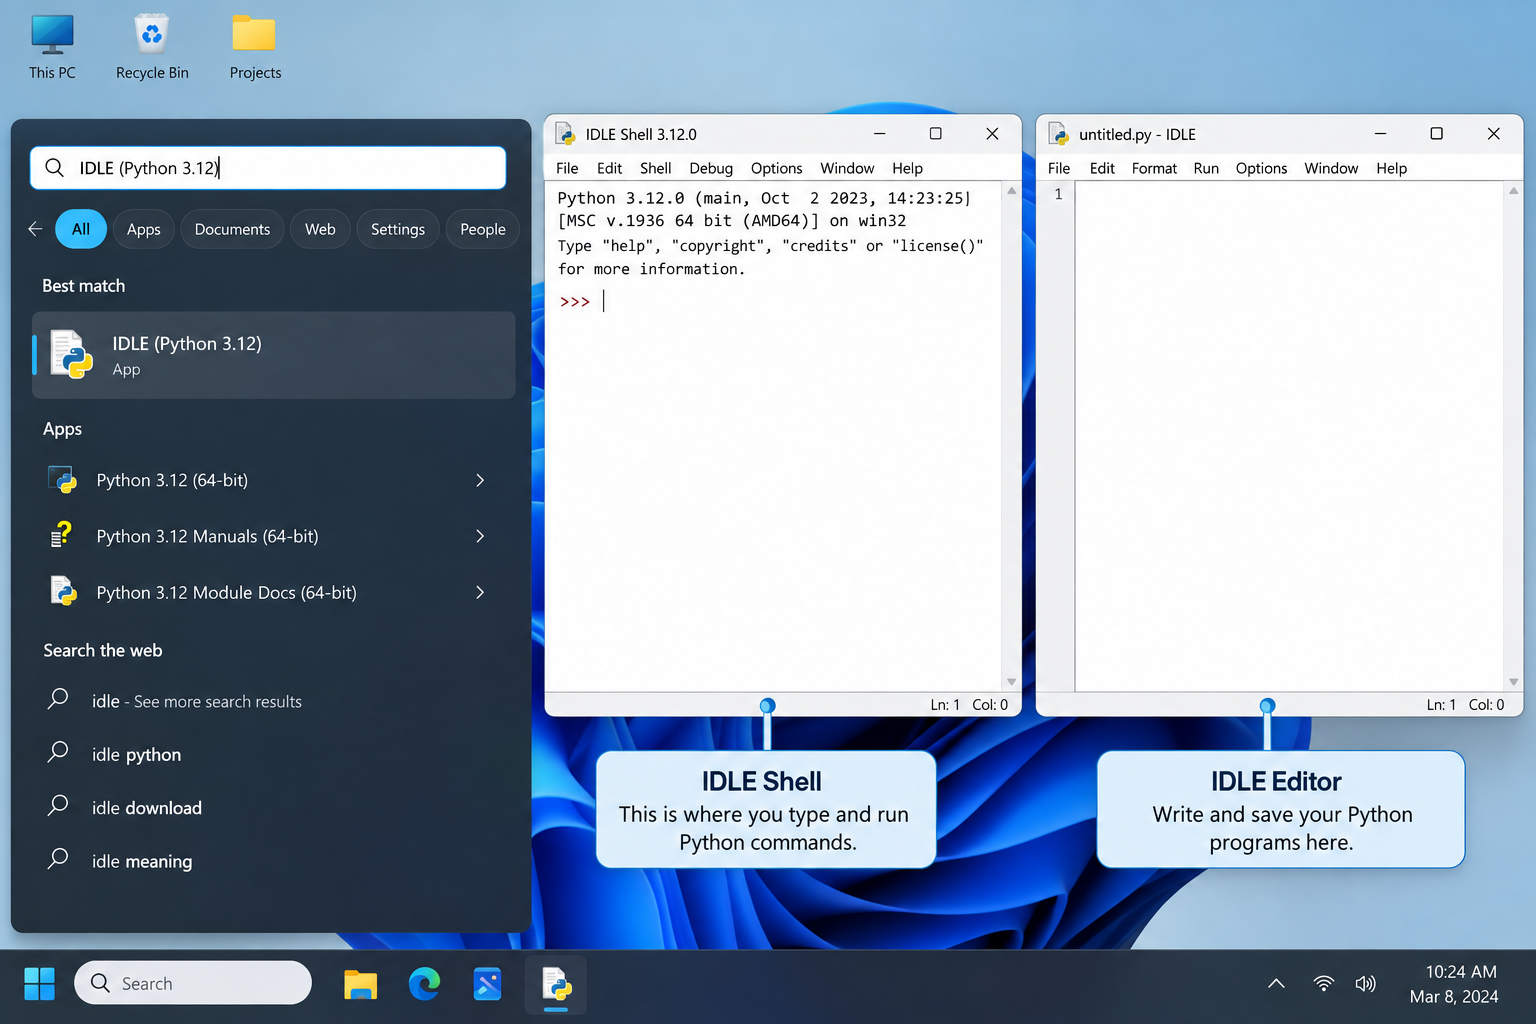
刚在Windows安装好Python却不知道如何启动?本文详细演示如何通过开始菜单找到并打开IDLE集成开发环境,以及如何在PowerShell或命令提示符中使用python和py命令启动交互式解释器、运行.py脚本文件。包含退出解释器的方法及常见启动问题排查,帮助初学者快速验证安装成功并开始编写代码。

了解Python编程领域中最好的就业行业导语:近年来,Python作为一种易学易用的编程语言,越来越受到企业和开发者的青睐。在Python编程领域中,有许多就业机会,涵盖了各个行业。本文将介绍一些Python编程领域中最好的就业行业,并提供相应的代码示例。数据科学和机器学习数据科学和机器学习是Python编程领域中最热门的行业之一。Python在数据科学和机
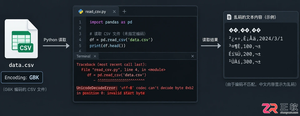
针对Python处理CSV文件时常见的编码报错、内存溢出和数据类型错误,本文对比标准库csv与Pandas库的适用场景,提供可复制的代码示例和因果排查思路,帮助开发者选择最优处理方案。
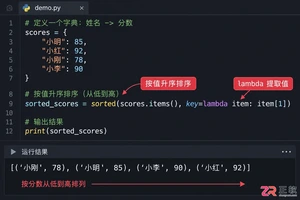
本文介绍如何使用Python的sorted函数对字典按值进行升序和降序排序,结合具体代码示例和应用场景,帮助读者理解排序逻辑及其在数据处理中的实际价值。
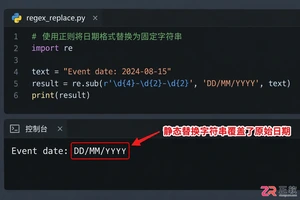
深入讲解Python中使用re.sub进行正则匹配与替换的技巧,涵盖基础语法、分组引用及回调函数应用,帮助开发者解决复杂字符串修改需求,提升代码效率与可维护性。


Skyvern是一款基于大语言模型的开源浏览器自动化框架,目前仅提供英文界面且无官方中文版。本文指导用户通过GitHub获取源码,使用Docker快速部署本地环境,并解释其如何通过DOM树解析与自然语言指令实现网页自动操作,同时提供针对中文用户的配置建议与替代方案。




Postman是一套面向API全生命周期的开发与测试平台,可在Mac上发送和调试多种协议请求,管理集合、环境及认证信息,并完成脚本测试、模拟服务、监控、文档发布和团队协作。它适合开发、测试及运维人员使用,提供个人免费方案。

Docker Desktop 是 Docker 官方为 Mac 提供的容器开发环境,集成 Docker Engine、命令行工具、Compose、Build、Kubernetes 与图形化管理界面。

Android Studio 是 Google 面向安卓应用开发提供的官方集成开发环境,基于 IntelliJ IDEA 构建。它整合智能代码编辑、Gradle 构建、界面预览、设备模拟、性能分析、调试测试及 APK 分析等工具。

PixPix 是面向品牌、卖家和内容团队的在线 AI 图片视频创作平台,提供图视频 Agent、无限画布、图片生成、视频生成、自然语言编辑及商品套图、产品精修和带货视频等电商工具。

Postman 是面向 API 全生命周期的开发与协作平台。Windows 桌面版可用于构建和发送 HTTP、GraphQL、gRPC、WebSocket、MQTT 等请求,并提供环境变量、集合、脚本测试、模拟服务、监控、文档及团队工作区等

Docker Desktop 为 Windows 开发者提供集成式容器环境,内置 Docker Engine、命令行工具、Compose、Build 与 Kubernetes 等组件,可在本机完成镜像构建、容器运行、日志查看和资源管理。