

nginx如何配置邮件服务
Nginx 本身并不直接内置邮件服务功能,但通过与第三方模块(比如 nginx-mail 或 nginx-mailstream)配合,完全可以胜任邮件袋里服务器的角色。下面这套配置方案,就是基于 nginx-mail 模块来搭建一个基础的邮件袋里服务。前提条件动手之前,先确认两件事:一是 Nginx
Nginx 本身并不直接内置邮件服务功能,但通过与第三方模块(比如 nginx-mail 或 nginx-mailstream)配合,完全可以胜任邮件袋里服务器的角色。下面这套配置方案,就是基于 nginx-mail 模块来搭建一个基础的邮件袋里服务。
前提条件
动手之前,先确认两件事:一是 Nginx 已经安装好,二是 nginx-mail 模块已就位。这个模块默认并不包含在 Nginx 的标准发行版里,需要从源码编译时手动加上。
编译 Nginx 并添加 nginx-mail 模块
整个过程分三步走,并不复杂。
第一步,获取 Nginx 源码包并解压:
wget http://nginx.org/download/nginx-1.21.6.tar.gztar -zxvf nginx-1.21.6.tar.gzcd nginx-1.21.6第二步,把 nginx-mail 模块的代码拉下来:
git clone https://github.com/yaoweibin/nginx-mail.git第三步,编译时把模块加进去:
./configure --with-http_ssl_module --add-module=../nginx-mailmakesudo make install这样一来,Nginx 就具备了处理邮件协议的能力。
配置 Nginx 邮件服务
接下来进入正题——编辑 Nginx 的主配置文件(通常位于 /usr/local/nginx/conf/nginx.conf),加入下面这段邮件相关的配置。注意,这里涵盖了 SMTP、IMAP 和 POP3 三大主流协议,以及它们的加密版本。
mail {server {listen 25;protocol smtp;host mail.example.com;auth_http localhost/auth;auth_http_timeout 3s;auth_request_set $auth_user $upstream_http_x_auth_user;auth_request_set $auth_password $upstream_http_x_auth_password;smtp_auth on;smtp_capabilities "TOP";smtp_helo_name mail.example.com;allow 192.168.1.0/24;deny all;access_log logs/mail.access.log;error_log logs/mail.error.log;}server {listen 587;protocol smtp;host mail.example.com;auth_http localhost/auth;auth_http_timeout 3s;auth_request_set $auth_user $upstream_http_x_auth_user;auth_request_set $auth_password $upstream_http_x_auth_password;smtp_auth on;smtp_capabilities "TOP";smtp_helo_name mail.example.com;allow 192.168.1.0/24;deny all;access_log logs/mail.access.log;error_log logs/mail.error.log;}server {listen 143;protocol imap;host mail.example.com;ssl on;ssl_certificate /path/to/ssl/certificate.pem;ssl_certificate_key /path/to/ssl/private.key;allow 192.168.1.0/24;deny all;access_log logs/mail.access.log;error_log logs/mail.error.log;}server {listen 993;protocol imap;host mail.example.com;ssl on;ssl_certificate /path/to/ssl/certificate.pem;ssl_certificate_key /path/to/ssl/private.key;allow 192.168.1.0/24;deny all;access_log logs/mail.access.log;error_log logs/mail.error.log;}server {listen 110;protocol pop3;host mail.example.com;ssl on;ssl_certificate /path/to/ssl/certificate.pem;ssl_certificate_key /path/to/ssl/private.key;allow 192.168.1.0/24;deny all;access_log logs/mail.access.log;error_log logs/mail.error.log;}server {listen 995;protocol pop3;host mail.example.com;ssl on;ssl_certificate /path/to/ssl/certificate.pem;ssl_certificate_key /path/to/ssl/private.key;allow 192.168.1.0/24;deny all;access_log logs/mail.access.log;error_log logs/mail.error.log;}}配置中反复出现了 auth_http 指令,这是邮件认证的关键——它告诉 Nginx 把用户认证请求转发给一个本地的 HTTP 服务来处理。下面就来搭建这个认证后端。
配置 HTTP 认证服务器
认证服务器的实现方式很多,这里用一个简单的 PHP 脚本来演示核心逻辑。你需要准备这样一个 auth.php 文件:
$username]);exit;} else {http_response_code(401);echo json_encode(['error' => 'Authentication failed']);exit;}?>把这个文件部署到你的 Web 服务器上,并确保 Nginx 能够访问到它。生产环境中,你需要用真实的用户数据库或 LDAP 服务来替换这里的硬编码判断。
启动 Nginx
一切就绪后,执行启动命令:
sudo /usr/local/nginx/sbin/nginx测试邮件服务
可以用 telnet 这类工具快速验证一下服务是否正常跑起来了。比如测试 SMTP 端口:
telnet localhost 25连接成功后,按照 SMTP 协议交互流程输入命令进行验证:
HELO example.comAUTH LOGINMAIL FROM:RCPT TO:DATASubject: Test EmailThis is a test email..QUIT 如果每一步都返回预期的响应码,说明配置生效了。以上就是一个 Nginx 邮件袋里服务器的基本搭建流程,你可以根据实际环境的需求(比如用户认证方式、SSL 证书路径、允许的客户端 IP 范围等)做进一步调整和扩展。
详解如何在 Windows 电脑上通过 Microsoft Store 安装 Codex 桌面应用,包括启动登录、切换 Codex 模式、关联本地代码项目及终端环境配置的界面操作指引。
本文详解如何在Windows环境中使用PowerShell生成SSH密钥对,配置ssh-agent自动加载私钥,并将公钥安全添加至GitHub账户,最后通过git remote set-url切换为SSH地址,解决每次操作需输入账号密码的问题。
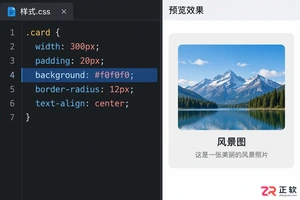
深入解析backdrop与background在网页开发及视觉设计中的区别。通过CSS代码示例,展示如何正确使用background设置元素背景,以及利用backdrop-filter创建弹窗遮罩模糊效果,避免概念混用。
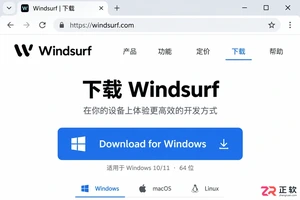
详解 Windsurf IDE 在 Windows 系统的下载来源、安装步骤及首次启动界面。指导用户如何导入编辑器设置、打开项目文件夹及使用终端与 AI 功能,适合初次接触该工具的开发者阅读。
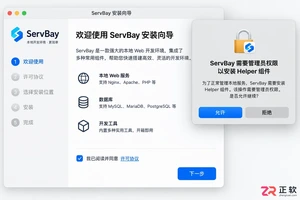
新手入门 ServBay 本地开发环境,详解安装包下载、Dashboard 状态监控、Packages 组件安装、Services 服务控制及 Websites 项目配置。掌握 .servbay.config 版本管理与日志排查技巧,快速搭建稳定的 PHP、Node.js 等多语言开发环境。
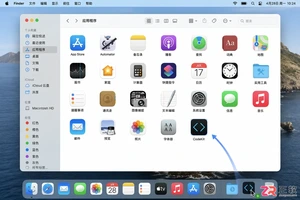
详解 CodeKit 在 macOS 下的安装步骤、项目导入方法、Sass与JavaScript编译设置及浏览器自动刷新功能,助您快速搭建高效的前端开发环境。
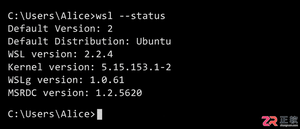
详解Windows环境下安装OpenAI Codex CLI的步骤,包括WSL环境检查、Node.js/npm配置、npm全局安装命令及首次启动验证,适合开发者快速上手。
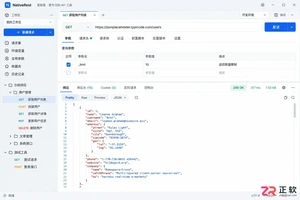
学习如何配置 NativeRest REST API 客户端。涵盖 Windows/macOS/Linux 安装后的工作区创建、环境变量管理、请求编辑及响应查看步骤,帮助开发者快速完成基础环境搭建与连通性测试。
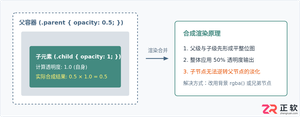
深入解析CSS中设置透明度的核心属性opacity,剖析子元素继承、事件穿透、层叠上下文等关键注意事项,并提供与rgba、hsla的实用选型对比。




WPS Office是一款面向macOS用户的综合办公套件,将文字处理、电子表格、演示文稿、PDF工具、模板与云协作整合在同一应用中。它兼容常见Microsoft Office格式,支持Intel及Apple芯片Mac,基础功能可免费使用,

Shapr3D是一款面向工业设计、机械工程、建筑概念和三维打印工作流的CAD软件。Mac版采用Parasolid建模内核,支持草图约束、实体建模、工程图、可视化渲染及常见CAD格式交换,并可通过账户在多台设备之间同步项目。

REAPER是Cockos开发的数字音频工作站,提供多轨音频与MIDI录制、剪辑、处理、混音和母带制作工具。Mac版兼容Intel与Apple芯片,支持AU、VST、VST3、CLAP等插件格式,并提供高度可定制的工作流程。

Adobe Photoshop 是面向摄影师、设计师和内容创作者的专业图像处理工具,可在 Windows 上完成照片修饰、选区抠图、图层合成、文字排版、绘画及生成式编辑。软件采用订阅授权,由 Creative Cloud 管理安装、更新与许

Adobe InDesign 是面向印刷与数字出版的专业页面排版工具,可制作书籍、杂志、宣传册、海报、交互式 PDF 和电子书。它提供精细的文字样式、多页面管理、印前检查及多格式输出能力,并能与 Photoshop、Illustrator

Adobe Illustrator 是用于绘制矢量图形、插画、图标、徽标和版式的专业设计工具。它以路径和锚点为核心,作品放大后仍能保持清晰,并提供画板、文字、渐变、图像描摹及精确变换等功能,适合品牌视觉、印刷物料、数字界面和商业插画创作。