

基于SpringBootAOP+Redis实现接口限流注解的示例代码
基于SpringBootAOP与Redis实现自定义注解接口限流,通过定义限流维度与参数,利用Lua脚本保证原子性,结合ZSet滑动窗口算法,实现按用户、IP或接口的精准限流,超出阈值返回429状态码与提示信息,有效防止恶意请求。
限流,说白了就是后端防护的第一道闸门。用 AOP 配合 Redis,搞一个自定义注解,往接口上一贴就能生效——这件事听起来简单,但真要落地,其实有不少细节。下面就把这套方案拆开揉碎了讲清楚。
一、定义注解
先定义注解的属性。这里需要明确几个字段:限流的 key、维度(按用户/按 IP/按接口)、窗口内最大请求数、窗口大小,以及被限流后的提示信息。这样设计,后续扩展起来也方便。
@Target(ElementType.METHOD)
@Retention(RetentionPolicy.RUNTIME)
public @interface RateLimit {

    /** 限流 key */
    String key() default "";

    /** 限流维度:user / ip / api */
    String type() default "user";

    /** 窗口内最大请求数 */
    long max() default 10;

    /** 窗口大小(秒) */
    long window() default 1;

    /** 被限后的提示 */
    String message() default "请求太频繁,请稍后重试";
}
二、实现 AOP
注解定义好了,接下来就是核心的逻辑处理。用 AOP 拦截所有加了 @RateLimit 的方法,然后通过 Redis 的有序集合(ZSet)做滑动窗口限流。这里的关键是 Lua 脚本保证原子性,避免并发场景下计数不准。
@Aspect
@Component
public class RateLimitAspect {

    @Autowired
    private StringRedisTemplate redisTemplate;

    @Around("@annotation(rateLimit)")
    public Object around(ProceedingJoinPoint pjp, RateLimit rateLimit) throws Throwable {
        String key = buildKey(rateLimit);

        // 滑动窗口限流
        boolean allowed = tryAcquire(key, rateLimit.max(), rateLimit.window());

        if (!allowed) {
            throw new BusinessException(429, rateLimit.message());
        }

        return pjp.proceed();
    }

    private boolean tryAcquire(String key, long max, long windowSec) {
        long now = System.currentTimeMillis();
        long windowMs = windowSec * 1000L;
        long windowStart = now - windowMs;

        // Lua 脚本保证原子性
        String lua =
            "redis.call('ZREMRANGEBYSCORE', KEYS[1], 0, ARGV[1]) " +
            "local count = redis.call('ZCARD', KEYS[1]) " +
            "if count < tonumber(ARGV[2]) then " +
            "  redis.call('ZADD', KEYS[1], ARGV[3], ARGV[3]) " +
            "  redis.call('EXPIRE', KEYS[1], ARGV[4]) " +
            "  return 1 " +
            "else " +
            "  return 0 " +
            "end";

        Long result = redisTemplate.execute(
            new DefaultRedisScript<>(lua, Long.class),
            Collections.singletonList(key),
            String.valueOf(windowStart),
            String.valueOf(max),
            String.valueOf(now),
            String.valueOf(windowSec + 1)
        );

        return Long.valueOf(1).equals(result);
    }

    private String buildKey(RateLimit rateLimit) {
        String prefix = "rate:";

        switch (rateLimit.type()) {
            case "ip":
                HttpServletRequest request = ((ServletRequestAttributes)
                    RequestContextHolder.getRequestAttributes()).getRequest();
                return prefix + "ip:" + getIp(request);
            case "api":
                return prefix + "api:" + Stream.of(
                    Thread.currentThread().getStackTrace())
                    .filter(s -> s.getMethodName().contains("$"))
                    .findFirst().orElse(new StackTraceElement("", "", "", 0))
                    .getMethodName();
            default:
                // type = user
                return prefix + "user:" + StpUtil.getLoginIdAsString();
        }
    }

    public static String getIp(HttpServletRequest request) {
        String ip = request.getHeader("X-Forwarded-For");
        if (ip == null || ip.isEmpty()) ip = request.getHeader("X-Real-IP");
        if (ip == null || ip.isEmpty()) ip = request.getRemoteAddr();
        if (ip != null && ip.contains(",")) ip = ip.split(",")[0].trim();
        return ip;
    }
}
三、使用
使用方式很直接:在 Controller 的方法上加上 @RateLimit 注解,指定好限流维度和参数即可。比如对某个 GET 接口限制每个 IP 在 10 秒内最多 5 次请求,或者对秒杀接口限制每个用户 10 秒内只能请求 1 次。
@RestController
@RequestMapping("/api")
public class TestController {

    @GetMapping("/test")
    @RateLimit(key = "test", type = "ip", max = 5, window = 10)
    public ResultVO test() {
        return ResultVO.success("成功");
    }

    @PostMapping("/seckill/{productId}")
    @RateLimit(type = "user", max = 1, window = 10)
    public ResultVO seckill(@PathVariable Long productId) {
        return ResultVO.success("秒杀成功");
    }
}
四、异常处理
被限流之后,切面会抛出 BusinessException,所以需要一个全局异常处理器来捕获,并返回 429 状态码和对应的提示信息。这样前端就能根据状态码做友好提示,而不是直接崩掉。
@RestControllerAdvice
public class RateLimitExceptionHandler {

    @ExceptionHandler(BusinessException.class)
    public ResultVO handleBusiness(BusinessException e) {
        if (e.getMessage().contains("请求太频繁")) {
            return ResultVO.error(429, e.getMessage());
        }
        return ResultVO.error(e.getCode(), e.getMessage());
    }
}
五、压测效果
效果怎么样?直接上压力测试。用 curl 模拟 20 个并发请求,可以看到:前 5 个请求正常返回,后面的请求全部被拦截,返回 429 状态码和提示信息。限流策略生效,稳稳的。
# 模拟 20 个并发请求
for i in {1..20}; do
    curl -X GET http://localhost:9090/api/test &
done

# 正常响应:{"code":200,"message":"成功"}
# 被限响应:{"code":429,"message":"请求太频繁,请稍后重试"}
详解Windows环境下安装OpenAI Codex CLI的步骤,包括WSL环境检查、Node.js/npm配置、npm全局安装命令及首次启动验证,适合开发者快速上手。
学习如何配置 NativeRest REST API 客户端。涵盖 Windows/macOS/Linux 安装后的工作区创建、环境变量管理、请求编辑及响应查看步骤,帮助开发者快速完成基础环境搭建与连通性测试。
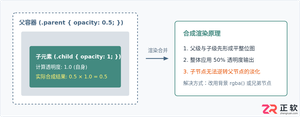
深入解析CSS中设置透明度的核心属性opacity,剖析子元素继承、事件穿透、层叠上下文等关键注意事项,并提供与rgba、hsla的实用选型对比。
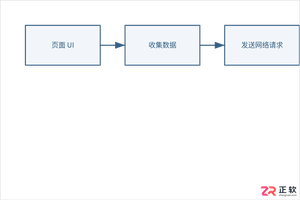

本文通过具体的旧版与新版代码对比,详细剖析Java 8引入的Lambda表达式、Java 14/16引入的Record类,以及Java 12至21逐步演进完善的Switch表达式与模式匹配,展示代码简化路径与避坑要点。
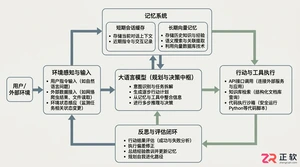
系统梳理AI智能体开发培训的核心知识模块、技术栈选型与典型实战项目,解析低代码平台与纯代码框架的差异,提供从零构建可落地智能体的完整学习与实施路径。
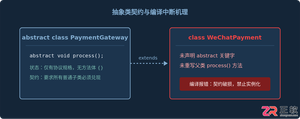
针对Java开发中常见的“子类未实现抽象方法”编译错误,深入分析报错原因,提供重写实现、声明抽象子类两种标准修复路径,并总结参数签名、访问修饰符等典型避坑要点。
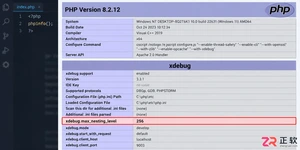
遇到PHP递归报错时,不要盲目调大max_nesting_level。本文教你区分Xdebug限制、内存耗尽和正则递归错误,提供代码级的终止条件优化与迭代替代方案,彻底解决栈溢出问题。
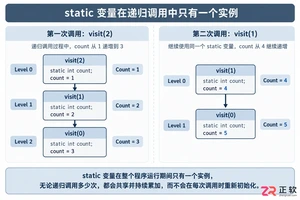
本文分析PHP递归中static变量导致的状态污染及引用传递引发的共享数据修改问题。提供具体的代码复现、缓存键设计建议及调试打印技巧,帮助开发者避免隐蔽的逻辑错误。
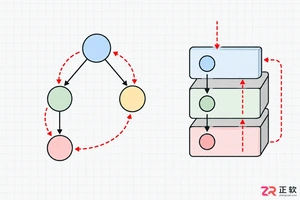
解析PHP递归函数在树形数据处理中的性能瓶颈,提供预加载数据消除I/O、使用显式栈替代深层递归的实战方案,帮助开发者在代码可读性与执行效率间做出合理取舍。




Photoshop 2026 是 Adobe 推出的专业图像处理与视觉设计软件,支持 Windows、macOS 和 iPad 等平台,广泛应用于摄影修图、电商设计、平面海报、数字绘画及视觉合成等创作场景。

Blender 是一款免费开源、跨平台的专业 3D 创作软件,集建模、动画、渲染、视频编辑与视觉合成等功能于一体,广泛应用于影视动画、游戏设计和建筑可视化等领域。软件支持 Cycles 物理渲染器与 Eevee 实时渲染引擎,并提供多边形建模、骨骼绑定、物理模拟等专业工具。Blender 兼容 Windows、macOS 和 Linux 系统,安装包轻巧、运行流畅,依托活跃的全球开发者社区持续更新,是从初学者到专业创作者都值得选择的正版 3D 创作工具。


Photoshop 2026 是 Adobe 推出的专业图像处理与视觉设计软件,支持 Windows、macOS 和 iPad 等平台,广泛应用于摄影修图、电商设计、平面海报、数字绘画及视觉合成等创作场景。
Blender 是一款免费开源、跨平台的专业 3D 创作软件,集建模、动画、渲染、视频编辑与视觉合成等功能于一体,广泛应用于影视动画、游戏设计和建筑可视化等领域。软件支持 Cycles 物理渲染器与 Eevee 实时渲染引擎,并提供多边形建模、骨骼绑定、物理模拟等专业工具。Blender 兼容 Windows、macOS 和 Linux 系统,安装包轻巧、运行流畅,依托活跃的全球开发者社区持续更新,是从初学者到专业创作者都值得选择的正版 3D 创作工具。